How to Fix a Cluttered Bathroom
How to fix a cluttered bathroom so you can turn this busy room into another organized space inside of your home.
Is your bathroom feeling like a total disaster zone? Don’t worry—this is actually an easy fix. With a few straightforward hacks and a few simple tricks, you can turn all that clutter into an organized room.
Say goodbye to the chaos and hello to our guide on how to declutter a bathroom that works for you and your family.

A Small but Busy Space
Isn’t it funny how one of the smallest rooms in the house can somehow become the messiest? The bathroom is that one spot everyone in the family uses multiple times throughout the day, every day, which means it doesn’t take long for chaos to creep in. Without a few simple systems in place, it can quickly spiral out of control.
For many people, keeping a bathroom neat feels like a losing battle, and often, keeping the door closed is the best solution.
Well, today is when we are going to turn things around, putting you back in control of the state of your bathroom.
When we built our forever home, our four boys were in what I lovingly call the “human tornado” phase. Wherever they went, destruction followed. They brought a level of chaos that can only be compared to Pigpen from Peanuts—except instead of a dust cloud, it was… well, everything.
I even told my husband I wanted the boys’ bathroom to have tile covering the entire room and a drain in the middle so I could hose it down weekly.
He laughed. I wasn’t kidding.
The funny things was that a few years later we found ourselves replacing the linoleum because, shocker, it didn’t stand a chance against four energetic boys.
Looking back, maybe I should’ve insisted on that drain idea. But all jokes aside, I learned a lot about dealing with messy bathrooms along the way, and today, I’m sharing some of my best tricks with you.
Whether you’ve got kids, roommates, or just a lot of clutter, these tips will help bring a little sanity back to your bathroom.
Kids Are Messy
If keeping your bathroom neat feels like an impossible mission, trust me—I get it. Living in a house with four boys, my bathroom battles were very real. Lucky for me, we had the luxury of giving them their own bathroom, so at least I had one space where I didn’t have to dodge toothpaste blobs and wet towels.
I know that not every family has the option of separate bathrooms, but with a few simple changes, you can turn the chaos into something that at least feels manageable (and maybe even a little peaceful).
Before we can get to organizing and streamlining, there’s one important step we have to tackle first—decluttering. Because, let’s be real, it’s hard to organize a space when it’s overflowing with who-knows-what.
How to declutter a family bathroom
When it comes to decluttering any space in your home I find it’s easier to break things down into steps. Instead of looking at the overall picture and risk getting stressed out just by the job itself, when you can break things down and only focus on that one step it allows you to make progress rather quickly.
Step #1. Remove the trash
I know this sounds like the most obvious step in the world, but you’d be surprised how often we skip right past it. And trust me, starting with a clean slate makes everything else so much easier.
Grab an empty trash bag and start hunting. Check every corner of the bathroom—around the sink, behind the toilet, and yes, even in the shower or bathtub. You’d be amazed at the random things that accumulate in these spots.
- Toss out the empty shampoo bottles that have been sitting there for weeks.
- Any stray wrappers and product packaging.
- Look for any bath toys that are mildewy or broken.
- Be sure to grab the barely-there soap slivers that no one is actually going to use.
- Toothbrushes that are way past their use-by date.
- Loofahs in the shower that have not been replaced in months.
- Dried-up makeup.
- Makeup brushes with massive wear and tear.
- Broken tub toys.
- Ratty torn towels.
Think of it as a small scavenger hunt, except in this game, the prize is a less chaotic bathroom. Once the trash is out of the way, you’ll already feel like you’re making progress.

DM Pro tip: As you are decluttering, make a list of any items you see that need to be replaced from the store. Remember to always make a shopping list as you are in the moment, this is a clutter-busting tip that will keep you from overstocking your home and ensure you do not run out of any tools or supplies that you need.
Step #2. Put Things Away
Next, track down everything in the bathroom that doesn’t actually belong there.
Here’s the thing about clutter—it has this sneaky way of wandering. Someone grabs something, moves to another room, and poof!—it’s like your stuff grew legs and decided to relocate.
Sound familiar?
It’s one of those universal struggles, especially if you’ve got a house full of little (or not-so-little) humans. Sometimes I look around and think, “Why is there a toy car next to the toothpaste? When did we start storing socks on the back of the toilet?” I swear, it’s like a live-action episode of Sesame Street’s ‘One of These Things Is Not Like the Other.’
To tackle this, I recommend grabbing a laundry basket—it’s my secret weapon for this step. It’s big enough to hold all sorts of random items, and it does an excellent job of keeping small stuff contained while you march through the house on a mission to return things to their rightful spots.
Take your basket into the bathroom and start collecting anything that clearly doesn’t belong. Books, cups, toys, or that one sock (you know the one)—if it’s out of place, into the basket, it goes.
Once you have everything gathered up into your laundry basket, simply walk your home and put things away where they belong.

Step #3. Set Up Sorting Bins
Here’s where we draw the line between organized chaos and actual organization—sorting bins. Trust me, setting up bins will save you so much time and energy as you power through the decluttering process.
Grab a few containers—brown paper bags, laundry baskets, or boxes. You’ll need three or four containers, depending on how much stuff you’ve got to sort. Label them (mentally or with actual sticky notes) as follows:
- Toss – Empty containers, crumpled tissues, and whatever mystery items you’ve been too afraid to inspect.
- Donate – For the things you no longer use but are still in good shape. That extra curling iron you swore you’d use or the decorative soap holder you bought on a whim.
- Put Away – For stuff that belongs somewhere else in the house. This might be the odd pair of sunglasses or your kid’s action figures. (Seriously, what don’t they leave lying around?)
- Keep – For the bathroom items you actually use and will stay.

Step #4. Time to Get Busy
Alright, it’s go time! You’ve done the prep work—trash is gone, your sorting bins are in place, and now you’re ready to roll.
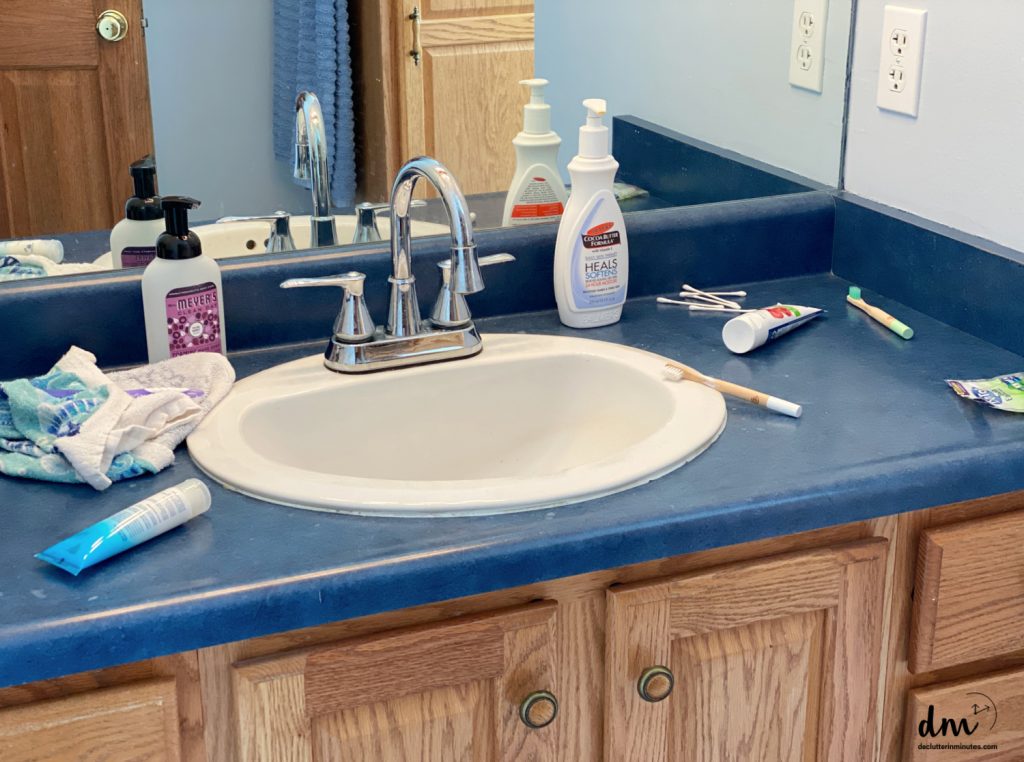
Start with the open surfaces like the bathroom vanity, countertops, or even the back of the toilet (aka the unofficial storage spot). Pick one area and focus on it completely. Every single item gets sorted and put into the appropriate bin—no exceptions.
Resist the urge to bounce from one spot to another. Stay in one area until it is completely done before moving on.
One of the great things about this system is that it helps streamline decision-making. By the time you’re done, every item in the keep basket has earned its spot. And honestly, that’s pretty satisfying. You’ll breathe a little easier just knowing everything in your bathroom is there for a reason.
Step #5. Clean
Once you have sorted an area and there is nothing in the way, take a few seconds to wipe things down. The good news is now that the stuff is gone, cleaning is simple and quick.
Step #6. Organize
Now for the fun part—getting everything in its proper place. Take a look at the items in your “Keep” bin. These are your must-haves, the things that deserve a spot in this space. And here’s the trick to making it work long-term—organizers.
The right organizers can turn even the smallest, most cluttered bathroom into a functional and tidy oasis.
Think of organizers as little superheroes, each with a job to keep your space neat and your items exactly where you need them. The key is to choose ones that works for your space. They should fit well and use every inch of the room efficiently.
Bathroom Organizers:
- Tension rods – Perfect for dividing up drawers and keeping things sectioned off. No more hunting for that lone hair tie or nail clipper.
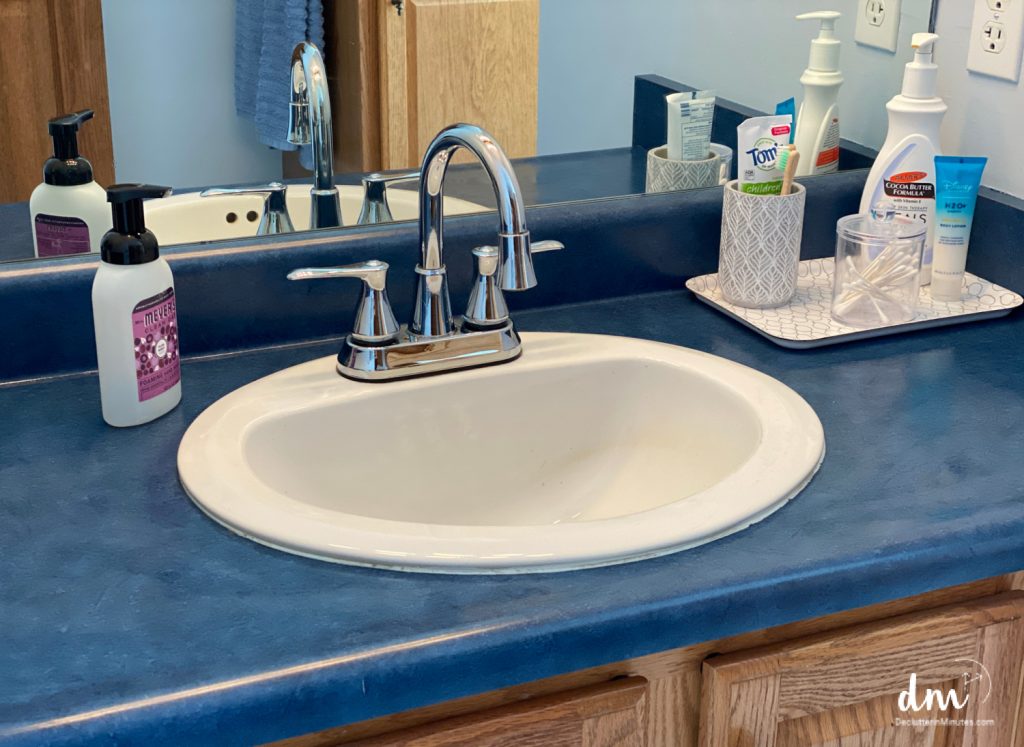
- Trays – Great for rounding up lotions, soaps, or skincare products on the sink area. It’s like an instant mini display that stays put.
- Hamper – For dirty clothes that somehow end up scattered across the floor. This keeps laundry corralled and out of sight.
- Hooks – The secret behind a clutter-free floor. Add them to the wall or behind the door to keep wet ones off the floor and drying properly.
- Bath bag – Perfect for bath toys. Hang one up to keep the tub area tidy and free of stray rubber ducks.
- Bucket – Ideal for gathering all your cleaning supplies in one handy spot. No more guessing where the glass cleaner went.
You’ll be amazed how these small additions can completely transform your bathroom. Make it functional, make it pretty, and most importantly, make it a space you can enjoy without the stress of clutter.
Decluttering specific areas
Let’s take a look at some common areas in the bathroom along with a few organizing solutions you can try.
Shelving
Just like we mentioned above, remove everything on the shelves and sort through them individually.
Remember to keep the items that will stay on the shelves in your keep bin.
Bathrooms are small and confined spaces, especially family bathrooms, and this means your space is limited. For that reason, you may want to rethink having knick-knacks or other non-essentials in this space.
The Bathroom Vanity
When decluttering a bathroom vanity, I find it is easiest to work your way from the top to the bottom going through each drawer and sorting things as you do. Remember to make a note of anything that needs to be replaced or updated on your shopping list.
D/M PRO TIP: If you have a large family and a vanity with multiple drawers, you can assign a drawer to each family member. This is a great way to give everyone their own space and, in turn, keep the clutter off of the sink top.
Use drawer organizers to hold toothbrushes, razors, or other items your family members need and use.
Bathtub and Shower
How does so much clutter end up in such a small area? It’s like the bathtub and shower have their own magnet for chaos. That’s why this spot deserves a good decluttering session on the regular—whether it’s weekly or monthly, depending on how many people in your household are using it.
- Start with the toys. Go through the bath toys first. Anything with mold, mildew, or that weird unidentifiable gunk needs to go. No excuses—your rubber duckies deserve better.
- Check personal care items. Sort through shampoos, body washes, and whatever else has taken up residence here. Toss anything your family no longer uses or needs. And don’t forget to jot down replacements for anything you’re running low on!
- Hunt for trash. Empty bottles and scraps of soap tend to lurk in corners, so bag them up and send them packing.
D/M Pro Tip: While you’re at it, take a good look at your shower curtain. Is it holding up, or is it ready to retire? Now’s a fantastic time to replace it if needed. Better yet, set a reminder to switch out the liner every 3-5 months—or invest in a mildew-resistant option to save yourself some hassle.
Organizing Tips for the Bathroom
Finding good organizing options will help to keep this room neater and less messy going forward.
- A bin to hold current magazines and other reading material.
- A bag to hold toys in the bathtub
- A makeup organizer for the vanity sink
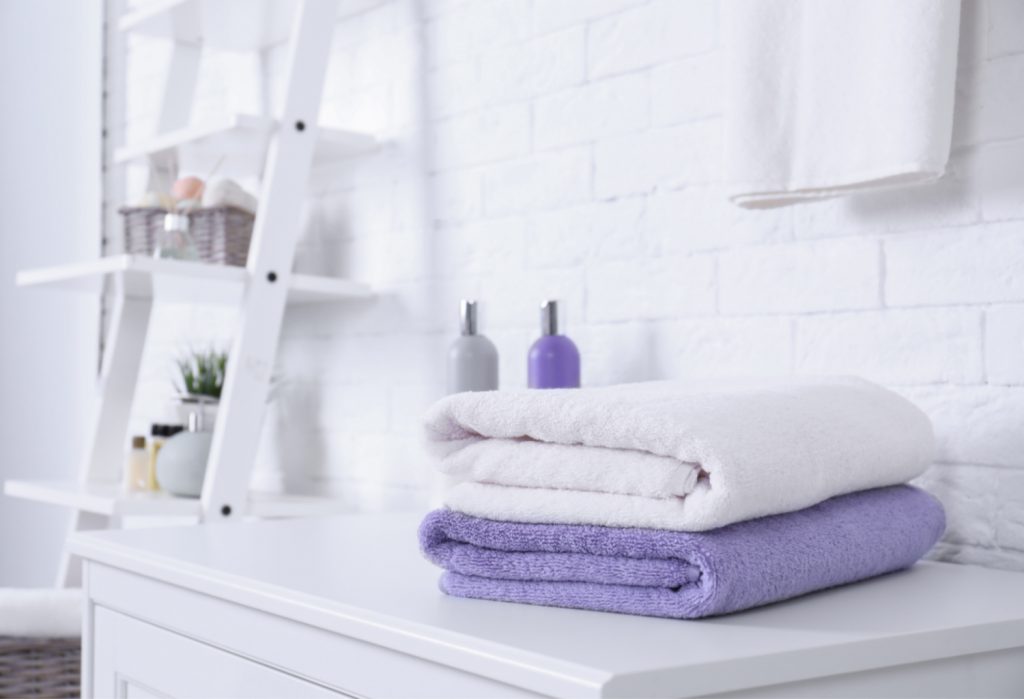
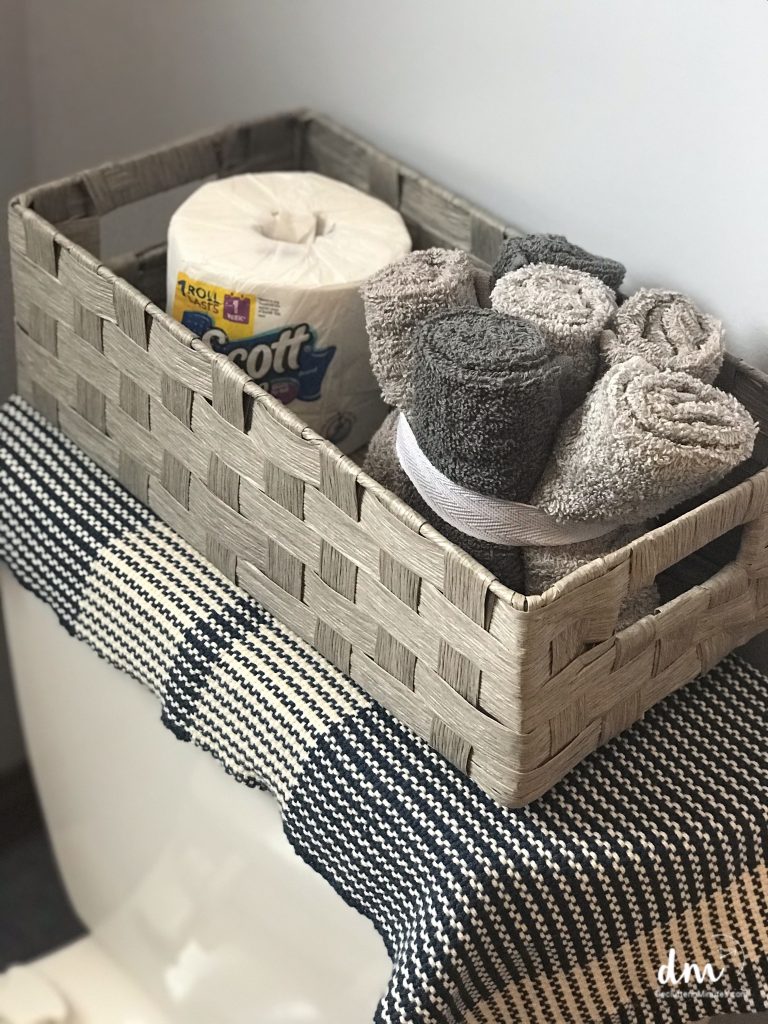
- A basket on a shelf to hold washcloths
- Multiple towel rods or Command hooks to hold wet and damp towels
- A small basket of cleaning supplies
- A basket on the wall to hold bath towels
- A shower organizer to hold shampoos and soaps
- I LOVE these organizers for the tub and shower if you are short on space.
- A basket to hold extra rolls of toilet paper on the back of the toilet to encourage your family to change the toilet paper when they run out.
Remember what your goal is, to create a space that is easy to keep neat and clutter-free. Test out a few options and see what your family is able to stick with. If you find they are not using a system you have set up, this is your chance to try something new.
I have found with my family, the easier I am able to keep it, the more likely they are to stick with it

Clutter-Busting Bathroom Tips
1. Do a room reset. Every time you leave the bathroom, take a few minutes to reset the room to the way it was. Pick up towels, toss dirty clothes in the hamper, and close the shower curtain. These small things will give you a room that is neater and cleaner.
2. Give a tour. It sounds silly, but once you have organized your bathroom, give your family a tour. Let them know what goes where and why. Tell them you hope they will help you keep things put away and how happy it makes you when they do. Be positive and encouraging, and have a bit of patience as they learn the new routine.
3. Use big labels. I have found the bigger the label (especially in the beginning), the more likely my family will remember just what goes where. Use index cards and a big gold marker. Give them no reason not to know what goes where.
4. Wash the sink. Whenever you are in the bathroom washing your hands, take a few seconds to wash the sink as well. This quick little habit can make a huge difference in a bathroom.
When organizing a space in your home, it is important to use family-friendly containers. Let’s face it decluttering a space is nobody’s idea of a fun time, so keeping things neat and clutter-free going forward is our number one goal.
Baskets and bins are your friends when you are looking to organize a bathroom; they make it easy for everyone to find what they need and put those items away again when they are done.
I hope these tips help you fix a cluttered bathroom turning it into a tidy, functional space your whole family can enjoy.
With a good declutter, clean, and these simple organzing tips, you’ll not only conquer the clutter but also create a room everyone can help keep neat and stress-free.
You have some very good ideas here. I find that the more drawers and cupboards you have in your bathroom the more likely you are to let too much unused or obsolete stuff just gather. As our children (3 girls and a boy) went off to college we never really figured out what was theirs and let it all sit there even after they were married and out-of-state. Last year (pandemic decluttering) it was absolutely amazing how much stuff (especially shampoos and lotions!) that we removed from the main bathroom. Now my husband uses that bathroom for most of his grooming paraphernalia while I use the master bath. A cousin says that not having two sinks in a bathroom is camping. We camp in our 1955 home — but each bathroom has a separate tub and shower!!!
an offer i cannot refuse
Some of the paragraphs at the end of the post are in red: they APPEAR to be links, and act like links but aren’t. They are causing issues trying to save this in doc form. Could you please see what is happening?
Great post and I hope to be using it soon! Whole house re-set due to construction! OH MY!