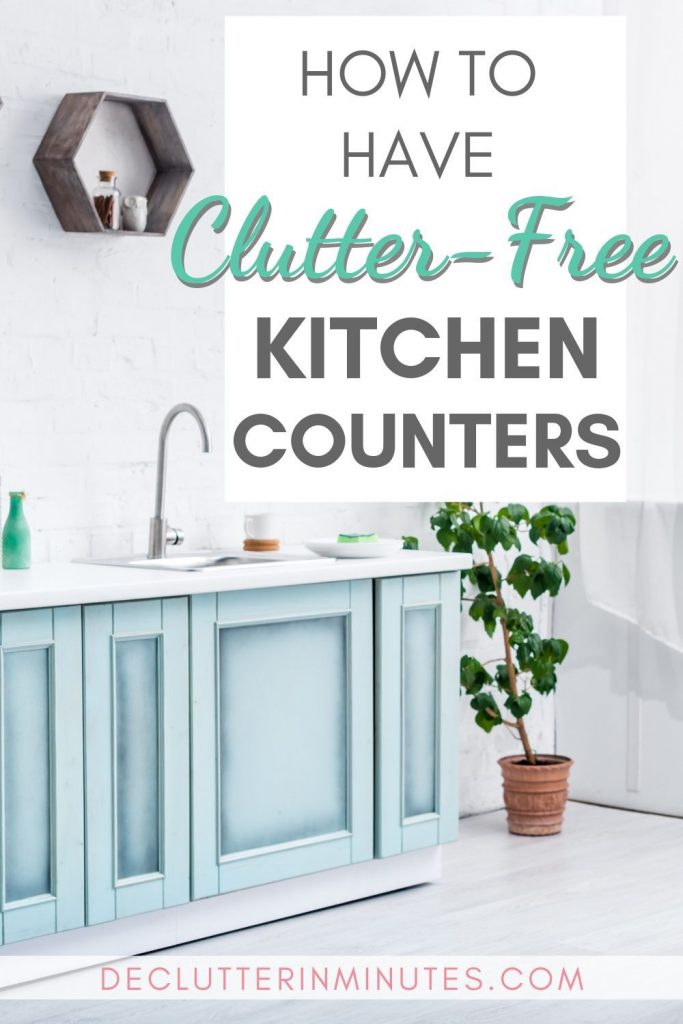
How to Have Clutter-Free Kitchen Counters
If your kitchen counters are a magnet for every paper, appliance, and random sock (seriously, how did that get there?), you’re in the right place. This guide on how to have clutter-free kitchen counters is going to walk you through simple, doable steps to reclaim your space, and your sanity.
Too often, we think we need more baskets, bins, or fancy organizing tools, when really, the magic starts with less stuff. We’re not just talking about tossing a few things. We’re diving into the power of downsizing what you own so that every item has a home, and your counters stay clear without constant effort.
Think of this as your friendly nudge toward your kitchen organization, even if you’ve never had a plan before. Spoiler alert: it’s not about perfection, it’s about progress (and having space to make dinner without shoving things aside first).

Clear Counters Changed Everything for Me
I learned the hard way that if I ever wanted to enjoy being in my kitchen, and not just pass through it like a stressed-out tornado, I had to figure out how to keep the mess away.
Honestly, it’s like a little bit of magic. When the counters are clear, the whole space feels calmer, cleaner, and somehow… more put together. Even if the sink has a few dishes (real life, right?), clean counters make the kitchen feel instantly lighter.
And let’s be real, the kitchen isn’t just for cooking anymore. It’s where we do all the things: morning coffee, last-minute homework, deep conversations, celebrations, and yes, even meal planning (or staring blankly into the fridge pretending something will appear). It’s the heartbeat of the home. But when clutter takes over, it’s hard to feel that rhythm, all you feel is stress.
If you’re someone who finds yourself avoiding your kitchen because of the mess, I get it. I’ve been there. But the good news is, we’re going to flip that script today. We’re starting with the mess you can actually see, the stuff sitting on your counters, silently judging you every morning. Clearing that visual chaos can completely shift how you start your day.
With so much happening in one room, organizing it all can definitely feel overwhelming. That’s why I swear by using zones in the kitchen. It sounds fancy, but it’s really just about grouping things by how and where you use them. And here’s the kicker, the fewer items you have, the easier it is to keep those zones neat. (Yes, this is where how to declutter meets kitchen design.)
Zones not only help you stay organized, but they naturally cut down on surface clutter, which is a total game-changer.

What Are Kitchen Zones?
Zones are specific areas set up for specific tasks, just like getting dressed in your bedroom or folding laundry in the laundry room. In the kitchen, that might mean a coffee station, a prep area, or a snack zone. When every task has a place, it’s easier to keep things where they belong. And fewer things = fewer piles. (See what we did there?) If you’re new to this idea, be sure to read our full post on kitchen zones so you can dig in deeper later.
Why Are My Counters Always Cluttered?
It’s simple, really, countertops are convenient. They’re big, flat, and right there when you walk in the door. So naturally, we drop everything on them. Mail, keys, groceries, backpacks… you name it. We set it down “just for a second,” but life gets in the way, and it stays there.
And then someone else walks in and does the same. Pretty soon, your counters become the family dumping ground. What starts as “temporary” turns into layers of clutter, and that clutter hides important stuff. Suddenly, even a prescription or permission slip disappears into the chaos.

That moment, when your important things are swallowed by the mess, that’s when clutter becomes a real problem.
Here’s how I define it: clutter is anything that hasn’t been put away.
Not junk. Not things you hate. Just the stuff that’s hanging out waiting for “later”, and never actually getting put all the way away. That one habit alone? It creates the majority of kitchen clutter for most women I talk to.
So before we get into organizing systems or streamlined setups, we’re starting with the one thing that will change everything: building better habits, ones that help you create and keep clutter-free kitchen counters, even in real life.

How to Declutter Kitchen Counters (Without the Overwhelm)
Even though kitchen counters are a small area, I find it so helpful to break this process down into simple steps. When you’re feeling overwhelmed, clear direction makes all the difference, and every step brings you closer to clutter-free kitchen counters.
Step 1: Start With Trash (Trust Me)
It might surprise you, but a lot of what’s cluttering your counters is actually just trash. Junk mail, old receipts, empty wrappers, packaging, it piles up fast.
Grab a trash bag (and a recycling bin if needed), and do a full sweep of your counters. Be relentless. This is the easiest step, so use that momentum. Toss the store ads you meant to read, the coupons you forgot about, and that one takeout menu you haven’t looked at in six months.
Pro tip: Keep the trash can nearby as you continue, it’s amazing how many little things you’ll keep finding.
Step 2: Deal With the Dishes
Now it’s time to tackle the dishes. If they’re clean, put them away. If they’re dirty, load them into the dishwasher or at least get them into the sink.
Sometimes cleaning as you work is a part of the process. By putting things away, you will uncover the true clutter that needs to be dealt with.
Sakugi Stainless Steel Dish Drying Rack for Kitchen Counter, Sink Organization and Storage Essentials with Silverware & Utensil Holder, Home and Apartment Decor, 12”W x 15.6”L, Black JASIWAY Dish Drying Rack in Sink, Expandable Stainless Steel Dish Drainers for Kitchen Counter, Dish Dryer Rack for Inside Sink, Over The Sink Dish Racks with Utensil Holder, SilverSakugi Over The Sink Dish Drying Rack – Adjustable 2 Tier Large Capacity Stainless Steel Drainer with Cutlery & Utensil Holders, Kitchen Storage & Organization, 30


Step 3: Put Away the Food
Find any food items left on the counter and ask: does this have a home?
If the answer is yes, put it there now. If it’s no, that’s a clue you may be storing more food than your space can handle. This is where downsizing comes in. Keeping only what fits helps avoid pantry chaos and makes putting things away way easier.
No pantry? No problem. Use a clean laundry basket for now to gather everything, and store it out of the way until you can create a dedicated zone.
Stale snacks? Toss them, and don’t feel guilty. You’re not wasting food; you’re reclaiming space and sanity.
Step 4: Return Items to Their Kitchen Homes
You may feel like your kitchen has no system, but chances are, you have a few designated spots already, for silverware, plates, cooking utensils, pantry items, etc.

Go through and put away anything that does have a home. This is often where people realize their “clutter problem” is mostly a “things-not-put-away” problem.
And this is where downsizing makes a big impact. When your cabinets aren’t overstuffed, putting things away becomes easy, almost effortless. And the easier it is to put things away, the more likely you are to actually do it. Less on the counters means less stress. Yes, it all adds up.
Step 5: Tame the Paperwork Pile
Paper is sneaky, and one of the top causes of kitchen counter clutter.
For now, don’t overthink a filing system. Grab a laundry basket and put all the paper into it. If something needs urgent attention (like a bill or school form), set it aside and make a note to go through those later. You can even set a phone reminder to deal with it within 24-48 hours.
Once a week, schedule a paper sort session, and bonus points if it’s the same day you pay bills. A simple paper basket is a great way to set up a weekly planning system and can make this chaos go away for good.
Step 6: Remove What Doesn’t Belong in the Kitchen
Toys, tools, socks, dog leashes, you know, all the things that somehow migrate to your counters.
Toss them into a separate basket for now. Later you can take that basket and walk your home putting things away. You’re not organizing the whole house right now, just clearing the kitchen.

Downsizing tip: As you gather items, ask yourself: Do I even need this? Do I want to store it? If the answer’s no, drop it straight into a donate bag or trash bin. You’ll be amazed how much clutter disappears this way.
Step 7: What’s Left Is Your Actual Clutter
Now take a look, your counters should be about 90% clear. What’s left? That’s your true clutter, the items that don’t have a home.
This is where you get to decide:
- Keep it? Then give it a home. Ask yourself: Where would I look for this if I needed it? That answer is usually the perfect place.
- Donate it? Drop it in the donation box.
- Toss it? Into the trash or recycling it goes.
Pro tip: If you’re afraid you’ll forget where you put something, jot it on a sticky note and put it on the fridge. Use it as a temporary reminder while your brain adjusts to the new location.
Step 8: Clean It Up and Set New Habits
Wipe down your counters and admire your work, look how far you’ve come! At this point, only the essentials should remain: daily-use appliances, maybe a produce basket or cookbook, and a small container or two if needed.
If you’re still feeling overwhelmed by what’s left, it may be time to downsize even further. Keep only what you use regularly and love having out.
Here are a few organizing tips to help you decide what to keep on your counters, and what to store away for a cleaner, calmer look:
- Meds & Supplements: Keep a pill organizer out if needed, and place the rest in a basket inside a cabinet, or relocate them to a bathroom if that works better.
- Seldom-Used Appliances: These don’t need prime real estate. Tuck them onto a high shelf, in an appliance garage, or even on the floor of your pantry.
- Spices: Keep your go-to spices on a magnetic rack on the fridge or a small tray near the stove. Store the extras in a drawer or on a pantry shelf.
- Coffee Station: Create a coffee bar area with just the essentials. Store filters, coffee, and extra mugs in a cabinet above to keep the area streamlined.
- Bread & Breakfast Items: Use a bread box to corral baked goods, butter, and your toaster in one area. Extra bread can go in the fridge or freezer to save counter space.
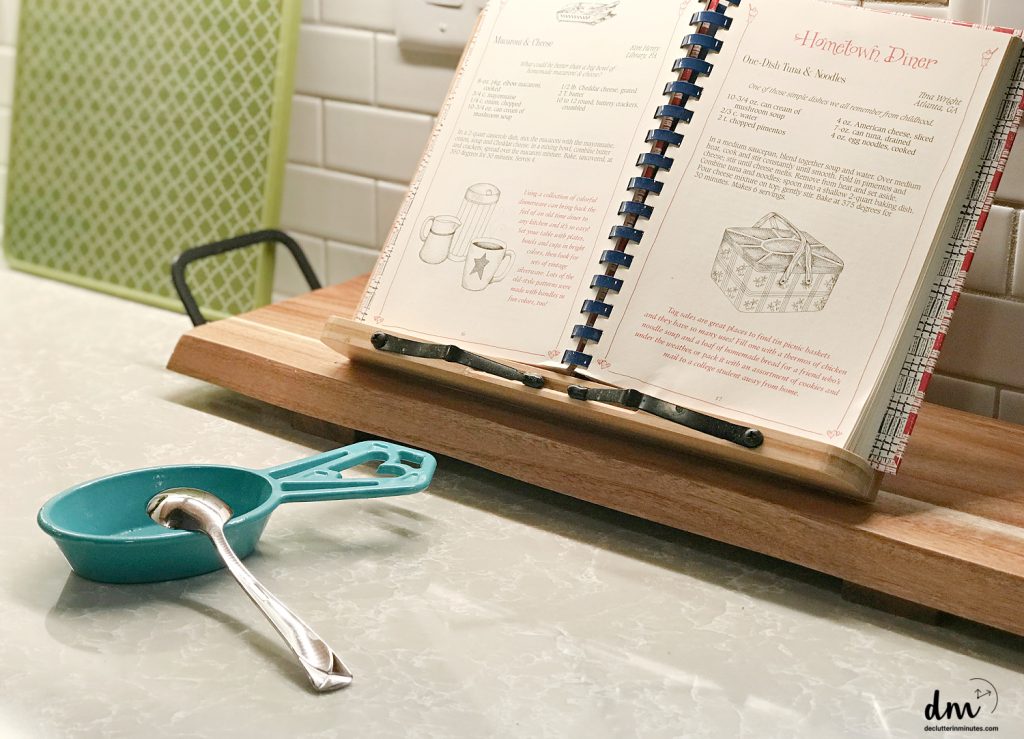
- Cookbooks: Keep one favorite on a cookbook stand if you use it often, and store the rest on a shelf in a cabinet or even in another room.
You Can Have Clutter-Free Kitchen Counters, One Step at a Time
If you’ve made it this far, first of all, high five! Creating and maintaining clutter-free kitchen counters isn’t about perfection; it’s about progress, consistency, and building habits that work in real life.
Remember, most of the clutter you see isn’t about being messy, it’s about not having the time, energy, or systems to put things all the way away. That’s where downsizing can be a total game-changer. When you own less, it’s easier to organize, easier to clean, and easier to enjoy your kitchen.
So whether you did one step today or all eight, you’re on your way. Keep showing up for yourself, keep putting things back where they belong, and celebrate the little wins, they’re adding up more than you think.

FAQ: Kitchen Counter Clutter
A: Clutter is anything that hasn’t been put away. Even if it’s something useful, if it’s sitting out without a designated home, it becomes visual noise that can overwhelm your space.
A: That’s where downsizing comes in. The key is keeping only what fits your space comfortably. If there’s no room to put it away, it might be time to let something go.
A: Start small by setting up clear zones, like a paper basket, coffee area, or catch-all tray by the door. Then, show your family how to use them. It takes time, but with consistency, new habits will form.
A: Once your systems are in place, just a quick 5-minute reset each evening (putting things all the way away) is usually enough to maintain those clear counters.
More Decluttering Resources:

Thank you for the ideas. With a compact ’50s galley kitchen, I do not have huge counters, but the kitchen table it “the” spot. When our 4 children were young and home, everything was off the table by dinner time. As “empty nesters,” we almost never see the whole table. Even for just the two of us, your ideas can help.
Yes, I totally get it!
I am an empty nester myself and in some ways, it can be harder to keep things put away than when we had the kids home. (we have 4 as well). I literally contain my entire home using baskets of all makes. why? Because they work and are super easy to keep things put all the way away.
Good luck!
Tracy Lynn