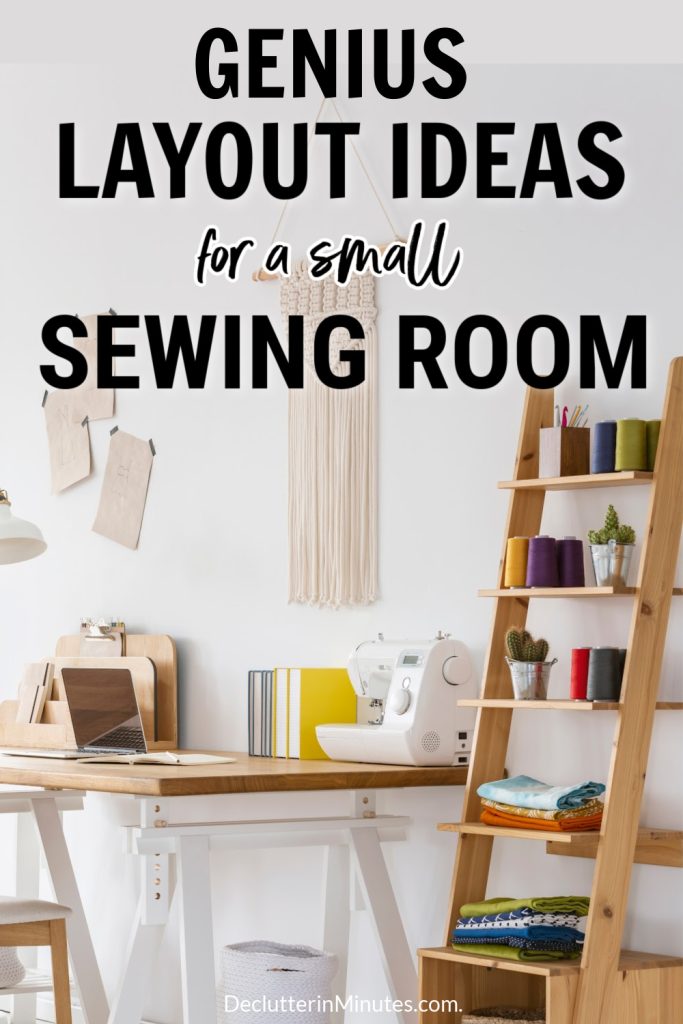
Small Sewing Room Layout Ideas
If you love to sew but your sewing space is more “creative chaos” than calm workspace, today can be your day one for creating a space that works better for you. Let’s face it, a small sewing room can get crowded fast with fabric, thread, patterns, tools, scraps, and half-finished projects that somehow multiply when you are not looking.
The good news is you do not need a big room to have a sewing space that feels functional and easy to use. You just need a layout that fits the way you sew today.
These small sewing room layout ideas will help you make the most of the space you already have, whether that is a spare bedroom, a corner of the guest room, a closet setup, or one side of your home office.
You can find even more organizing ideas and home setup tips in my How to Organize resource library, where I share practical ways to simplify and organize your home one space at a time.
Quick Tips for Setting Up a Small Sewing Room
A small sewing room works best when each area has a clear purpose. Instead of trying to fit everything into one crowded space, focus on creating simple work zones for sewing, cutting, fabric storage, and supplies you use most often.
Here are a few easy ways to make a small sewing room feel more functional:
- Use vertical wall storage to free up floor space
- Keep your sewing table near natural light if possible
- Store fabric by type, color, or current projects
- Use rolling carts or slim storage pieces for flexibility
- Create one main workspace instead of overcrowding the room
- Keep your most-used tools within easy reach
- Use bins, shelves, and drawer organizers to contain small supplies
Remember, the goal is not to create a picture-perfect craft room. The goal is to create a sewing space you love walking into… one that makes you want to sit down, start sewing, and enjoy creating again. Sometimes it is the colors, the calm feeling, or simply being able to find what you need without digging through piles that makes all the difference.
Finding Space in a Small Sewing Room
One of the biggest mistakes people make in a small sewing room is focusing only on the sewing table itself. But when space is limited, every wall, shelf, corner, and even the back of a door can help your room work better.
Go Vertical
When floor space is limited, the walls become your best friend. Going vertical can free up valuable workspace while still keeping your sewing tools, fabric, and supplies easy to reach.
- Install shelves on one wall for holding totes of material.
- Use a perimeter shelf closer to the ceiling for holding patterns or sewing books.
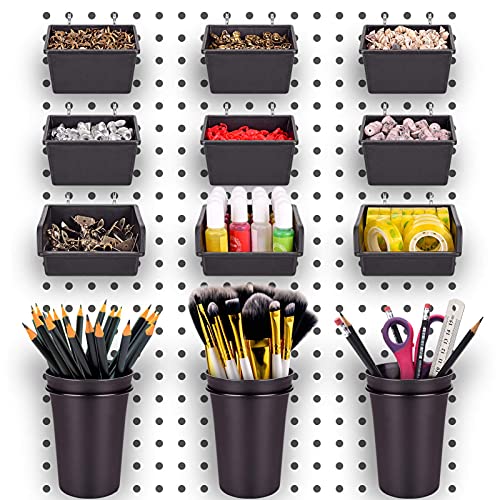
- Fill an area with pegboards and use it to hold all your sewing tools and cutting boards.
- Hang baskets to store your scraps, in-progress projects, supplies, and tools.
YYWUOJJ Wood Floating Shelves for Wall Decor, Rustic Wall Shelves for Bedroom Bathroom Kitchen Living Room, Set of 6 Black G.CORE 12 Pack Pegboard Bins PegBoard Cups with Hooks & Loops, Peg Hooks Assortment Organizer Accessory, Various Tools Storage Arrange System Kit, for Garage Craft Workshop Workbench Hobby OfficeWall Mounted Bin Basket with 5 Hooks 3 Label Plate Adhesive-3 Pack, Cabinet Hanging Metal Wire Basket,Rustic Farmhouse Decor, Storage Organization Shelf for Pantry Kitchen Bathroom 10.6*7.5*5.1inch


This simple shift can make a small sewing room feel much more open and easier to work in.
Fold-Down Table
If your sewing room also needs to function as a guest room, office, or shared space, a fold-down table can be a huge help. You get the workspace you need while still being able to tuck everything away when you are finished for the day.
This type of table gives you room for patterns, cutting, or sewing large projects. And when you’re done, you can simply fold it back up and have your space back.
VEVOR Mounted Convertible, Multi-Function Folding Wall Table with Chalkboard for Home Office, Space Saving Computer Desk with Storage Area, BlackHOMCOM Fold-Out Convertible Writing Table Wall Mount Desk Cabinet with Blackboard and Side Shelf Multi-Function Home Office Workstation, GreyWall Mounted Desk, Laundry Folding Table, Wall Table, Floating Desk for Wall, Murphy Desk, Wall Mounted Folding Table, Floating Table, Wall Mount Desk, Wall Mounted Table, Folding Wall Desk, Foldable


Think Thin
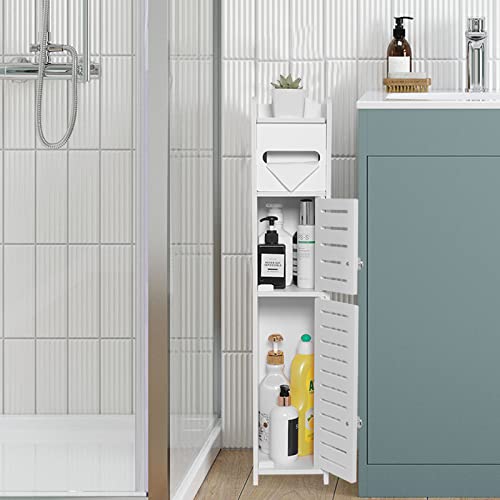
In a small sewing room, bulky furniture can quickly make the entire space feel crowded and harder to work in. Choosing slimmer storage pieces can help your room feel more open while still giving you enough space for the supplies and projects you actually use in your life today.
A thin rolling cart is another option, allowing you to bring it out for a project and roll it back into place when you are finished.
Fixwal Narrow Storage Cabinet, Narrow Nightstand Dresser with 4 Drawers, Slim Fabric Dresser Storage Tower for Small Spaces, White Dresser, for Bedroom, Bathroom, Laundry, ClosetTuoxinEM Small Bathroom Storage Cabinet for Small Spaces, Over The Toilet Storage Cabinet for Skinny Bathroom Storage Corner Floor, Slim Toilet Paper Storage Cabinet with 2 Doors & Shelves (White)Pipishell 3 Tier Rolling Cart Organizer, Plastic Rolling Cart with Lockable Wheels & Reinforced Handle, Lightweight Utility Cart Storage Cart for Nursery, Kitchen, Bathroom, Craft Room, White, PIUC14W


Use Every Inch of Space
Small sewing rooms usually have more usable space than you think. The key is learning to look beyond the obvious spots and finding ways to use the hidden storage areas that often get overlooked.
- Use the top of a bookshelf to store extra fabric or patterns in baskets.
- Utilize the inside of doors by hanging an organizer to hold a variety of supplies.
- Use hooks on the side of a table for hanging tools or holding smaller items like scissors and measuring tapes.
- Add risers to your worktable if you need more storage space underneath for bins or larger supplies.
- Hang a shoe organizer on the door or wall for storing notions and other small items.
When you start using overlooked spaces more intentionally, your sewing room becomes much easier to maintain because everything finally has a home instead of piling up on your work surface.
A sewing room works so much better when it is set up around the way you sew today instead of trying to store supplies for every possible project you might do someday.
Small Sewing Room Layout Ideas
When setting up a small sewing room, try to think beyond simply finding places to store things. The best sewing spaces are set up in a way that makes it easier to sew, keeps your most-used tools nearby, and gives you enough room to actually work on the projects you enjoy most.
Breaking the room into smaller work zones can also help you stay focused without getting overwhelmed. Instead of trying to organize the entire space at once, focus on one area at a time and build your setup around the way you sew today.
Good lighting, a comfortable chair, and enough open space to move around safely can also make a huge difference in how enjoyable your sewing room feels to use over time.
#1. Sewing Area
Start with your sewing table first since it will likely become the main working area in the room. Try to place it somewhere that gives you enough space to move comfortably, spread out projects, and sew without constantly bumping into things or shifting piles around.
Where to Put It:
Before moving furniture around, take a fresh look at the room and think about how you naturally like to sew. Start with the sewing area first, then build the rest of the room around that main workspace.
Be sure to keep a few things in mind.
- How is the light in that area?
- Is there room for you to move around the table?
- Do you have easy access to the tools you use most often?
If space is limited, look for a sewing table with built-in storage so your most-used supplies stay nearby without taking over the rest of the room.
#2. Cutting Area
If cutting fabric at the kitchen table has you constantly cleaning up and starting over, creating a dedicated cutting area can make sewing projects feel much easier and far less frustrating.
Where to Put It:
If possible, keep your cutting area close to your sewing table so projects can move easily from one step to the next. And if space is limited, you can always divide one larger table into separate work areas for sewing and cutting.
The goal is to create enough open workspace that you can spread out patterns and fabric without constantly having to clear things off first. Use wall storage, magnetic organizers, or nearby bins to keep tools close by without crowding your work surface.
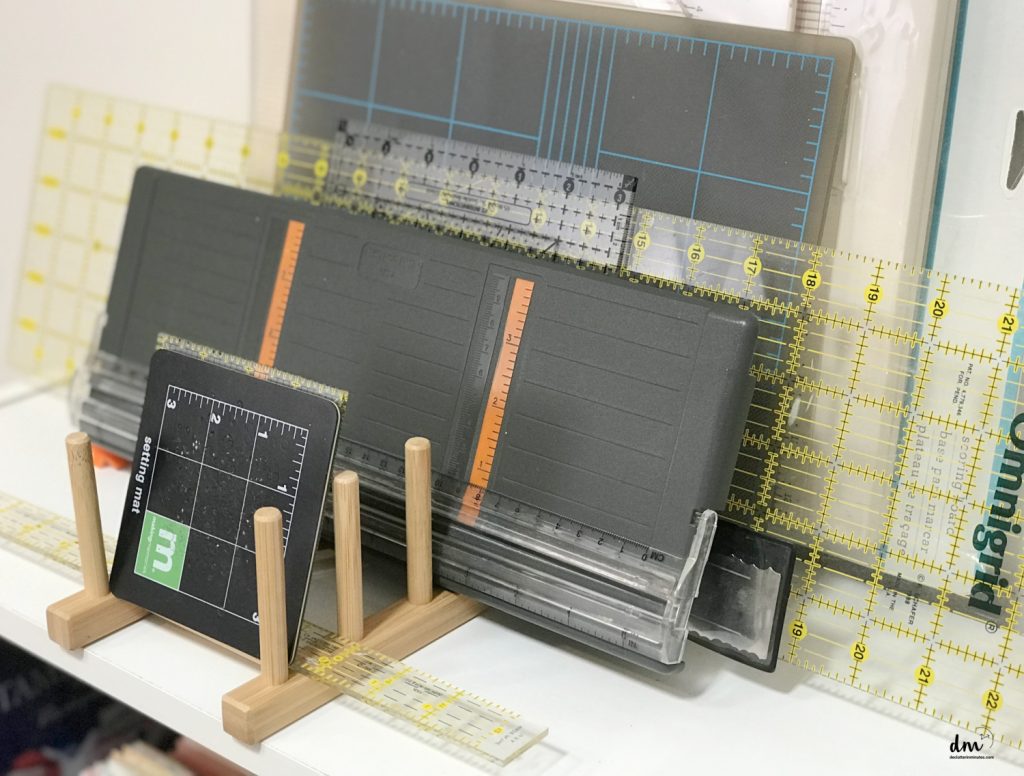
A few ideas are:
- Use a turntable to hold cutting tools.
- Use a file folder to hold cutting mats and rulers.
- Use magnetic baskets to hold scissors and sewing tools.
#3. Patterns
Patterns have a sneaky way of piling up fast, especially when you save projects you want to make “someday.” Before long, they can take over shelves, drawers, and baskets without you even realizing it.
Creating a simple storage system for your patterns can help keep your sewing room easier to manage while still keeping your favorite projects easy to find.
Where to Put It:
Try to keep patterns stored close to your cutting area so they are easy to grab when you are ready to work on a project. Shelves, binders, hanging organizers, or labeled bins can all work well depending on the amount of space you have.
Here are a few storage ideas:
- Shelves placed above tables with plastic totes specifically for holding patterns.
- A hanging organizer on the door.
- A long shelf near to the ceiling.
It also helps to regularly sort through older patterns and keep the ones that still fit the type of sewing projects you enjoy working on today.
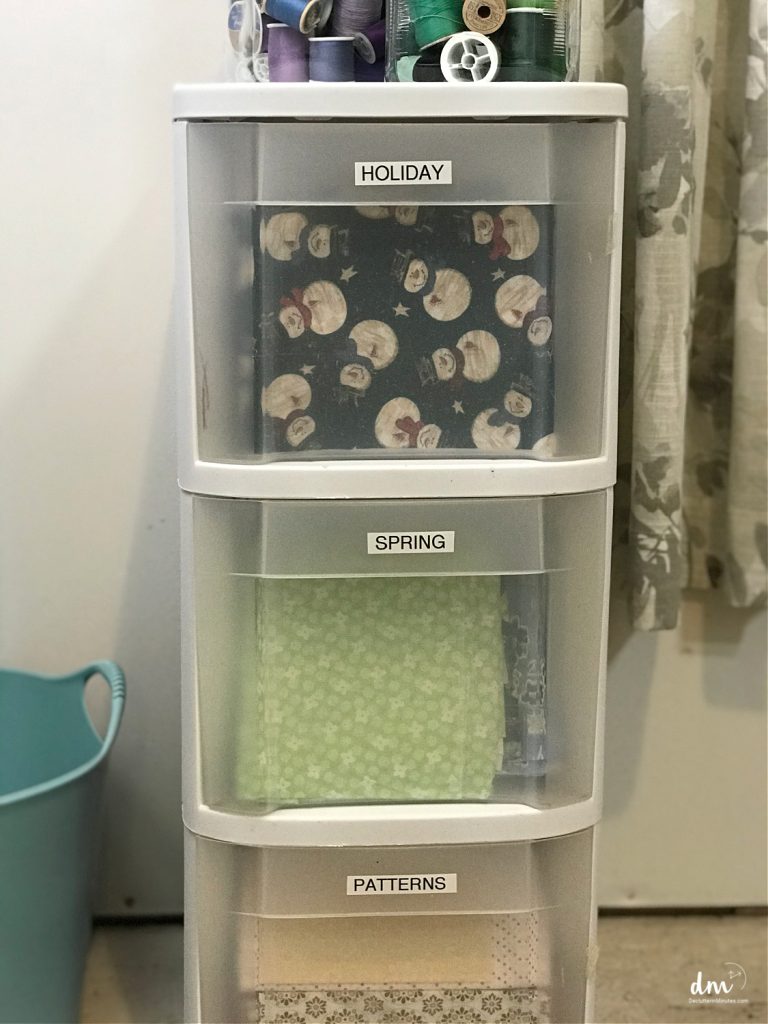
#4. Fabric Storage
Fabric tends to be one of the biggest space-takers in a sewing room. Between full bolts, scraps, seasonal prints, and “I might use this someday” fabric, it can pile up quickly before you even realize how much you have.
Creating a storage system that fits the way you sew today can make your fabric easier to find, easier to use, and much less overwhelming to manage.
Where to Put It:
Keep the fabric you currently use most often close to your main work area so it is easy to grab while sewing. You can use baskets, rolling carts, shelves, or clear bins depending on the amount of fabric you have and the space available. Fabric that you use less often can be stored higher up or farther away to keep your sewing area feeling more open and less crowded.
Here are a few storage ideas:
- If you have a closet in the room, you can hang fabric on pant hangers, allowing you to make the most of your space.
- Use shelves or bookcases with clear totes to see the “type” of fabric stored inside.
- Install a tension rod in the corner of the room and hang fabric on cascading hangers.
Quick Tip: Sorting fabric by color, season, project type, or material can make it much easier to find what you need without digging through piles every time you want to sew.
#5. Thread and Notions
Thread, needles, scissors, seam rippers, buttons, bobbins… the small sewing supplies are usually the things that create the biggest mess the fastest. Giving these items a designated home can make projects feel much less frustrating because you are not constantly stopping to search for what you need.
Where to Put It:
Keep your most-used sewing tools within easy reach of your main sewing area so they are simple to grab while working on projects. Drawers, pegboards, jars, clear containers, or rolling carts can all work well depending on the amount of supplies you have. Clear containers are especially helpful because you can quickly see what you have without digging through cluttered bins.
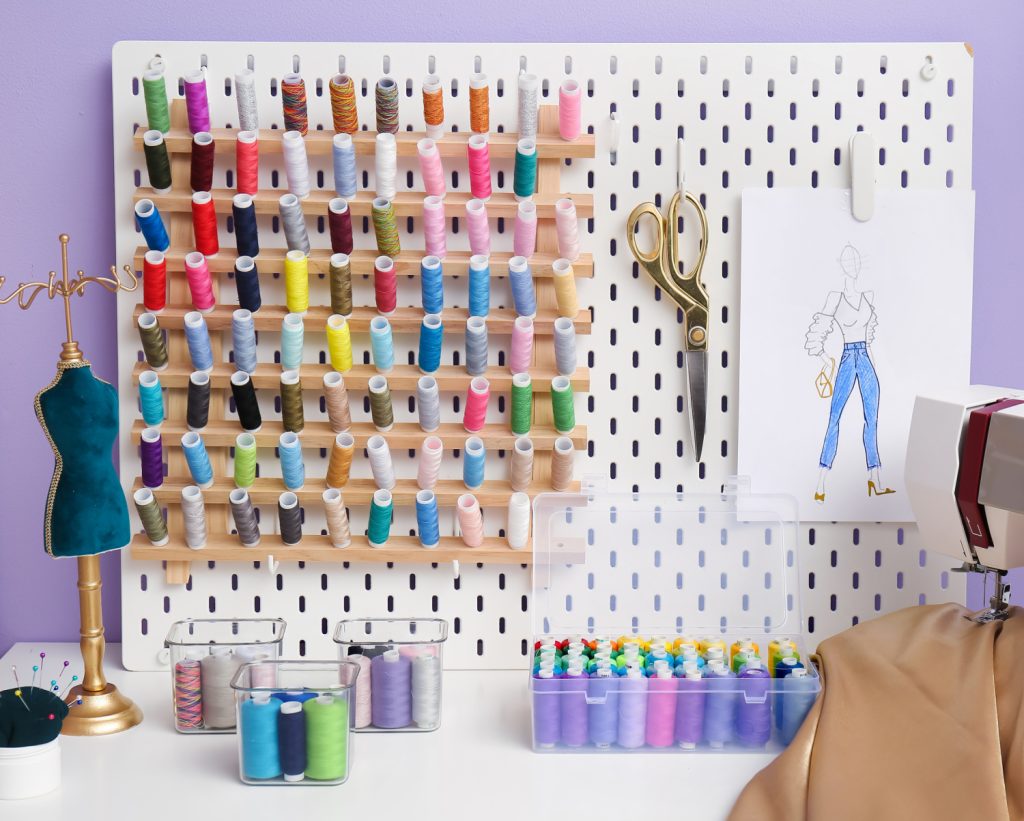
Here are a few storage ideas:
- Use a thread hanger to hold spools of thread on the wall.
- Hang a shelf and fill mason jars with buttons and extra threads.
- Use clear utility boxes to hold snaps, buttons, zippers, and ribbons.
- Use a turning pen organizer to hold tall items such as marking pens, seam rippers, and scissors.
Try not to let small supplies spread into every corner of the room. Keeping your most-used tools together can make sewing feel calmer and much easier to manage.
#6. Dress Form
If you sew clothing, a dress form can be helpful for fittings, measurements, and working through design ideas.
Where to Put It:
Dress forms can easily become one more thing to walk around in a small sewing room, so try to place yours somewhere that keeps it accessible without blocking your workspace or walkways.
Here are a few storage ideas:
- Use a rolling cart to store and move your dress form around as needed.
- Hang hooks on the wall and use them to hang the dress form when not in use.
- If you have enough space, consider getting a collapsible or adjustable dress form for easier storage.
Quick Tip: Cover your dress form with a sheet or fabric when it is not in use to help keep dust and loose threads from collecting on it.
#7. Ironing Board
Ironing may not be the most exciting part of sewing, but having a dedicated place for it can make projects move along much more smoothly. A sturdy ironing setup that is easy to access can also save you from dragging supplies in and out every time you need to press seams or fabric.
Where to Put It:
Try to keep your ironing area close enough to your sewing space that you can easily move between the two while working on projects. And if possible, leave enough open floor space around it so you are not constantly bumping into things while ironing.
Here are a few storage ideas:
- Use wall mounts or hooks to store your ironing board against the wall when not in use.
- If you have limited space, consider getting a tabletop ironing board that can easily be stored in a closet or under your sewing table.
- Use a hanging storage organizer to keep all of your ironing supplies together and easily accessible.
APEXCHASER Wall Mounted Ironing Board with Iron Holder, 36Organizedlife Wall Mounted Ironing Board Cabinet with Iron Storage, Built in Ironing Center, Hanging Ironing Board for Laundry, Folding Leg & MirrorDuwee 12


Quick Tip: When using an ironing board, make sure to always have a heat-resistant surface underneath it to protect your workspace from hot irons or steam.
Sewing Room Layout Tips
One of the easiest ways to keep a sewing room from becoming overwhelming is to break it into smaller work zones. Instead of trying to organize the entire room at once, focus on setting up areas based on how you actually sew and create today.
When each zone has a clear purpose, it becomes much easier to find supplies, work on projects, and keep the room from turning into one giant pile of fabric and unfinished ideas.
- Sewing zone: This is where you will do most of your machine sewing. Keep your sewing machine, cutting mat, rulers, and other necessary tools in this area.
- Cutting Zone: If you have the room, you can set up a separate area for cutting out patterns. If not, you can use your sewing zone for cutting as well.
- Ironing zone: As mentioned before, having a dedicated space for ironing is important. Keep your ironing board and supplies in this zone.
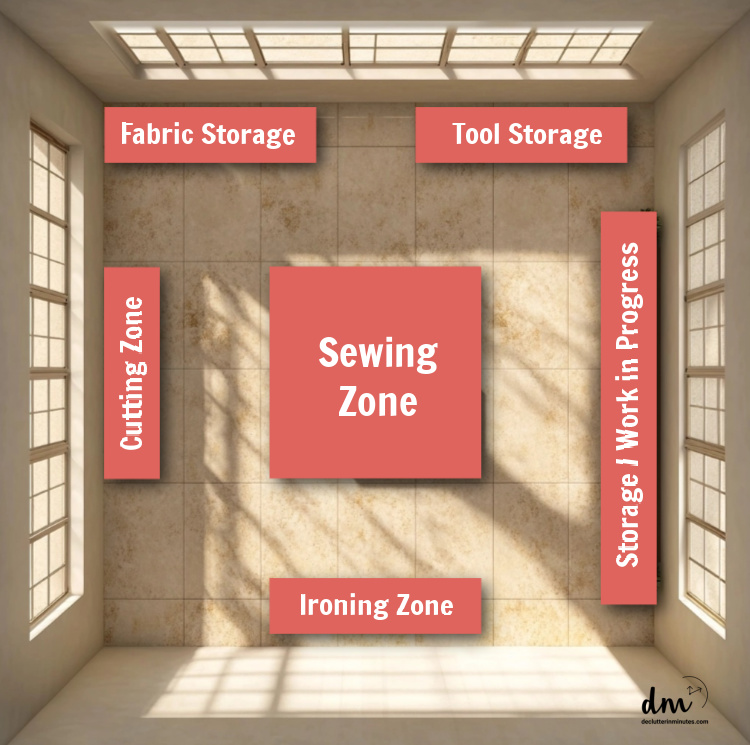
- Fabric storage zone: Keep the fabric you use most often easy to reach, while storing overflow fabric higher up, farther away, or in labeled bins.
- Notions and tool storage zone: Create one main area for scissors, thread, buttons, measuring tools, and other small supplies so they are easy to grab while working.
- Work-in-progress zone: Having one designated spot for current projects can help keep unfinished work from spreading across the entire room.
A sewing room does not need to be huge or picture-perfect to work well. The goal is to create a space that fits the way you sew today, keeps your favorite supplies easy to reach, and gives you enough room to actually enjoy creating.
If your sewing room feels overwhelming because supplies have slowly taken over the space, my Right-Sized Living approach can help you focus on what actually fits the way you create today.
Start with one work zone at a time and focus on making the room easier to use instead of trying to organize everything perfectly all at once. Sometimes a few small changes, a little breathing room, and better placement are all it takes to make a sewing room feel calmer and much more functional.
And remember… organizers work best after you decide what truly belongs in the space.
Small Sewing Room FAQ
Start by creating simple work zones for sewing, cutting, ironing, and fabric storage. Focus on keeping your most-used supplies nearby and avoid overcrowding the room with too much storage furniture.
Clear bins, shelves, rolling carts, and labeled containers can all work well. Keep the fabric you use most often easy to reach and store overflow fabric farther away or higher up.
Give small tools like thread, scissors, needles, and buttons a designated home near your sewing area. Clear containers and pegboards can make supplies easier to see and grab quickly.
Use vertical storage, keep walkways open, reduce visual clutter, and choose furniture that fits the way you sew today instead of overcrowding the room with too many supplies.