How to Organize Cans in a Pantry
Canned food can be tricky to keep, but these tips on how to organize cans in a pantry will help you find a solution that works. Streamline the food you are investing in so you are using it up before it expires.
This is a great tip to use on your journey to pantry organization so you can streamline this important extension of your kitchen.
Canned goods can be surprisingly heavy. I remember, as a kid, watching my mom use family-sized soup cans as makeshift arm weights. She’d stand in the kitchen, pumping those chicken noodle soup cans along with a workout show playing on our tiny black-and-white TV.
Another memory is one of checkout clerks putting a dozen cans of sauce in one bag, leaving you alone to lug it to your car and then into your house. Then, hoping the bag would not tear, crushing your toe under a pound of tomato sauce.
Storing cans may not seem like a project worth your attention but actually, it is. Even though can goods have a long shelf life, they do still have an expiration date and there is nothing quite as frustrating to me (and maybe to you as well) as throwing out expired food.
How to Organize Cans in a Pantry
Having an organized food storage area is the secret behind an organized kitchen. This is true in a restaurant as well as in the family kitchen.
Knowing exactly what food you have will help you to cook meals more easily and keep that grocery budget in check at the same time.
Step #1. Gather Up What you Have
Before we can get to organizing, you will first need to know what you have and how much you have of it. You can use a laundry basket or a plastic tote to remove all the canned goods you have.
Be sure to pull out everything, including jars. Since they’re so similar to cans, it makes sense to group and organize them together for convenience.
Step #2. Sort
Find a good workspace that gives you enough room to really spread out. A kitchen table of large counter will work well for this step. Begin removing the cans from the tote one at a time sorting as you go. How you sort will all depend on you and your family’s dietary likes and needs. A few ideas are:
- Soups/Broth
- Sauces
- Vegetables
- Fruit
- Beans
- Meat
- Fish
- Sugar-Free
As you set up a new pile, use a post-it note as a label. This will help you to remember what you have where, in case you need to leave in the middle.

Step #3. Look at what you have
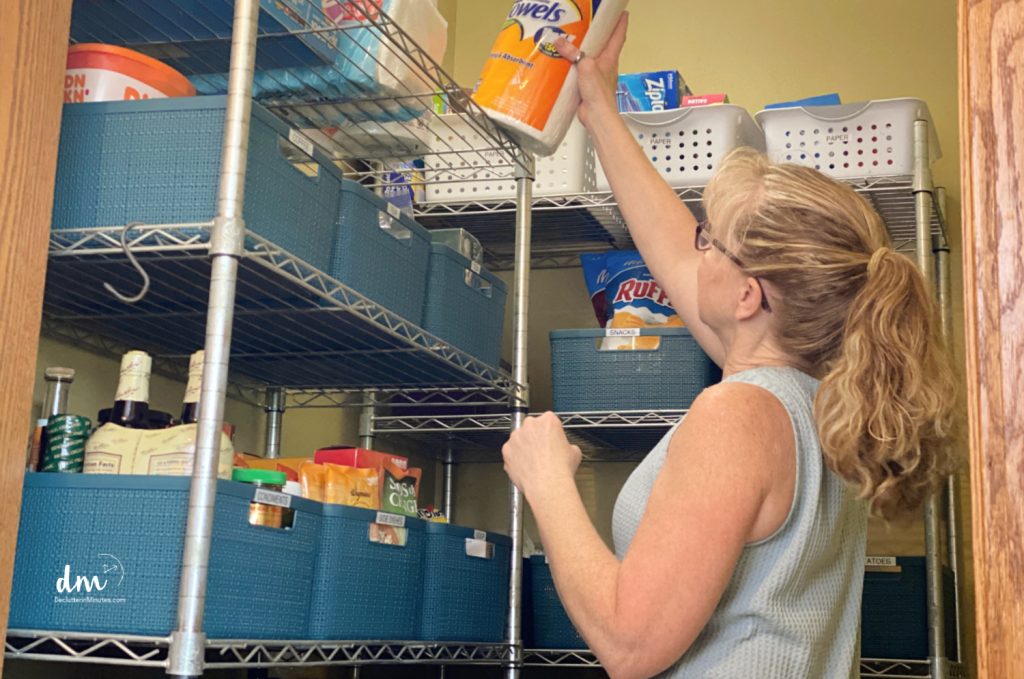
Depending on the type of pantry you have, will determine the best way to organize the canned goods you plan to store there. If you have solid shelving you can get away with simply stacking your cans, using a riser, or keeping things in a single layer organized into rows.
If you have wire shelving, however, you may need to use bins to keep them all from tipping over like dominos each time you are there grabbing a can for tonight’s dinner. If you are not a fan of bins you can use plexiglass to give you a more solid surface.

READ: HOW TO ORGANIZE A WIRE SHELVES IN A PANTRY
Step #4. Choose appropriate containers
No matter what you choose to hold your canned goods, you will want to have sturdy containers. This will better allow you to slide the container out without risk of damage. A few options are:
- Metal bins
- Stackable rack
- Risers
- Heavy wicker baskets
- Plastic totes
Step #5. Location matters
When organizing your pantry, where you store your canned goods matters more than you’d think. These heavy items should be within easy reach, so they belong in what we call “prime real estate.” That’s the space from chest to thigh—your most convenient zone for grabbing everyday essentials.
Take a moment to scan your pantry. What’s currently occupying your prime real estate? Are they staples you use daily or things you barely touch a few times a month? If it’s the latter, consider relocating those items to harder to reach areas.
This will free up valuable space for your canned goods, making your pantry more efficient and easier to use.
Step #6. Label each container
In the beginning, you want to be sure you label each container thoroughly. I like to use index cards for this part so they really stand out. This will be not only helpful to you but to your entire family as well.
You want loud, big labels at first to help everyone acclimate to the new setup. Don’t worry; once you do, you will be able to make new labels that you like better.
Step #7. Let it Ride
It is important with any newly organized system that you give it time to set in. This is especially true in the pantry since most, if not all, of your family will be using this space. The goal of organizing is to help everyone find what it is they are looking for without having to turn an area upside down in the process.
Once you have everything set, let it sit for a few weeks to a few months. If you see a neat and tidy pantry after that time then you know you have a setup that works.
If, however, you see food items on the floor or in the wrong containers, then that is your clue that your setup is not making sense to everyone that is using it. Before you go and change things, have a family meeting to explain what goes where. Sometimes this is all you need to do to ensure everyone is on board.
If you do not have room in your pantry you can try out a few of these options to see if they will work for your setup.
Organizers that help to keep cans tidy
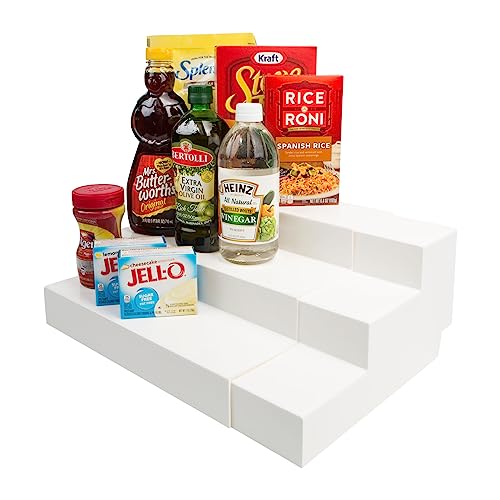
Shelf risers are a great option if you are short on space. Be sure to find risers that will fit in the area you have and also be sure it is sturdy to hold up under the weight of the cans.
HENABLE 2PCS Large Acrylic Display Risers, Perfume Stand Organizer, Clear Acrylic Shelf Risers for Display Stands for Food, Tabletop Use, Amiibo Funko POP Figure, 3 Tier Clear Cupcake Stand Risers Copco Non-Skid 3-Tier Spice Pantry Kitchen Cabinet Organizer, 10-Inch, White/GrayDial Industries 3 Tier Adjustable Canned Goods Shelves for Kitchen Cabinet and Pantry Organization, Expand A Shelf, Mega


Corner shelving is another option to look into. Corners can be tricky to streamline and this option will work well giving extra storage space if you are needing more.
AKAZA 3-Tier Corner Shelf Counter and Cabinet Organizer – Cabinet Storage Shelf Rack, Shelves,Kitchen Counter and Cabinet Shelf, Bathroom Cupboard (White)Cook N Home 02649 Corner Storage Shelf Organizer, Triangle, 2 Tier, BambooVERTORGAN Bamboo Corner Shelf – 3 Tier,Dish Drying Rack,Plate Organizer,Spice Rack for Countertop & Cabinet,Bathroom Counter Organizer,Kitchen Cabinet Organizer,Pantry Organization and Storage


Wall organizers that attach to the wall or a door are a great option if you are really tight on storage space. I just love this option as it will work well for cans and jars.
Moforoco White Over The Door Pantry Organizer, Pantry Organization and Storage, Metal Hanging Spice Rack Shelves Door, Seasoning Shelves, Laundry Room Organization, House and Kitchen EssentialsDelamu Adjustable Cabinet Door Organizer, 6-Tier Hanging Spice Rack Organizer, Metal Over the Door Pantry Organizer, Pantry Organizers and Storage Shelves for Kitchen Bathroom Laundry Room, Blackbukfen Over the Door Pantry Organizer, 6-Tier Adjustable Wooden Basket Kitchen Pantry Door Organization and Storage, Heavy-Duty Metal Hanging Kitchen Spice Rack,D6.3 x W17.71 x H50.60 inch,1 Pack


Jute plastic baskets or bins are a sturdy option for holding not only cans but also bottles, jars, and even boxes of food. These containers make it easy to hold similar items, allowing you to streamline your entire pantry area using categories.
Curver Set of 4 Jute Large Decorative Plastic Organization and Storage Basket Perfect Bins for Home Office, Closet Shelves, Kitchen Pantry and All Bedroom Essentials, GreyCurver Jute Decorative Plastic Slim Organization and Storage Laundry Room Basket Perfect Bins for Home Office, Closet Shelves, Kitchen Pantry, Bedroom Decor and Bathroom Accessories, Set of 8, BlackMaxGear Organization and Storage 3 Packs, Plastic Storage Bins Organizer Bins, Woven Baskets for Storage, Plastic Baskets with Handles Storage Baskets for Organizing, Basket Organizer for Home, Large


When it comes to streamlining your food setup, remember three things. Location is crucial, especially with heavy items. Sort things in a way that makes sense to your family, and use big, bold labels during the test period to make sure everyone understands your new setup.
Give things a try and let them ride tweaking if you see clutter showing up in your pantry. This is always the first sign that there is a problem with your setup.
Once you find the best way how to organize cans in a pantry you will streamline another section in your kitchen making this room one you love to be in.
More Food Organizing Resources:
