Genius Ways to Keep Kitchen Counters Clutter-Free
Create a more enjoyable cooking space with these kitchen countertop organization ideas. From storage solutions to decluttering tips, you can find everything you need to transform your kitchen into a clutter-free zone.
Try these ideas in your kitchen organization plan today. You’ll be amazed at how much more efficient and enjoyable your space will feel.
It’s true that clutter can take over different areas in our home, and nowhere is this truer than in our kitchen counters. But clearing away the chaos can be hard, especially when you are constantly using your kitchen for everyday life.
The good news is that it doesn’t have to be so hard. All it takes are a few easy storage solutions, a bit of time, and a plan to keep things in their place going forward.
These ideas can get you started, whether you have lots of time for DIY projects or are looking for some store-bought options.
Don’t forget to download your daily kitchen cleaning checklist below!
How Can I Maximize My Kitchen Countertop Space?
To make the most of your counter space, take a look at what you have sitting out now. If you see wall to wall appliances and gadgets, start here by removing things that you are not using daily.
This will free up quite a bit of space that you can now use to meal prep more easily.
DM Pro Tip: Keep only essential items on the countertops and make sure everything has its designated place.
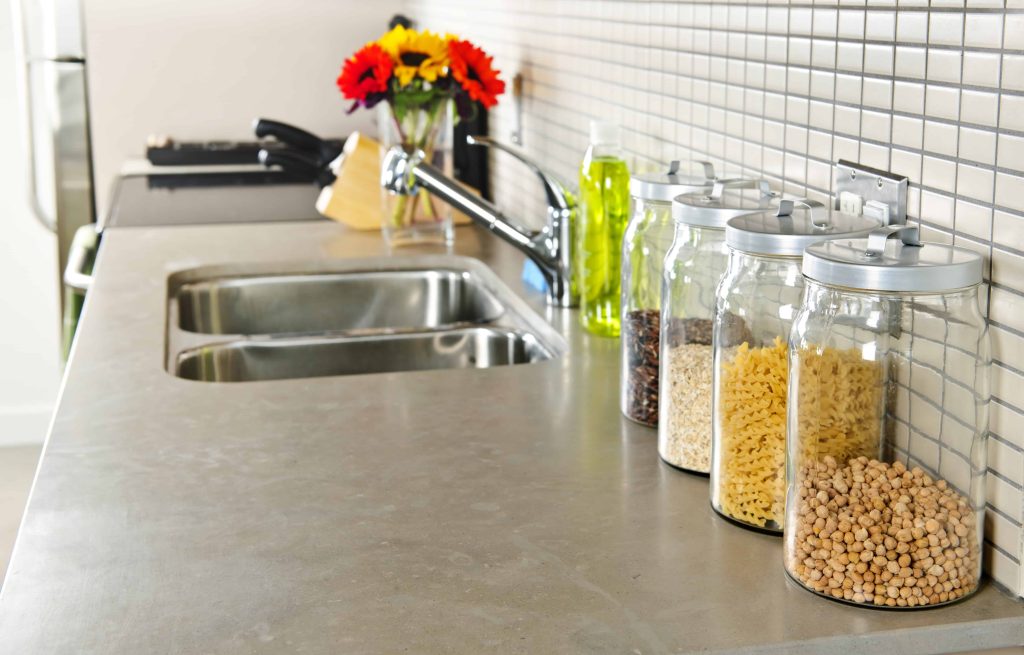
What containers work best to help keep clutter off of counters?
Containers are an easy way to keep counters looking neater. Here are a few ideas:
- Crock – works great to hold cooking utensils.
- Tray – works great to hold oils and sprays.
- Bowl – works great to hold fresh produce.
- Basket – works great to hold baked goods and bread.
- A counter shelf – works great for holding favorite spices, salt, and pepper.
Kitchen Countertop Organization Ideas for a Spotless Cooking Area
Looking for ways to organize your kitchen countertops? These innovative ideas can keep your cooking space neat and tidy.
1. Magnetic Knife Organizer
A magnetic knife organizer is a great solution because it keeps your knives stored safely in a way that is easy to use even while cooking.

This DIY project can help you save money while allowing you to customize the organizer to fit your kitchen’s needs and style.
Materials Needed:
- Magnetic strip or bar
- Level
- Pencil (for marking the spots where you need to drill holes)
- Drill
- Drill bits (appropriate size for the screws)
- Screws (usually included with the magnetic strip or bar, but make sure you have the right size and type)
How to Install:
- Purchase a magnetic strip or bar from a hardware store.
- Choose a location on your kitchen wall or the side of a cabinet where you want to install the strip.
- Use a level to make sure that the strip will be straight, then mark the spots where you need to drill holes for the screws.
- Drill the holes at the marked spots.
- Secure the strip to the wall with screws, making sure it’s firmly in place.
- All done. Attach your knives to the strip and see to it that they hold securely.
Looking for other magnetic knife organizer designs? There are so many different options that you are sure to find one you love.
Magnetic Knife Block Without Knives,Magnetic Universal Stands with Strong Enhanced Magnets Strip Kitchen Storage Cutlery Large Organizer ,Knife Holder for Kitchen Organizerlinoroso 16 Inch Magnetic Knife Holder for Wall, Acacia Wood Knife Magnetic Strip Use as Knife Bar, Knife Holder, Magnetic Tool Organizer, Kitchen Utensil Organizer & Home Organizer
NPPLUS Magnetic Knife Block Holder: Double-Sided Strong Magnets for Kitchen Counter Organizer Rack – Wooden Knife Stand Storage for Home Cooks Chefs


2. Organize pots and pans
Using a DIY hanging pot rack is a smart and stylish solution that can make a big difference in how your kitchen functions and looks.
Remember, when organizing your kitchen supplies, you don’t have to just place them on the counter or in cabinets.
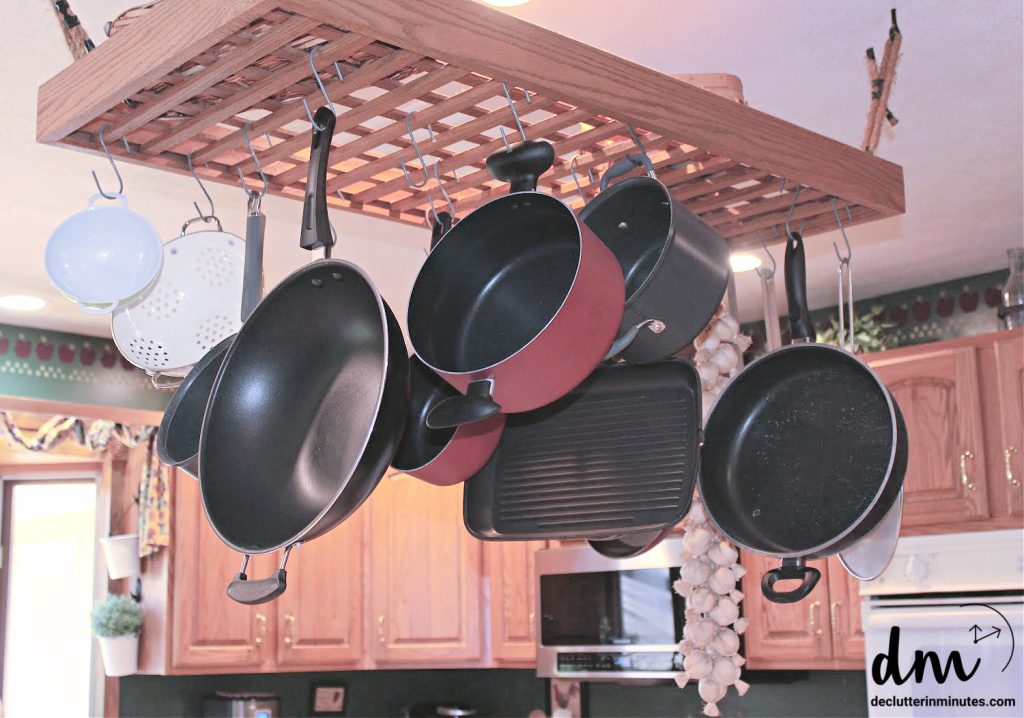
You can also hang them, which is a great way to utilize vertical space in your kitchen and free up space in your drawers.
Materials Needed:
- Sturdy wooden grid
- Strong hooks
- Screws
- Anchors (appropriate for your ceiling type, e.g., wood screws for wooden ceilings)
- Stud finder
- Drill
- Saw (for cutting the wood)
- Measuring tape (for precise measurements)
- Sandpaper (to smooth the wooden grid)
- Crossbars (for added support to the wooden grid)
How to Install:
- Select a spot in your kitchen where the pot rack will be accessible yet out of the way, such as above an island or a counter.
- Use a stud finder to locate ceiling beams. Then, install the anchors to make sure that the rack can support the weight of the pots and pans.
- Make a wooden grid by cutting a sturdy piece of wood into a frame and attaching crossbars for added support.
- Secure the wooden grid to the ceiling using the screws and anchors.
- Attach hooks to the grid at evenly spaced intervals.
- Hang your pots once the rack and hooks are secure. Just make sure that they are balanced and easy to reach.
If you don’t have time for DIY, there are also store-bought options available.
KES Ceiling Pot Rack 34-Inch Hanging Pot Rack for Kitchen Oval Pot and Pan Rack Matte Black Pot Hanger with 20 S Hooks (For 16OROPY 38 inch Pot Bar Rack Wall Mounted Detachable Pans Hanging Rail Kitchen Lids Utensils Hanger with 14 S Hooks Black
VyGrow Pot Rack Wall Mmounted, 2 Tier Pots and Pans Organizer with 20 Hooks and 6 Pot Lid Holders, Heavy Duty Steel Pot and Pan Hanger for Kitchen Cookware Utensils Storage 28.5


3. Organize kitchen appliances
Not a DIY but a great way to keep your busy counters more streamlined. Store kitchen appliances based on how often you use them to save countertop space.
Keep only the most-used appliances on the counter, and store less frequently used ones in a nearby cabinet or on a floor in your kitchen pantry.
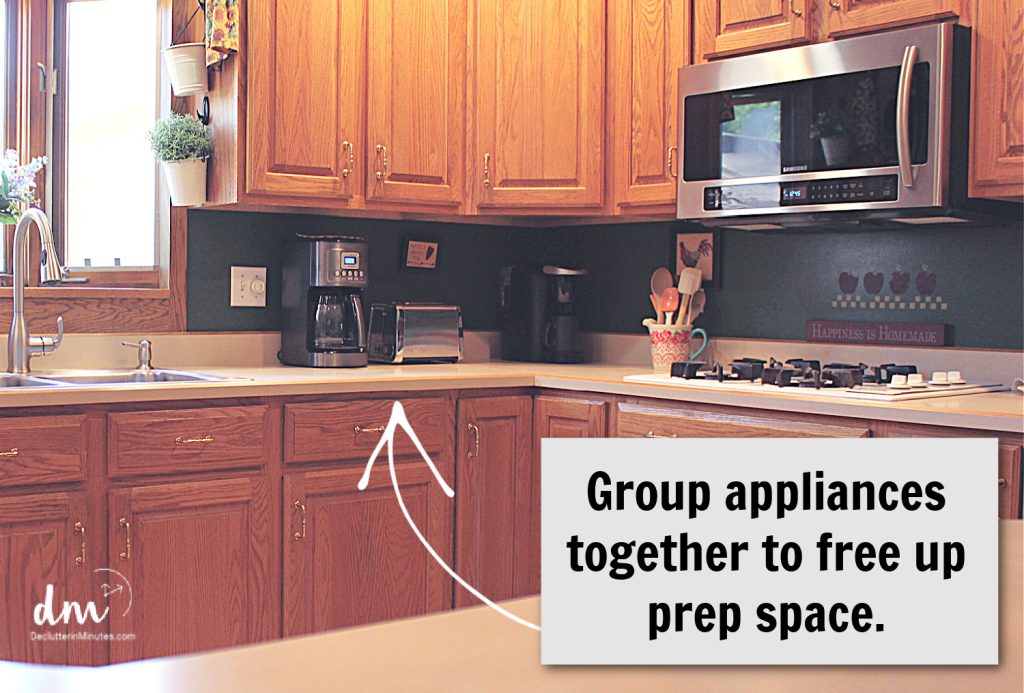
For example, keep your coffee maker and toaster on the counter if you use them daily, but store your blender and slow cooker in a cabinet if you use them less often.
By only keeping essential appliances out, you free up valuable workspace for cooking and food preparation.
Helpful Tips:
- Designate a specific cabinet or shelf for appliances you don’t use daily.
- Consider using a rolling cart to store items that you need easy access to but don’t want on the counter all the time.
- Group similar appliances together to make them easier to find and use.
4. Limit decorative items
Another non-DIY solution is to limit decorative items, which is simple way to save countertop space.
Keep out a few favorites that are also functional. Here are a few examples:
- A stylish bowl to hold fresh fruit.
- A ceramic tray to hold oils and sprays.
- A wooden stand to hold coffee mugs and creamers.
By looking for function and decor you can add personality without cluttering the area.
Remember, it’s better to have enough space for cooking and prepping meals than it is for decorations that serve little to no purpose.
5. Use Over-the-cabinet door storage
I love this unique way of finding more space for items that are often used in a kitchen. An over-the-door storage basket is the perfect way to hold small silicone bakeware, lids, and even baking sheets.
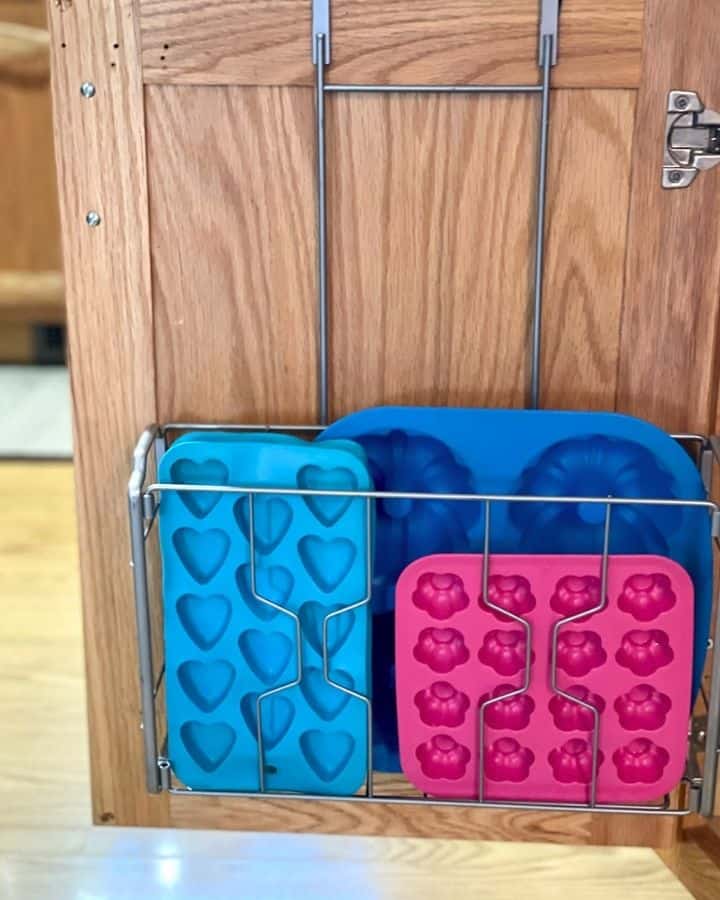
Just attach a storage rack inside your cabinet door, and then store items like baking sheets, cutting boards, and silicone molds.
Materials Needed:
How to Install:
- Choose a cabinet door that is easily accessible and can accommodate the items you plan to store.
- Use a measuring tape to measure the inside of the cabinet door.
- Hold the wire storage rack against the inside of the cabinet door to determine the best position. It should be level and not interfere with the door closing.
- Use a pencil to mark where the screws will go.
- Drill small pilot holes to make it easier to insert the screws.
- Secure the storage rack to the cabinet door using the screws and a screwdriver.
- Make sure it is firmly attached and can hold the weight of the items you plan to store.
- Place your baking sheets, cutting boards, and silicone molds in the rack.
Clear, tidy counters make cooking and cleaning so much easier. Not only that, it gives such a great vibe to the rest of your home.
With a few storage solutions for things that are taking up space on your counters now, you can dramatically change the overall look of your kitchen.
Once you set up a system, like using DIY storage solutions, keeping things put away is so much easier.
Just a few minutes each day to put things back in their designated spots, and you have a kitchen that is easier to keep put away.