Kitchen Zones Organization
If you’re looking for an easier way to tackle the clutter and get your kitchen back in shape without getting overwhelmed, you’ve come to the right place. Kitchen zone organization is a simple, and effective way to set up your kitchen so it is laid out more efficiently.
Use this unique approach to kitchen organization and transform your messy cooking space into a well-organized area you love to cook in.

When I think about the most organized place in the world, my mind always goes to a preschool classroom. It might not be the first thing that comes to mind for everyone, but think about it. It’s a space that supports a dozen or more different activities every day, stays manageable enough for little kids to clean up, and keeps a room full of 4-year-olds busy and happy.
That’s no small feat.

I can still remember some of the routines from my own preschool days. We had a block area for building, a spot for arts and crafts, and even a dress-up corner. Every activity had its place, and they rarely overlapped.
When nap time rolled around, we’d quickly clean up, grab our towels from our cubbies, and head to the nap area. Within minutes, we’d all be settled in our designated spots, ready for 30 minutes of quiet time. The system just worked.
There’s something we can learn from those classrooms and bring into our homes—creating zones that make each room feel more organized. It’s one of the best ways to figure out where everything should go in your kitchen and set up a layout that is easy to maintain.

How do Zones Work for Organizing?
Just like the art area in a preschool classroom, zones help establish boundaries. These boundaries make it simple to spot what belongs and what needs to go. For instance, if you do laundry in the laundry room, all the supplies for it should stay right there.
Let’s level this up and talk about a room in your home that might even rival a preschool for activity and chaos. The kitchen.
The kitchen is where countless tasks happen every single day. Why? Because it’s the heart of the home, the family command center. With so much going on, it’s no surprise this room can spiral into disarray faster than you can say “What’s for dinner?”
But here’s the thing—kitchen zones are not some shiny new idea. It’s an old-school rule that still works wonders. And honestly, some of the best organizing tricks come from these tried-and-true methods. Zones are one of those golden classics.
While we’re on the topic of old-school wisdom, here’s another rule worth reviving: “A place for everything and everything in its place.”

When your things don’t have a designated spot, they end up wherever you last used them. And that habit? That’s the root of clutter. But simply giving your things a home isn’t enough. You’ve got to take it one step further and actually put them back when you’re done. That’s the secret to staying organized.
Organizing Your Kitchen with Zones
Let’s use zones to simplify and organize your whole kitchen setup.
Step 1: Make a List
Start by listing all the tasks you typically do in your kitchen. Don’t overthink it, and feel free to jot down anything that pops into your mind. There’s no right or wrong here. Your kitchen tasks might look very different from someone else’s.
Sure, most of us cook, bake, and eat in our kitchens, but beyond that, it’s so personal. Maybe you sort mail or pay bills there, while someone else might use theirs for crafting or even making soap.
The key here is to walk around your kitchen and really observe. Picture what you do in that space daily or weekly. Grab a clipboard (or just some paper) and start your brain dump, writing down every single task. This will become your master list.

Step 2: Combine and Finalize
Once your list is ready, you might be surprised (or overwhelmed) by how many tasks you’ve written down. Don’t panic. It’s time to combine similar activities into broader categories.
For instance, if you pay bills at the kitchen table and your kids do homework there too, combine them into one zone, like a “work zone.” This step trims down your list into manageable sections. Keep merging until you have a realistic number of zones for your kitchen.
Step 3: Map It Out Visually
Here’s where the fun begins. If you’re a visual person like me, grab some sticky notes in your favorite color. Write down each zone or task on a sticky note and place them around your kitchen where it makes sense.
But wait, don’t just stick them where you currently do that activity. Instead, reimagine your kitchen. Pretend you’re moving into it for the first time.
Ask yourself questions like:
- Where would I cook? That’s your cooking zone.
- Where would I bake? There’s your baking zone.
- Where should the dishes be washed? That’s the clean-up zone.
Keep moving the sticky notes around until it feels natural and makes your space functional. Yes, you might need to shuffle things around a few times. That’s perfectly okay.
Take your time with this process. Finding the layout that works best for you might take some trial and error. Some zones might only need a drawer, while others may require multiple cabinets or shelves.

Step 4: Adjust as You Go
Now it’s time to tweak. Shift your sticky notes and items until things flow easily. For each zone, gather everything you need and make sure it’s accessible. If you’re organizing a baking zone, group your mixer, measuring cups, mixing bowls, and baking tools together.
Remember, the goal is efficiency. Don’t stick the crockpot on a high shelf if you use it all the time. Keep it handy. And yes, it might look a bit chaotic during this step, but trust the process. The end result will be worth it.
Step 5: Purge as You Organize
Zones make decluttering a breeze. When you assign a task to a specific space, you’ll quickly spot items that don’t belong. For example, if your canning zone is packed with random vases, it’s time to move or donate them.
You’ll also see if you have duplicates. (Didn’t realize you owned five funnels, huh?) Keep only what you really need. Simplifying makes maintaining these zones much easier.
Best Choice Products Set of 4 9x12in Water Hyacinth Pantry Baskets, Woven Organizers w/Chalkboard Label, Chalk Marker – Natural Eastherry Over The Door Pantry Organizer,9-Tier Over The Door Organizer with Adjustable Basket,Metal Hanging Pantry Organizers and Storage for Kitchen, Back of Door Seasoning Rack (Black)YCLADEC 4 Pack Lazy Susan 11.5


Step 6: Clean and Prep
Before you put items into their new zones, give the cabinets and drawers a good wipe-down. Fix anything that’s broken or needs adjustment.
Taking care of this step now saves you from dragging the process out. A little effort upfront means you’ll actually finish the project instead of leaving it half-done.
Step 7: Compartmentalize
Make sure your zones are easy to use and maintain. Add drawer dividers, baskets, or other organizers to prevent clutter from creeping back in. You could even get creative and DIY your dividers.

The easier it is to keep your zones tidy, the more likely everyone in your home will actually stick to the system. Keep it simple enough for even the youngest family members to follow.
Labeling helps too. And if you’re working with something like a lazy susan, you can use tape to divide it into sections so every item has its own space.
Step 8: Keep Sticky Notes in Place
Leave your sticky notes up for a few weeks as reminders. They’ll help you and your family learn the new setup and make tidying up automatic. Once everyone’s got it down, feel free to remove them.
Step 9: Do Monthly Check-Ins
Set aside time each month to evaluate your zones. Are they working? Is something still not quite right? No problem. Adjust as needed to make your system as efficient and functional as possible.
Sometimes it just takes a little tweaking to make everything flow perfectly. Shifting a few items to a different drawer or revamping a zone can make all the difference.
Use Organizers that Work
Once you have zones setup, be sure you are using tools that makes sense for that space.
And here’s the kicker—to make sure you stick with putting things away, your kitchen has to be super easy to use. The simpler, the better. It should be so straightforward that it’s almost automatic.
Take storage boxes with lids, for example. Sure, they look pretty in your cabinets. But do you really want to deal with lids every time you need something? Adding extra steps makes it harder to stick to the system. One-step solutions are your best friend, especially when starting from scratch. That’s the key to keeping your kitchen clean, organized, and clutter-free.
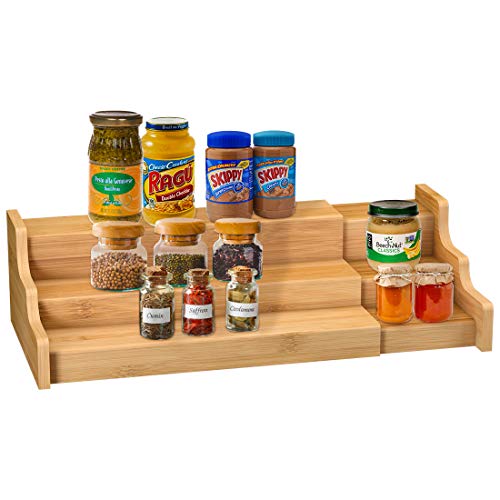
Spice Rack Kitchen Cabinet Organizer- 3 Tier Bamboo Expandable Display Shelf YellowNorcalway Adjustable Bakeware Pots and Pans Organizer Under Cabinet,11 Dividers Cookie Sheet Baking Pan Pot Lid OrganizersSeinloes 2Pack Expandable Pull Out Cabinet Organizer 21


Just like those cubbies in preschool, functionality is everything when it comes to building habits that actually last.
Organizing your kitchen with zones isn’t just about streamlining one space; it can truly change how your entire home works. When you set up specific zones for different tasks and items, finding what you need is easier, clutter disappears, and everything runs more smoothly. It’s a simple way to bring order to your daily life.


