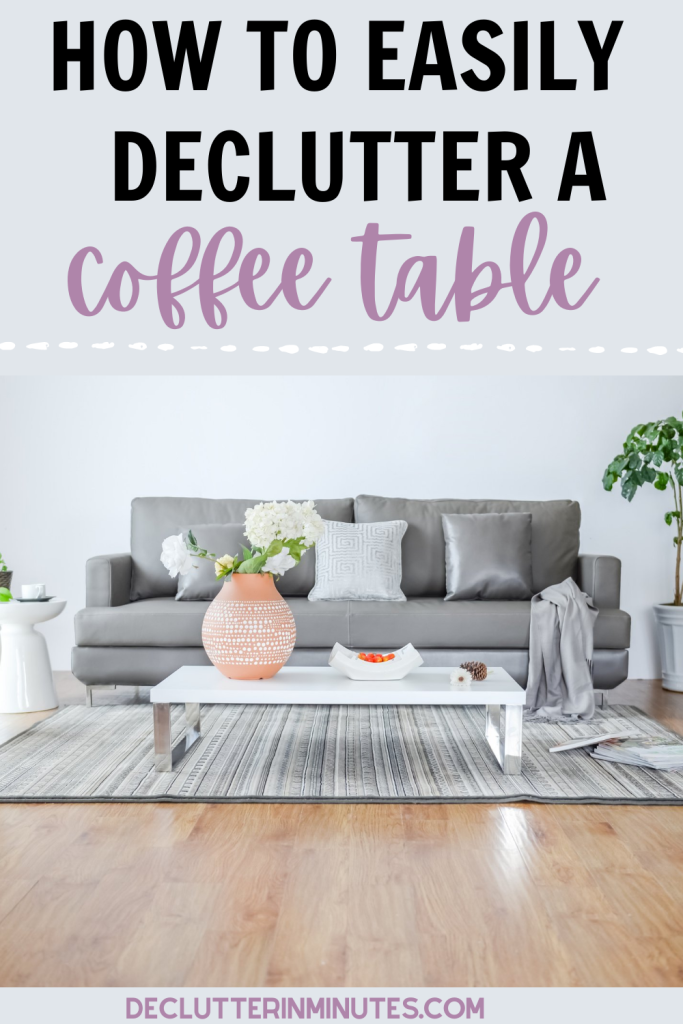
Declutter a Coffee Table
If you’re ready for a quick win that will make your whole living space feel calmer, then this is your sign to declutter a coffee table today. It’s a small project with a big payoff, less mess, more peace, and one less surface that collects random stuff. In this step-by-step guide, you’ll learn exactly how to declutter your coffee table, set limits for what belongs there, and keep the clutter from creeping back in tomorrow.
Feeling stuck in clutter overwhelm? You’re not alone. Starting with a manageable surface like your coffee table can help you build momentum, especially if you’ve struggled to finish bigger decluttering projects before.

Most rooms have that one piece of furniture that quietly steals the spotlight, the anchor of the space. In the kitchen, it’s the table. In the bedroom, it’s the bed. And in the family room? Yes, it’s the coffee table. That’s exactly why it’s such a powerful place to start when you’re decluttering. When you have a neater coffee table, it becomes the calm center of your living space, not the epicenter of chaos.
When my kids were little, our coffee table pulled double duty as the world’s largest Matchbox parking lot. Tiny cars lined up bumper to bumper like a miniature city grid. Back then, that table saw it all, game nights, birthday parties, even the occasional base to a fort.
Now it’s a movie-night snack station and a bench for our grandkids. So yes, it’s just a piece of furniture… but also kind of a memory vault.

But let’s be honest: for many of us, that coffee table has turned into a catch-all. It becomes a clutter magnet for mail, snack wrappers, remotes, mystery cords, and whatever else that happens to be in our hands at the time. And when that anchor is messy, the whole room feels a little off.
But here’s the good news: your coffee table can serve a purpose and stay neat, even organized. Think of it as a mini command center for your family room, storing only what you actually use, with a system that makes it easy to keep things in order.
The goal isn’t perfection, it’s function with a dash of pretty.
How to Declutter a Coffee Table (and Keep It Clutter-Free for Good)
Let’s take the guesswork out of how to declutter a coffee table and finally turn that clutter magnet into a calm, functional, and beautiful anchor for your living room. Whether your table is piled high with paper, toys, cups, or just plain mystery items, this guide breaks it all down into stress-free, manageable steps.
We’re not just removing junk; we’re resetting a space that should support your daily life. You’ll get action-focused tips to declutter, clean, organize, and maintain your coffee table, with zero overwhelm.
Step #1. Start with the Easy Stuff
Clutter is sneaky. It creeps in slowly, a little mail here, a snack wrapper there, a sippy cup, your kid’s art project, a stray puzzle piece, until suddenly your coffee table looks like a garage sale gone wild.
To ease into this project without overwhelm, start by clearing out the obvious. Begin with the easy stuff:
- Gather up any trash and toss it out.
- Collect anything that belongs elsewhere, dirty dishes, homework, socks, or junk mail, and place it all in a laundry basket.
- Walk through your home and put those items away where they actually belong.
Action Step: Set a timer for 10 minutes and do a quick sweep. Clearing out the surface mess helps you see what you really need to deal with.
Why This Works: You’ll instantly reduce visual clutter, which makes everything that’s left feel more manageable. It’s like pulling weeds before planting flowers, necessary prep work for a peaceful space.
Step #2: Prep Your Sorting Bins
Set up a sorting area with clearly labeled bins to help you quickly decide where each item goes. The goal is to avoid shuffling things around and making this project easier to get done with zero distractions.
- TOSS: You can use a trash bag or a recycling bin, and remember…once it’s full, out it goes.
- DONATE: Grab a cardboard box, label it Donate, and remove your address if it’s a reused shipping box. Pro tip? Stick it straight in your car when it’s full so it’s ready for your next errand.
- PUT AWAY: A laundry basket is perfect for this. When you are done with this project, carry it around the house and put things back where they belong. Easy.
- KEEP: Use any container here or just make a pile, this bin is a temporary home for the things staying on (or in) the coffee table.

Don’t skip this part. Most people stall in decluttering because they didn’t prep their space to finish the job. These bins help you get everything all the way done.
Action Step: Set up your sorting area with clearly labeled bins before you dive into deeper decluttering. Keep them close so you can stay focused as you go.
Step #3: Declutter One Item at a Time
Now the real work begins, but don’t worry, we’re doing this the low-stress way.
- Focus on just one item at a time.
- Decide quickly and confidently.
- Use your sorting station for every decision.
Remember, you’re not just moving stuff around. You’re making fast, intentional decisions with built-in support bins so you can finish the job. So don’t overthink it. Trust your gut. And absolutely do not go back into your donation box to second-guess yourself.
Keep going until your coffee table is completely cleared. Don’t forget drawers, shelves, or any hidden storage.
Read our guide on: What are the 3 Core Steps and How to do Them for a shortcut whenever you tackle a new decluttering project.
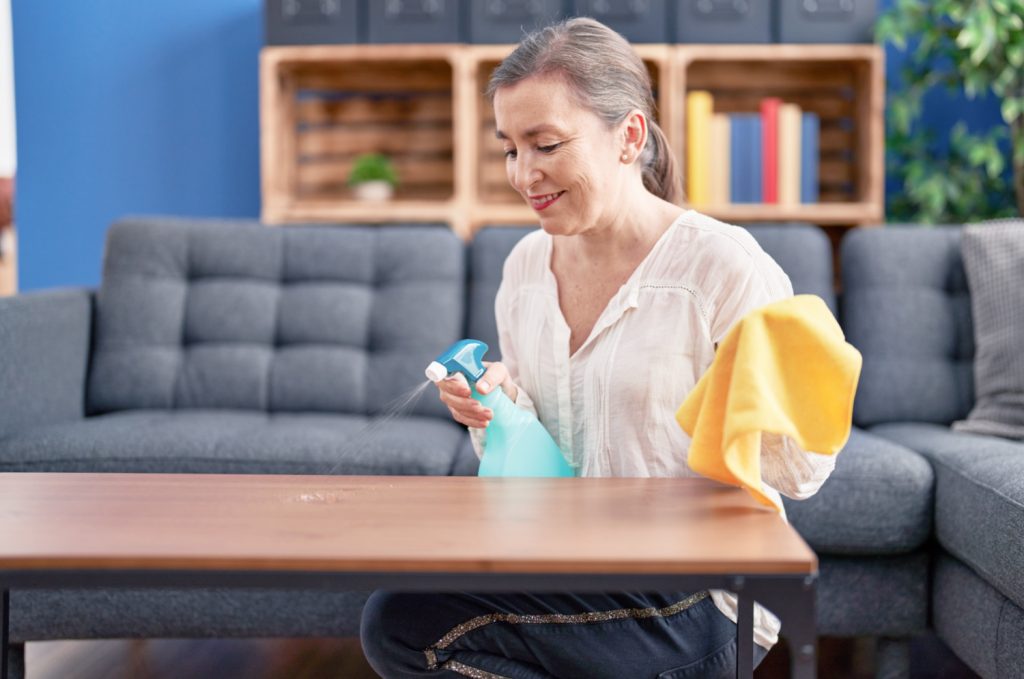
Step #4: Clean
Okay, now for the part that actually feels good, cleaning. I know, it might not usually top your list of fun activities, but trust me, it hits differently when there’s no clutter in the way. No teetering piles, no mystery crumbs hiding under mail. Just you, a rag, and a clear surface.
A freshly cleaned surface is like a little exhale for your home. It tells your brain, “This space is done.” And that feeling? It’s peace, progress, and pride all rolled into one.
Action Step: Grab your favorite cleaner and give your coffee table a nice wipe-down, don’t forget the drawers, legs, and underneath too. Want bonus points? Light a candle or add a cute little plant to give the whole space a fresh new vibe.
Step #5: Decide What Deserves to Stay
Not everything deserves a spot back on your coffee table. Choose only what belongs and supports how you use the space. Ask yourself:
- Do I use this item here?
- Is there enough space to hold this much stuff?
- Does this need to be out in the open?
- Can this live elsewhere?
Action Step: Set a “cap” for this space. For example, only 3 decorative items and one basket for function. This limit helps maintain your clean space long-term.
Caps change everything. They give your table a boundary, so clutter can’t creep back in unchecked.
Step #6: Rethink the Table Itself
Now that you’re clear on what deserves to stay, take a step back and ask yourself if the coffee table itself still serves your home well. Sometimes clutter builds up simply because the table no longer fits the needs of your space.
Questions to ask:
- Is the table too big or too small for the room?
- Does it offer enough (or too much) storage?
- Is the style or material kid- or pet-friendly?
- Would a soft ottoman, a lift-top table, or a trunk be a better fit?
Action Step: Evaluate your current coffee table. If it doesn’t serve your family’s needs, start a wishlist for what would work better. You deserve furniture that fits your life right now, not just what used to work years ago.
Why This Matters: Decluttering is about function as much as it is about space. The right coffee table can support your daily routines and make it easier to keep the surface neat.
WLIVE Coffee Table for Living Room, Lift Top Coffee Table with Storage, Small Rising Wooden Dining Center Table with Storage Shelf & Hidden Compartment, 39 VASAGLE Farmhouse Coffee Table with Storage, Square Coffee Table for Living Room, Center Table with Flip-Top Lids, Honey Brown and Rustic White ULCT232W73VASAGLE Lift Top Coffee Table, Center Table with Storage, Gas Spring, 2 Drawers and 3 Hidden Compartments, Open Shelf, for Living Room, Home Office, Honey Brown ULCT254K01


Step #7: Organize Thoughtfully
Now that you’ve decided what deserves a spot on or in your coffee table, it’s time to give those items a home with a few family room organizers. The goal here isn’t just to make it look nice, it’s to create a simple system that works for everyone in your home.
Here are a few easy organizing ideas:
- Tote or bin: Great for puzzles, games, or family night staples
- Craft caddy: Perfect for projects in progress
- Remote control organizer: So remotes stop disappearing into the couch abyss
- Basket: Use it to corral the little everyday things like coasters, chargers, or notepads
And here’s the secret: labels. Big, easy-to-read ones. Because if your family can see where things go, they’re way more likely to put them there.
Action Step: Pick 1 or 2 organizing tools that suit your needs and put them in place. Then return only the items you’re keeping back into those containers, nothing more, nothing less.
Poeland Remote Control Holder Desk Storage Organizer Box Container for Desk, Office Supplies, HomeBTSKY Multipurpose A4 File Tray Natural Water Hyacinth Desk Tray Organizer Woven Letter Size Desk Documents Trays Magazine Files Storage Basket Organizer Bin for Office Cosmetics Bathroom4-Pack Art & Craft Organizer Storage Case – Semi Transparent Stackable Plastic Craft Storage Container, Project Organizer Box Paper Custom Size Fit 8.5 x 11 Paper & More 12.4 x 10.8 x 1.7 InJuleduo Serving Tray 16.5“X 13“Deluxe Wooden Ottoman Tray for Coffee Table with Polished Silver Metal Handles and 4 Coasters, Living Room Bathroom Coffee Bar Organizer Modern Decorative BlackCitylife 17 QT Plastic Storage Box with Removable Tray Craft Organizers and Storage Clear Storage Container for Organizing Bead, Tool, Sewing, PlaydohLIN CHUAN Decorative Coffee Table Tray, 11


Step #8: Keep It Clutter-Free
Alright, you’ve done the work, now let’s keep that coffee table looking and feeling amazing. The secret? A quick reset routine. It doesn’t need to be fancy or time-consuming. Just a simple habit that helps things stay under control.
- Put items back when you’re done.
- Toss trash right away.
- Return misplaced items to other rooms before bed.
Daily resets only take a few minutes and prevent pile-ups from taking over giving a messy look to the entire room.
Wrap-Up: You Did It!
Learning how to declutter a coffee table isn’t just about making a space look nicer. It’s about creating a spot in your home that supports your everyday life, a place that feels calm, works well, and doesn’t constantly demand your attention.
You’ve taken real steps to transform this space, and now it’s more functional, intentional, and easier to maintain.
One Last Encouragement: This isn’t about doing it perfectly. It’s about making meaningful progress and building a system that works for the way you live today.
More Decluttering Resources: