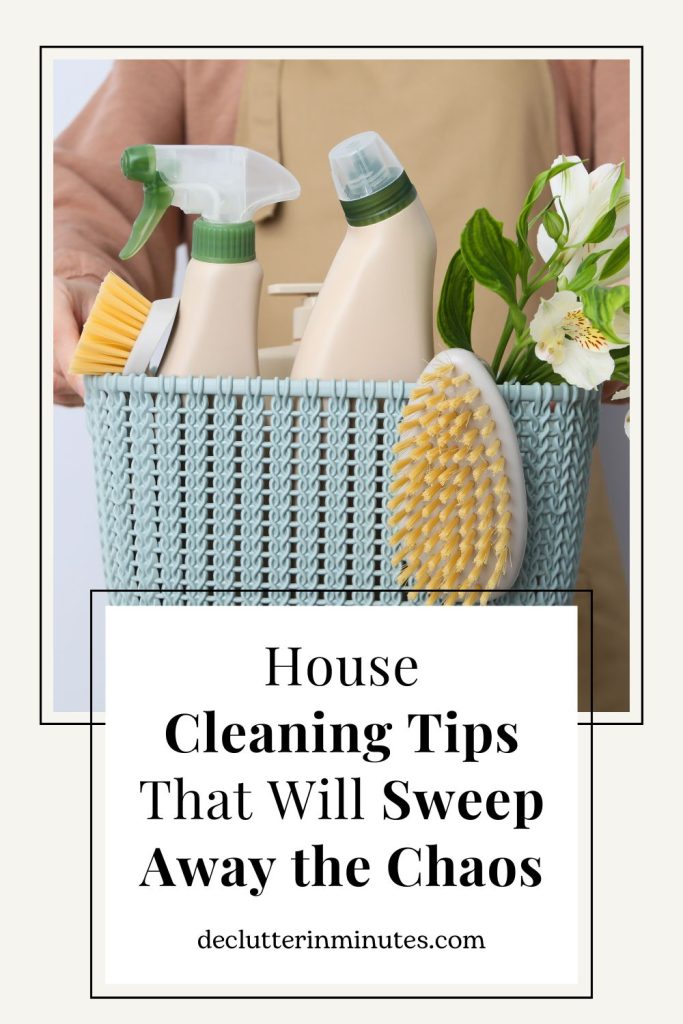
routine House Cleaning Tips
These simple, time-saving routine house cleaning tips will help you tackle the busiest areas of your home without feeling overwhelmed.
Make time each week to follow these practical cleaning tips, and relax knowing each hot spot in your home is clean and in it’s best working condition.
Cleaning is something I’ve always dreaded. I tend to put it off until the sight of dust piling up on the dresser practically begs for my attention.
When our kids were little, I used to sacrifice entire weekends trying to get the house back in order.
And while it felt good to have a clean home, I was left feeling exhausted, cranky, and frustrated—wishing I’d spent that time making memories with my family instead of scrubbing toilets and cleaning floors.
Eventually I learned an important tip, routine cleaning is by far an easier way to keep our home neat. The difference it made was huge.
routine Cleaning Tips for our busiest rooms
Daily regular cleaning makes life so much easier—and it doesn’t have to be a big production either. A simple routine can help you stay ahead of the mess.
Focus on the high-traffic spots like your kitchen, bathroom, and bedroom. These areas see the most action and can get dirty the fastest, so giving them a little extra attention goes a long way.

Daily Tasks for the kitchen
- Wipe down countertops and the stove top after each meal to prevent crumbs and spills from building up.
- Sweep the floors to pick up any dropped food or debris.
- Load dirty dishes into the dishwasher or wash them by hand after meals.
- Empty the trash can if it’s getting full, especially if it contains food scraps.
- Wipe kitchen sink and faucet to keep them clean and avoid grime buildup.
Helpful Tool: Use a microfiber cloth for counters—it’s great for wiping up messes quickly and leaves fewer streaks.
Daily tasks for the Bathroom
- Wipe down countertops, sinks, and faucets after each use to prevent toothpaste stains and soap buildup.
- Squeegee shower walls and doors after showering to prevent water spots.
- Replace hand towels regularly to avoid spreading germs.
- Spray bathroom cleaner on the toilet bowl and let it sit while you complete other tasks, then scrub and flush before leaving the room.
Helpful Tip: Keep a container of disinfectant wipes under the sink for quick touch-ups throughout the day.
Daily tasks for the Bedroom
- Make the bed every morning to instantly make the room look tidy.
- Pick up any clothes or clutter from the floor and put them away in their designated spots.
- Wipe down surfaces, such as nightstands and dressers, with a dusting cloth or disinfectant wipe.
Helpful Tip: Invest in storage solutions, such as under-the-bed bins or closet organizers, to help keep your bedroom clutter-free.
5 Tier Closet Hanging Organizer, Clothes Hanging Shelves with 4 Hanging Hooks 5 S Hooks, Wire Storage Basket Bins, for Clothing Sweaters Shoes Handbags Clutches Accessories Patent Design Homsorout Closet Organizers Bins 6 Packs – Large Closet Shelf Organizer with Handles, Fabric Trapezoid Storage Bins for Bins and Baskets for Shelves. Light GreyHBlife 6 Pack Closet Organizers and Storage, Clear Shelf Dividers, Vertical Purse Organizer for Closet Perfect for Sweater, Shirts, Handbags in Bedroom and Kitchen, Acrylic Bookshelf for Organization


routine House Cleaning Tips for Messy Spots
Let’s tackle some of those often-overlooked areas that gather grime and mess faster than we realize. Here’s an easy plan to keep them clean without much hassle.
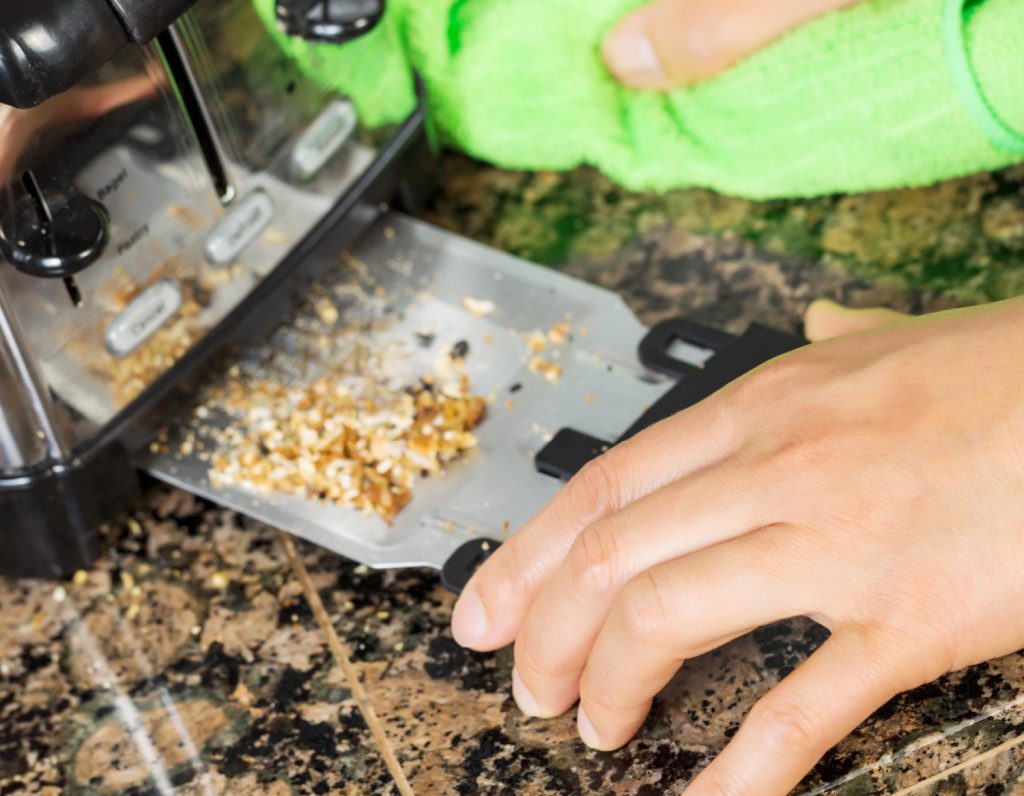
Toaster or Toaster Oven Cleaning tips
Your toaster or toaster oven could be a hidden source of crumbs and grease if it’s not cleaned regularly—but don’t worry, it’s easier to deal with than you think.
Routine Cleaning
- Empty the crumb tray and give it a quick rinse or wipe down. This prevents crumbs from burning and causing a smoky mess each time you use the toaster.
- Wipe the outer surface with a damp cloth to remove fingerprints, grease, or food splatters. For stainless steel finishes, use a mix of vinegar and water for a streak-free shine.
For Stubborn Messes:
- If there are baked-on crumbs or greasy spots inside, make a paste with baking soda and water. Apply it to the problem areas using a soft sponge or cloth, allowing it to sit for 10–15 minutes to loosen the grime. Then, scrub gently and wipe clean with a damp cloth.
- Don’t forget to rinse thoroughly and dry all parts before reassembling to prevent moisture buildup or rust.
Bonus Tip: Place a small silicone mat or foil in the bottom tray of your toaster oven (if safe for your model). This catches crumbs and spills, making cleanup even faster.
Closet Cleaning Tips
Closet shelves and drawers can quickly turn into chaotic spaces if left unattended. Here’s how you can keep them tidy, dust-free, and stress-free.
Routine Cleaning:
- Dedicate a few minutes each week to decluttering your shelves and drawers. Remove items that no longer fit, are worn out, or are out of season. This habit keeps clothing and accessories manageable.
- Dust shelves with a microfiber cloth to get rid of buildup. Don’t forget those hard-to-reach corners where dust can accumulate.
- If drawers are used for smaller items like socks or accessories, reorganize while you clean. Matching up stray pairs or grouping similar items can work wonders for efficiency.
For Stubborn Messes:
- For wooden or plastic shelves, use a mild soap and warm water solution. Gently scrub away sticky spots, grime, or stains. Wipe clean with a damp cloth, then dry completely before putting items back to avoid warping or mold.
- Fabric-lined drawers or shelves can be refreshed by vacuuming them or running a lint roller over the surface to collect dust and debris. For spills or stains, spot clean with a gentle fabric cleaner and allow to air dry.

Bonus Tip: Use shelf dividers or baskets to categorize items like jeans, sweaters, or accessories. This keeps everything in its place and makes your closet visually pleasing.
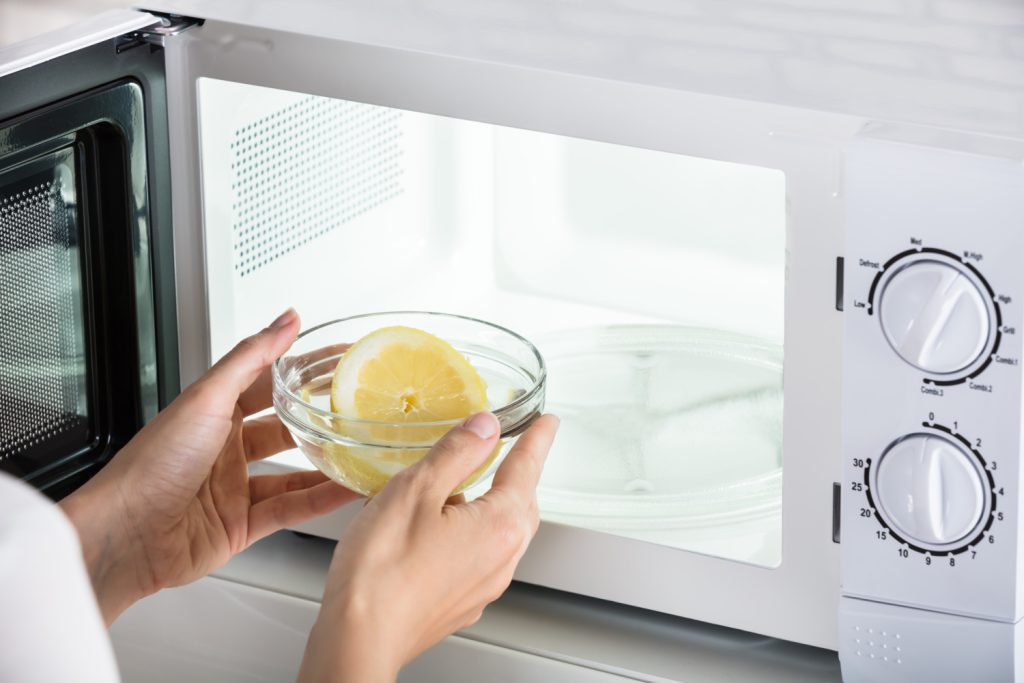
Microwave Cleaning Tips
Microwaves can get messy fast, especially with splatters and spills from reheating food. But don’t worry, keeping it clean can be quick and easy with a few simple tricks.
Routine Cleaning:
Here’s a super-easy method to tackle even tough messes in minutes:
- Fill a microwave-safe bowl with water, a few slices of lemon, and a splash of vinegar.
- Place the bowl inside and heat on high for 3–5 minutes. The mixture will create steam that loosens stuck-on grime.
- Leave it for an extra few minutes after the timer ends to allow the steam to work its magic.
Once it’s cooled down slightly, use a damp cloth or sponge to wipe the interior. The grime will come off effortlessly, leaving your microwave spotless and fresh-smelling.
For Stubborn Messes:
- If you find any hard-to-remove areas, dip your cloth in the same water-vinegar-lemon mixture and scrub gently. You can also sprinkle a bit of baking soda on tough spots for added scrubbing power.
- Don’t forget the turntable. Remove it and either wash it in the sink or pop it into the dishwasher for a thorough clean.
Bonus Tip: To keep your microwave smelling fresh, place an open box of baking soda nearby or microwave a small bowl of water with a few drops of your favorite essential oil.
Wood Furniture Cleaning Tips
Since wood is a natural material, improper cleaning can harm it, stripping its oils and causing cracking, drying, or even warping. Keep it gentle and protect your wood.
Routine Cleaning:
- Combine equal parts olive oil and vinegar in a small jar or bowl. Shake or stir gently to mix the solution.
- Using a soft, lint-free cloth, dip it lightly into the mixture (don’t soak; a little goes a long way).
- Wipe the surface of the furniture, working in the direction of the wood grain. This not only cleans away dust and dirt but also leaves a beautiful polished finish.

Bonus Tip: Always use minimal liquid when cleaning wood. A damp—not wet—cloth is your best bet to prevent water spots or warping.
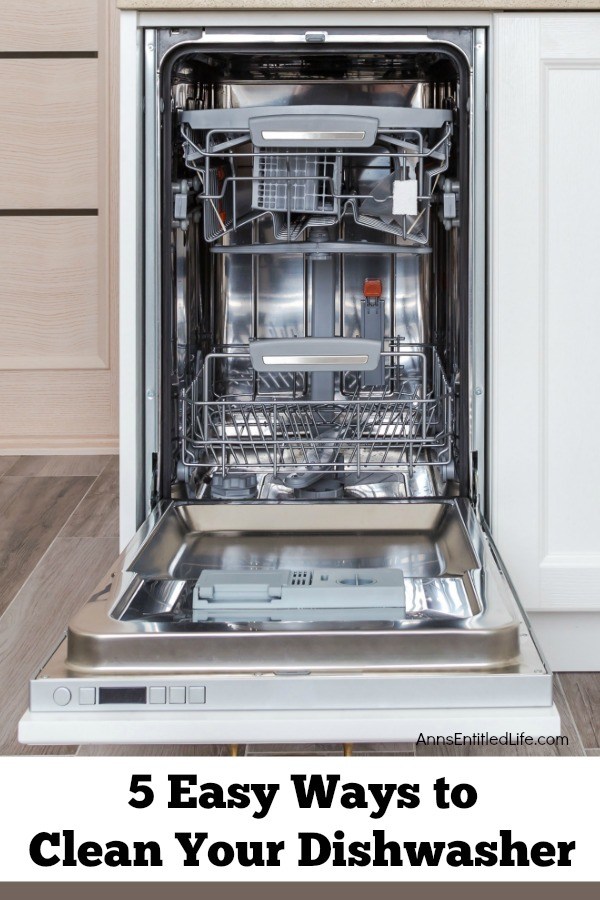
Dishwasher Cleaning Tips
The dishwasher does so much of the cleaning for us, but it also needs some regular TLC to stay in top shape.
Routine Cleaning:
A mix of vinegar and baking soda is all you need to dissolve grime, tackle stubborn spots, and freshen up your dishwasher.
- Clear Out Debris: Start by removing any leftover food or debris from the bottom of the dishwasher or the filter/trap. Unscrew or remove the trap (if possible), scrub it gently with a soft brush, and rinse thoroughly before placing it back.
- Deodorize with Vinegar: Place a bowl or dishwasher-safe cup filled with white vinegar on the top rack. Run the dishwasher on its hottest cycle. The steam from the vinegar will loosen grime, mineral deposits, and grease while deodorizing the interior.
- Freshen with Baking Soda: Once the first cycle is complete, sprinkle a cup of baking soda across the bottom of the dishwasher. Run another hot, short cycle. Baking soda will neutralize any remaining odors and leave the dishwasher looking and smelling fresh.
For Stubborn Messes:
- If there are stubborn mineral deposits or soap scum, make a paste using baking soda and water. Apply it to problem areas with a sponge or old toothbrush, scrub gently, and wipe clean.
- Use a toothpick or small brush to clean out any debris stuck in the spray arms. Clear water jets mean better performance.
Bonus Tip: Want your dishwasher to smell extra fresh? Place a slice of lemon on the top rack or add a few drops of lemon essential oil when running a cycle. It’s a simple way to prevent odors and leave a clean scent.
Fridge Cleaning Tips
Cleaning the fridge is a good project to do the day before grocery shopping—there’s less to move around, and it’s easier to unload new food into an clean space.
Routine Cleaning Tips:
- Wipe Down Shelves Weekly: Remove any spills or crumbs as you notice them. Use a damp cloth with mild dish soap to clean the shelves and drawers weekly. This prevents residue buildup and keeps your fridge smelling fresh.
- Check Expiry Dates Regularly: Go through your fridge once a week to discard any expired or spoiled items. This not only keeps your food safe to eat but also creates more space for fresher groceries.
- Clean the Seal and Handles: Every month, wipe down the rubber door seals with a mix of warm water and vinegar to remove grime and maintain a good seal. Don’t forget to sanitize the handles regularly to reduce the spread of germs.
For Stubborn Messes:
- Empty the Fridge: Start by removing all the contents and check for expired items, leftovers you forgot about, or anything past its prime.
- Remove Shelves and Bins: Take out the removable shelves, drawers, and bins.
- Clean with a Baking Soda Paste: Mix baking soda with a bit of water to create a gentle cleaning paste. Use a sponge or cloth to scrub the shelves and bins, focusing on tough spots or sticky residue.
- Rinse and Air Dry: After scrubbing, rinse everything with warm water, then set the items aside to air dry. If you’re in a hurry, wipe them down with a clean, dry towel to speed up the process.
- Wipe Down the Interior: Use a mixture of equal parts warm water and white vinegar in a spray bottle. Wipe down the walls, door, and any fixed surfaces with a soft cloth, getting into all nooks and crannies.
- Reassemble and Organize: Replace the clean shelves and bins, then strategically organize your food items.
Bonus Tips: Wipe down spills immediately to avoid having to scrub dried-on messes later.
Kitchen CAbinet Cleaning Tips
Kitchen cabinets work hard holding all your essentials, but they’re also magnets for grease, fingerprints, and random spills.
Routine Cleaning:
- Wipe Down Surfaces Weekly: Use a damp microfiber cloth with mild dish soap to clean cabinet doors and handles at least once a week, especially in high-use areas near the stove or sink.
- Declutter and Reorganize Monthly: Take a few minutes each month to declutter your cabinets. Check for expired items, donate kitchen tools you don’t use, and reorganize shelves to ensure everything is easy to access.
- Deep Clean the Interiors Seasonally: Every few months, empty the cabinets completely and give the interiors a thorough wipe-down with warm, soapy water or a gentle cleaner. For wooden cabinets, use a wood-friendly cleaner to preserve the finish.
For Stubborn Messes:
- Mix a Gentle Cleaning Paste: Combine a few tablespoons of baking soda with water to create a loose, non-abrasive paste. Baking soda is great for lifting surface dirt and stains without damaging the finish.
- Scrub the Grime Away: Dip a sponge or soft cloth into the paste and gently scrub areas with dirt, sticky spots, or fingerprints. Focus on high-traffic cabinet handles and doors. For wood cabinets, always scrub along the grain to preserve the finish.
- Tackle Grease Buildup: For stubborn greasy spots, a drop of Dawn dish soap in warm water works wonders. Use it sparingly with a sponge or soft-bristle brush to scrub sticky residues. Be careful not to soak wood cabinets, as excess moisture can damage them.
Bonus Tips: Line the bottoms of your cabinets and drawers with washable liners to catch spills and crumbs—cleanup will be fast and fuss-free.
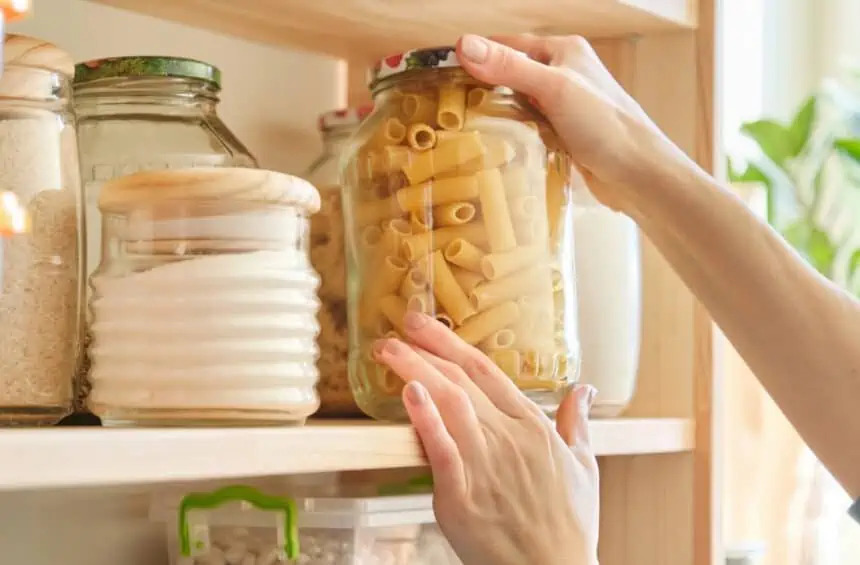
Pantry Cleaning Tips
A clean pantry makes mealtime easier and helps reduce food waste.
Routine Cleaning:
- Clean Up Spills Immediately: Keep a damp cloth or paper towels handy to wipe up any crumbs, spills, or sticky spots as soon as they happen. This helps prevent pests and keeps your pantry looking neat and tidy.
- Clean the floor regularly: Sweep or vacuum your pantry floor at least once a week. This helps get rid of any crumbs or debris that may have fallen, preventing pests and keeping your pantry clean.
- Rotate Foods Regularly To prevent food from going bad or expiring, make sure to rotate items in your pantry regularly. Place newer items behind older ones so that the oldest items get used first, minimizing waste and saving money on groceries.
For Stubborn Messes:
- Floor Stains from Spills: Wipe the area with a damp cloth to remove any surface debris. Mix warm water with a small amount of mild dish soap or floor cleaner. Apply the solution directly to the stain and gently scrub with a soft brush or sponge. Rinse with clean water and dry with a towel to prevent streaks.
Bonus Tip: Organize your pantry using food categories to make it easier to keep this important area neat. Get our pantry category list for the easy approach.
Gas Stove Cleaning Tips
Keeping a gas stove clean can feel like an uphill battle, especially with spills and burnt-on food. But the good news is that with the right steps and tools, it is easier to keep up with.
Routine Cleaning:
- Clean the Stove Surface: Mix equal parts hot water and vinegar in a bowl. Immerse a microfiber cloth in the solution, wring it out slightly, and use it to wipe down the stove’s surface. Pay extra attention to any sticky or greasy spots.
- Degrease Stove Top: Mix equal parts hot water, vinegar, and lemon juice in a spray bottle. Spray this solution onto your stove top and let it sit for a few minutes. Then, scrub with a non-abrasive cleaner and wipe clean.
- Remove Burner Grates and Clean: Take the burner grates off the stove and wash them with warm soapy water. For tougher stains, sprinkle baking soda on the grates and scrub with a sponge or brush.
- Clean the Burners: Remove any debris from around the burners and wipe them down with a damp cloth. You can also use an old toothbrush to get into those hard-to-reach areas.
For Stubborn Messes:
- Start by Removing Grates and Burner Caps:
Remove all the grates and burner caps from your stove. These parts collect most of the food debris and grease, so they need individual attention. - Pre-Soak Grates and Caps:
Place the grates and burner caps in a sink filled with hot, soapy water. Add a splash of vinegar to tackle grease. Leave them to soak while you work on the stove’s surface. - Tackle Stubborn Burnt-On Residue:
For tough messes or burnt-on food, let the vinegar solution sit on the affected areas for 5–10 minutes. Afterward, gently use a flat, plastic scraper to lift away the residue. Be careful not to scratch the surface—if your stove top is glass or damaged, skip this step entirely.
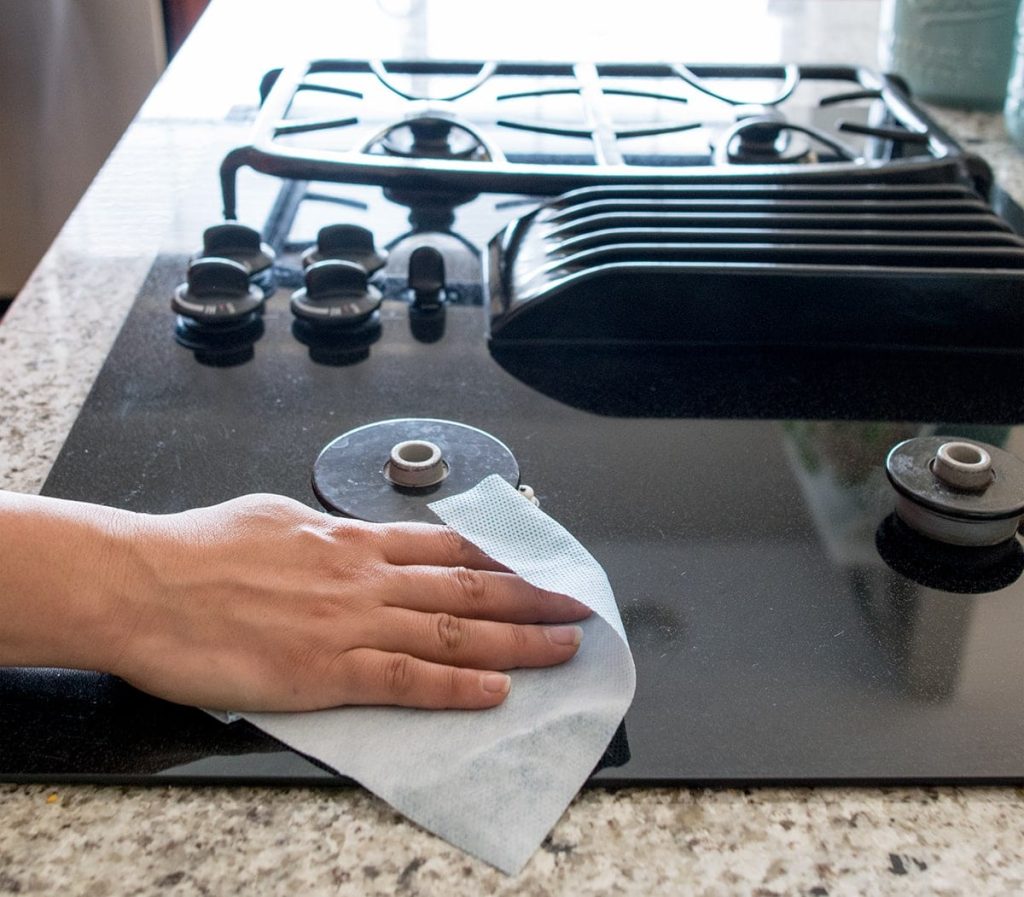
Bonus Tip: Make it a habit to quickly wipe down the stove top after every use. This prevents grease and spills from hardening and makes deep cleaning less frequent.
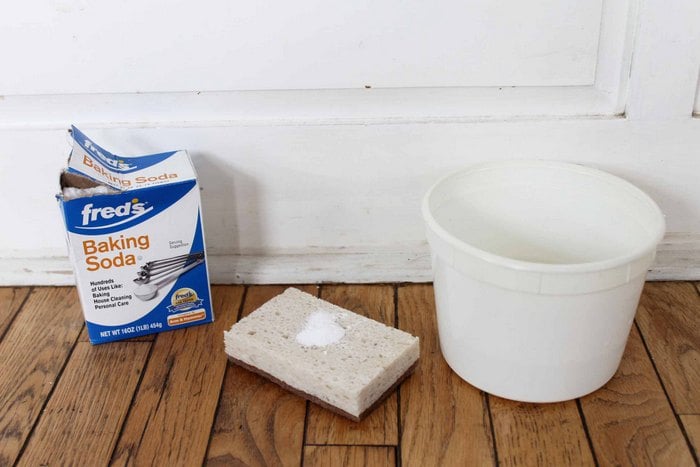
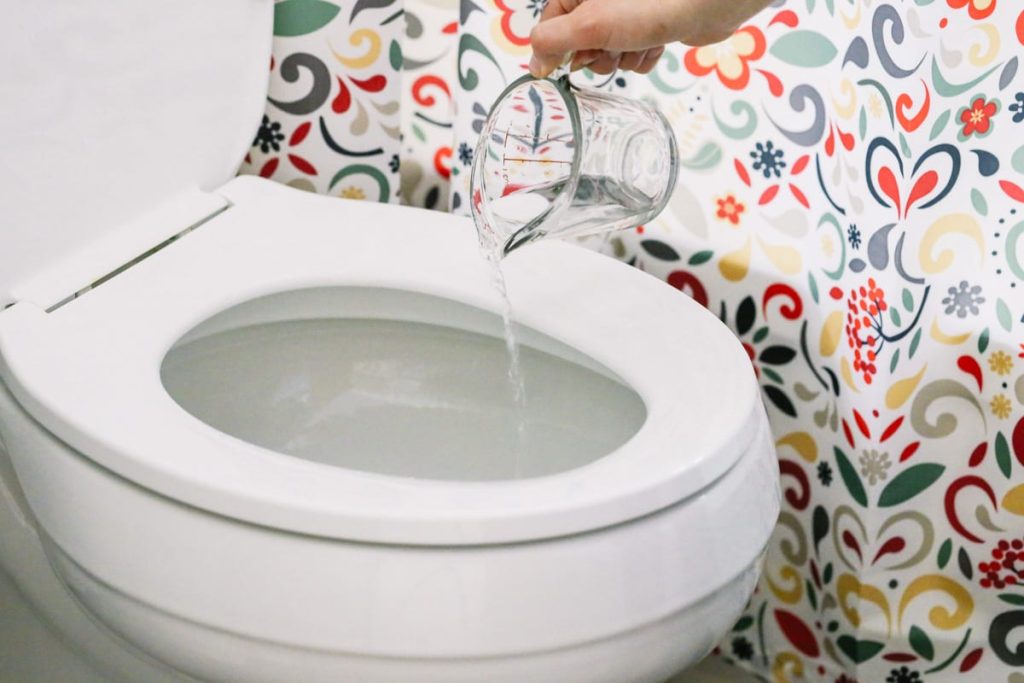
Toilet Cleaning Tips
With these easy steps, you can tackle dirt, stains, and germs while keeping everything hygienic, smelling fresh, and clean.
Routine Cleaning:
- Sprinkle the Cleaning Powder: Mix equal parts baking soda, borax, and salt in a bowl. Generously sprinkle the cleaning powder around the inside of the toilet bowl. Don’t forget to hit under the rim, as this area often builds up hidden grime.
- Give It Time to Work: Allow the powder to sit for about 15 minutes. During this time, it breaks down stains and loosens buildup, making it easier to scrub away.
- Scrub the Bowl Thoroughly: Use a toilet brush to scrub the entire bowl, paying extra attention to areas with visible stains or discoloration.
- Disinfect with Vinegar: Pour white vinegar directly into the toilet bowl (around 1–2 cups). Vinegar is a natural disinfectant that effectively kills bacteria and leaves the bowl shiny. Allow it to sit for 30 minutes for the best results.
For Stubborn Messes:
- For tough spots, add a bit more powder or dampen the area and scrub again. Flush to rinse the powder away.
- For a constantly fresh scent, drop a homemade toilet bomb into the bowl every few days. These are easy to make with baking soda, citric acid, and essential oils.
- If your area has hard water, place a cleaning tablet or vinegar-soaked sponge inside the tank to reduce mineral buildup over time.
Bonus Tip: Always flush the toilet with the lid closed to prevent germs and bacteria from dispersing into the air.
Air Duct Cleaning Tips
Your home’s air ducts play a vital role in maintaining a healthy home, however, they can collect dust, dirt, allergens, and even mold. Regular cleaning and upkeep can ensure fresh, clean, and healthy air for your household.
Routine Cleaning:
- Change Air Filters: Regularly change your HVAC system’s air filters to prevent dust and debris from circulating throughout your home.
- Vacuum Air Vents: Use a vacuum with a brush attachment to clean the air vents in your home. This will help remove any built-up dust or debris.
- Dust Around Vents: Use a damp cloth to wipe down the area around the air vents to remove any excess dust or dirt.
- Clean Return Air Registers: Remove the cover of your return air register and vacuum inside to remove any accumulated dirt or debris.
Deep Cleaning:
- Clean Duct Covers: Remove and clean all duct covers with warm soapy water and a brush to remove any accumulated dust or dirt.
- Professional Duct Cleaning Service: Consider hiring a professional duct cleaning service to thoroughly clean your air ducts. They have specialized equipment and knowledge to effectively remove any built-up dust, debris, or mold.
- Inspect for Mold: Regularly inspect your air ducts for signs of mold growth. If you notice any signs, it is important to address the issue immediately by hiring a professional mold remediation service.
Bonus Tip: A dirty filter forces your HVAC system to work harder and contributes to dust accumulation in the ducts. Replace your air filter every 1–3 months depending on usage and the type of filter you use.

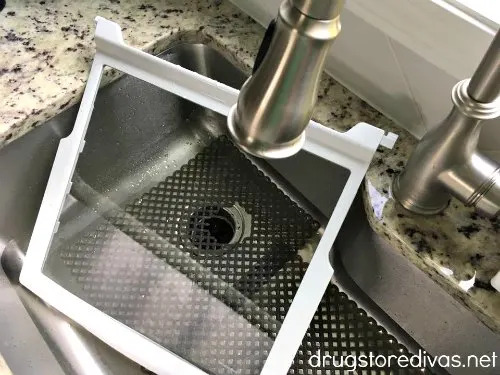
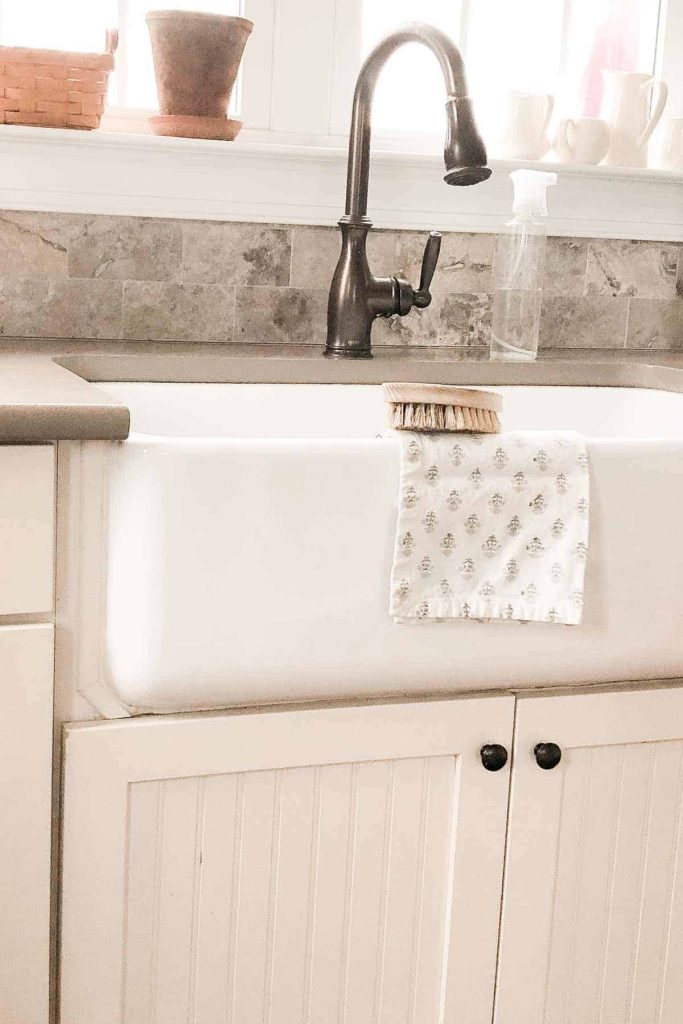
Kitchen Sink Cleaning Tips
Keep sinks cleaned to prevent making you area breeding grounds for stains and odors.
Routine Cleaning:
- Clean Daily: Make it a habit to clean your kitchen sink daily with warm soapy water and a cloth or sponge.
- Use Baking Soda: Sprinkle baking soda into your sink and scrub with a brush or sponge for extra cleaning power.
- Rinse Thoroughly: After cleaning, rinse the sink thoroughly with hot water to remove any residue or soap.
- Dry the Sink: Use a clean towel to dry the sink after cleaning to prevent water spots and keep it looking shiny.
For Stubborn Messes:
- Unclog Drains: If you notice slow draining in your sink, use a plunger or drain snake to clear any clogs.
- Remove Stains: For tough stains, mix equal parts of baking soda and hydrogen peroxide to create a paste. Apply it to the stain and let it sit for 10-15 minutes before scrubbing and rinsing.
- Disinfect with Vinegar: Use a mixture of equal parts water and white vinegar to disinfect your sink and remove any lingering odors.
- Clean Faucet Handles: Don’t forget to clean the handles and knobs on your sink faucet regularly, as they can harbor bacteria.
Bonus Tip: If you have a garbage disposal, toss in a handful of ice cubes and a few lemon slices every couple of weeks. Run the disposal with cold water to clean the blades, while the lemon leaves a fresh citrus scent.
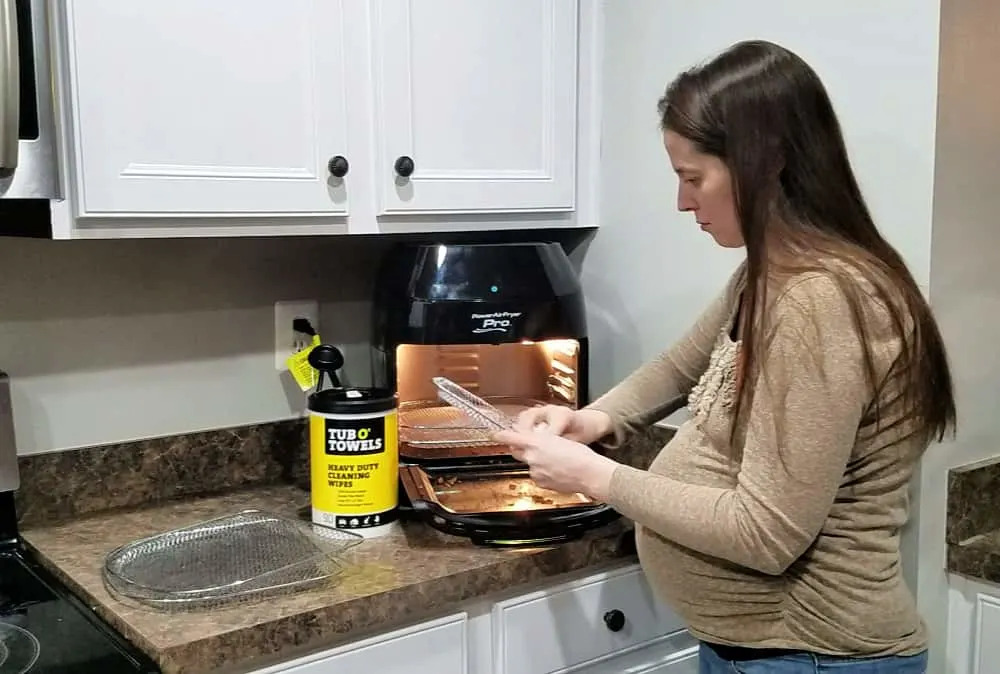
Air Fryer Cleaning Tips
A dirty air fryer not only affects the taste of your food but can also cause lingering odors and buildup over time.
Routine Cleaning:
- Empty Out Crumbs and Residues: Remove the basket, tray, or shelves (depending on your air fryer model) and shake out any loose crumbs or food debris into the trash. This avoids clogging your sink during the washing process.
- Clean the Basket and Accessories: Use hot soapy water and a non-abrasive sponge to scrub the basket, tray, or shelves. Focus on getting rid of stuck-on grease or food particles.
- Tackle the Interior: Dip a soft damp sponge or microfiber cloth in warm water and use it to wipe the inside of the fryer. Be gentle, as the heating element and fan can be delicate.
- Don’t Forget the Exterior: Wipe down the outside of your air fryer with a damp cloth or a gentle multi-surface cleaner.
- Dry Everything Thoroughly: Before reassembling, dry all parts and surfaces completely with a clean towel or leave them to air dry. Reassembling damp parts can lead to odors or damage over time.
- Reassemble and Store Properly: Once everything is fully dry, put your air fryer back together and store it in a dry, clean area, ready for your next use.
For Bigger Messes:
- Stubborn residue inside: Soak the items in warm soapy water for 10–20 minutes before scrubbing. Rinse thoroughly to ensure no soap residue is left behind.
- Interior Messes: For tough grease spots or buildup, mix a paste of baking soda and a little water, apply to the greasy areas, and gently scrub with a soft brush.
- Keep it Odor-Free: If odors persist, place half a lemon or some vinegar-soaked paper towels in the basket and run the air fryer at a low temperature for a few minutes. This will help neutralize lingering smells.
Bonus Tip: Avoid Overfilling the basket as it can lead to more spills and grease build-up. Follow your air fryer’s instructions for proper capacity.
Floor Cleaning Tips
Keeping your floors clean can make your entire home feel fresher and more welcoming. While it’s tempting to save this chore for the weekend, giving your floors some regular attention prevents dirt and debris from spreading throughout your house.
Routine Cleaning:
- Laminate Flooring:
- Start by sweeping or vacuuming to pick up loose dirt, dust, and crumbs. Use a vacuum with a hard floor setting, or a soft broom, to avoid scratching the surface.
- Follow up with a damp mop or a spray-and-wipe tool like a wet jet.
- For stubborn spots, use a slightly damp microfiber cloth to scrub gently and dry the spot immediately.
- Tile Flooring:
- Sweep or vacuum regularly to remove dirt that can dull the tiles and scratch grout lines.
- Mop the floors with warm water and a tile-safe cleaner.
- Clean grout lines periodically with a soft brush and a mixture of baking soda and water to maintain their color and keep them looking fresh.
- Carpeted Floors:
- Vacuum carpets weekly to keep dirt, pet hair, and allergens at bay.
- Spot-clean spills as soon as they happen with a carpet-safe cleaner to prevent stains from setting in.
- Schedule a deep clean with a carpet cleaner or steam cleaner every 6–12 months to revitalize your carpets and remove embedded dirt.
- Hardwood Flooring:
- Sweep daily using a Swiffer or a soft-bristled broom to pick up dust and debris.
- Clean weekly with a hardwood-safe cleaner and a microfiber mop. Spray the cleaner onto the mop, not directly onto the floor, to avoid excess moisture.
- For spills, wipe them up immediately with a dry or damp cloth to prevent damage to the wood or finish.

Bonus Tip: Invest in a robot vacuum cleaner for effortless upkeep. These handy devices are great for keeping crumbs, pet hair, and dirt under control between deeper cleaning sessions. Most models work on various floor types, from carpets to hardwood, and can be scheduled to clean while you’re busy elsewhere.
Robot Vacuum and Mop Combo, 2 in 1 Mopping Robot Vacuum Cleaner with Schedule, Wi-Fi/Voice/App, Strong Suction, Ease of Use, Self-Charging Robotic Vacuum, Slim, Ideal for Hard Floor, Pet Hair, CarpetShark AI Ultra Voice Control Robot Vacuum with Matrix Clean Navigation, Home Mapping, 60-Day Capacity, XL Self-Empty Base for Homes with Pets, Carpet & Hard Floorseufy L60 Robot Vacuum with Self Empty Station, Hair Detangling Technology, Up to 60 Days Hands Free Cleaning, 5,000 Pa Suction, Remove Hair, Dust


Vacuum Cleaner Cleaning Tips
Regular cleaning and maintenance of your vacuum will not only improve its performance but also extend its lifespan.
Vacuum Cleaner Cleaning Guide:
- Empty the Dust Canister or Replace the Bag: If your vacuum has a removable canister, empty it after every use or when it’s about 75% full to prevent loss of suction.
- After emptying the canister, wipe it down with a damp cloth or wash it with mild soap and water if the manufacturer’s instructions allow. Make sure it dries completely before reattaching to avoid mold or odors.
- If you use a bagged vacuum, replace the bag when it’s two-thirds full to maintain optimal suction power.
- Clean or Replace Filters: Check the owner’s manual to locate your vacuum’s filters and determine if they’re washable or replaceable.
- For washable filters, rinse them under cold running water until the water runs clear. Avoid using soap unless the manual explicitly allows it. Allow filters to air dry completely (this can take 24–48 hours) before reinserting them to avoid damaging your vacuum.
- Replace non-washable filters as recommended by the manufacturer, usually every 3–6 months.
- Remove Debris from the Roller Brush: Wipe the roller brush and its housing area with a damp cloth to remove any remaining dust or dirt buildup.Turn your vacuum over and manually remove the roller brush. Use scissors or a seam ripper to carefully cut away tangled hair and fibers.
- Inspect the Hose and Attachments: Detach the vacuum hose and any accessories, such as crevice tools or brushes. Check for blockages or clogs by shining a light through the hose and clearing any debris.
- Clean the Vacuum’s Exterior and Base: Use a damp microfiber cloth to wipe down the vacuum’s body, wheels, and base. Focus on areas where dust and dirt tend to accumulate, such as vents or crevices.
- Check the Belt: Inspect the belt for cracking, stretching, or slippage. Replace it according to the manufacturer’s instructions, which is typically every 6–12 months or when performance declines.
- Freshen Your Vacuum: For a fresh-smelling vacuum, sprinkle a little baking soda into the empty canister or bag before your next use.
Bonus Tip: For heavy-use households or those with pets, schedule a deep clean for your vacuum every month. Take time to clean all parts thoroughly, inspect wear and tear, and replace any components as needed.
Keeping your home clean doesn’t have to be a massive weekend project. By creating a manageable cleaning routine, you can stay on top of chores without feeling overwhelmed. Break bigger jobs into smaller, regular tasks and spread them out over your week or month.
Add a few of these routine house cleaning tips to your regular to-do list, and enjoy the peace of mind that comes with knowing your home is clean and organized—without all the stress.
More Cleaning Resources:
- Daily Cleaning Schedule
- Clean Kitchen Checklist
- How to Quickly Clean Your Closet in under 15 Minutes
