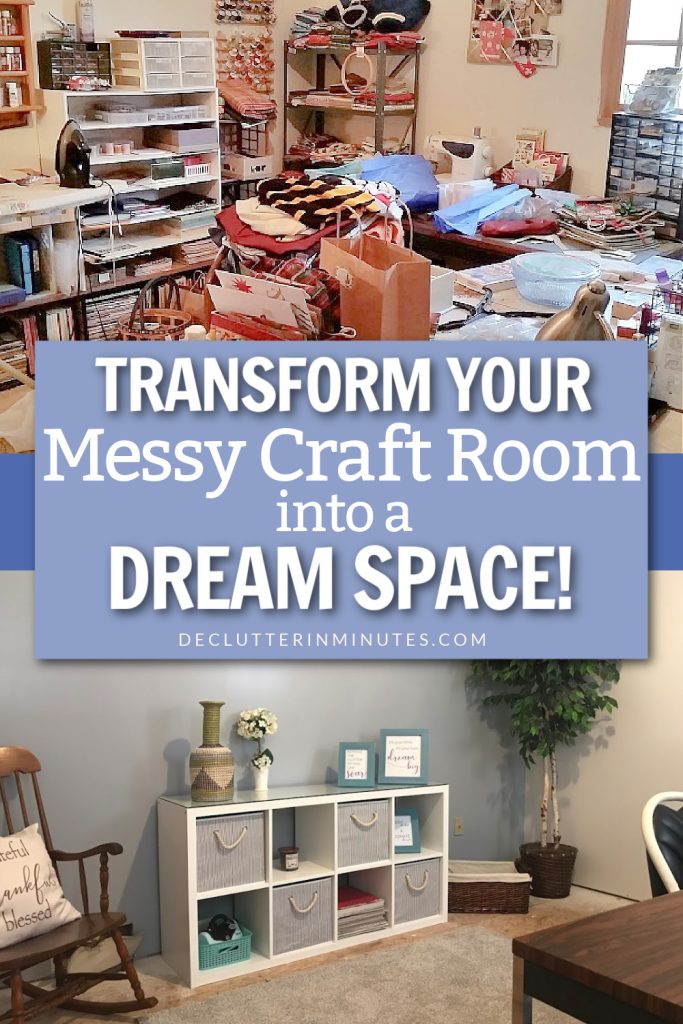
How to Declutter a Craft Room Step by Step
Take your cluttered creative space and turn it into a room where you get inspired with these simple tips on how to declutter a craft room. No matter how chaotic it feels right now, you can get organized without getting overwhelmed.
This how to declutter guide will help you make progress in another room in your home, one that might get overlooked.
If you’ve got a craft room, chances are you’ve had your share of struggles keeping it neat. It doesn’t matter if you’re naturally organized or not—when you’ve got so many supplies crammed into one space, it’s easy for things to get out of hand.
No matter how overwhelming things may seem right now, these tips are here to help you turn your craft room into a space you actually enjoy spending time in.
Now, I won’t lie to you. This is not the fun, Pinterest-perfect part of the project. Going through your stash of supplies, half-finished projects, bits of fabric, half-used paints, and all those (so many!) tools is going to take some effort. But trust me, it’s a necessary step, and you’ll thank yourself later.
Don’t worry, though—I’m not about to suggest you toss out all those Christmas fabrics you’ve been saving for years. Instead, we’re going to work on turning that overwhelming stash into a more manageable, useful collection.
It’s all about progress, not perfection.
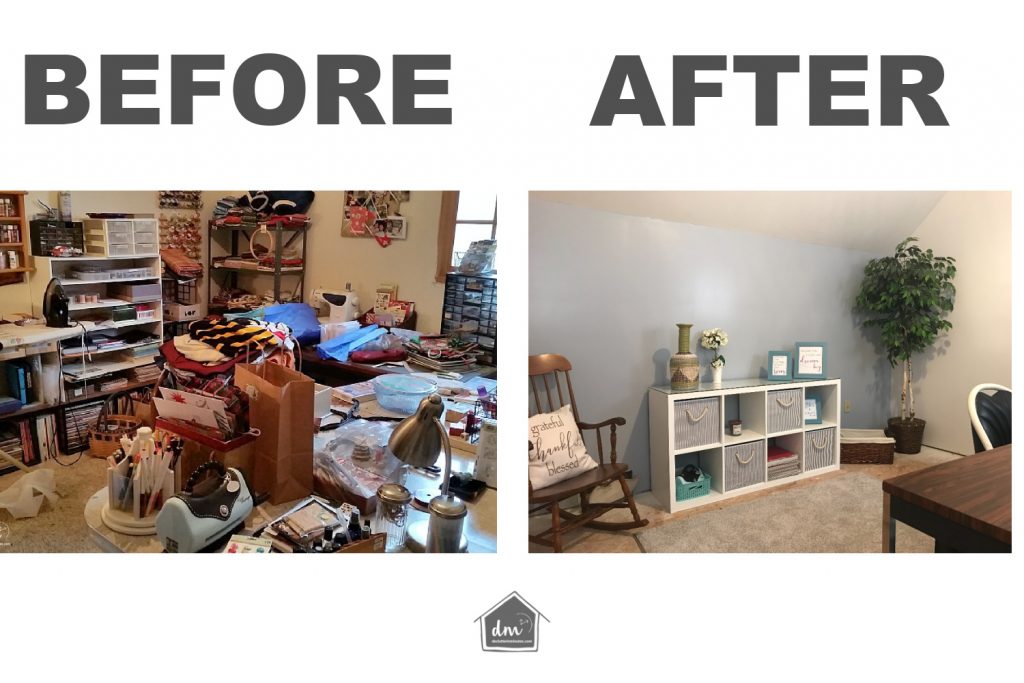
Create a Craft Room You Love
Still shaking your head, thinking this is just too big of a job to tackle? I get it. I’ve been there. My own craft room used to be the most chaotic space in the house. I avoided it at all costs.
There was so much stuff crammed in there that even when I wanted to create something, I just couldn’t. The thought of sorting through the mess was enough to send me running the other way.

But here’s the thing—I cleaned it up, little by little, and it was worth it. Sure, it wasn’t easy, but it was surprisingly rewarding, and even a little fun along the way.
If you’re ready to go from chaos to a craft room you love, I’ve got you covered. We’ll walk through a simple step-by-step plan that makes this whole decluttering thing way easier.
Before we jump in, though, here’s the key to success: take it one piece at a time. Trying to tackle the entire room in one go isn’t realistic, and it will only make you feel burnt out before you’ve even made progress. Breaking the job into smaller, more manageable tasks will keep things from feeling so overwhelming and give you a real shot at success.
Get Ready to Declutter
Before you jump in and start tossing things out of your craft room, there’s a little prework to do. Trust me, this quick prep will make the entire process a whole lot smoother and way less frustrating.
1. Figure Out Your “Why”
This step is super important, and I’ll admit, I used to skip it all the time. Big mistake. Without a clear “why,” most of my organizing projects didn’t get finished. You need a reason, a vision for your space. Think of it as your motivation—the thing that keeps you moving forward when the task feels boring or overwhelming.
Ask yourself why it’s important to have a clean, organized room. A few ideas to get you thinking are:
- I want to work in a space that doesn’t make me pull my hair out.
- I’d love to finish a project on time, for once.
- I want to know exactly where my supplies are when I need them.
- I want to enjoy time in my creative space to unwind after stressful days.
ArtBin Ribbon Storage Rack – White Pipishell 3-Tier Rolling Cart with Wheels – Rolling Storage Cart with Hanging Cups & Hooks – Mobile Utility Cart for Office, Kitchen, Craft Room – Art & Craft Organizer, White, PIUC06WMarbrasse Desk Organizer, 360-Degree Rotating Pen Holder, Desk Organizers and Accessories with 5 Compartments Pencil Holder, Art Supply Storage Box Caddy for Office, Home(Light Blue)


2. Set a “Complete By” Date
This part also matters more than you think. Picking a deadline gives your project a clear finish line. It’s that big day circled on your mental (or actual!) calendar when this room will finally be done.
Giving yourself a solid end date makes this project feel real and important. And when the process gets tough, that deadline can be a powerful motivator to keep going.
3. Assess the Mess
Take a deep breath, walk into your craft room, and really look around. How much work are you dealing with here? Get a rough idea of how many hours (or minutes) you’ll need to spend in the space each day to meet your end date.
Once you’ve estimated the total time, it’ll be easier to break things down step by step.
4. Make a Plan
Now, it’s time to figure out when you’ll actually work on this. Will you tackle it on weekends? Work only on Tuesdays? Dedicate a few minutes each night before bed?
Your schedule and lifestyle will guide this decision. For example, if you’ve got young kids at home, it might be easier to squeeze in some productive alone time while they nap or after bedtime.
And just like that, you’ve got a plan.
Recap: Here are the four things you’ve set up to make sure you follow through:
- Your “why” is your motivator.
- Your deadline gives you a finish line to work toward.
- Your time estimate helps you stay realistic and organized.
- Your schedule keeps you on track every step of the way.
With these pieces in place, you’re ready to start tackling that craft room and turning it into the space you’ve been dreaming of.

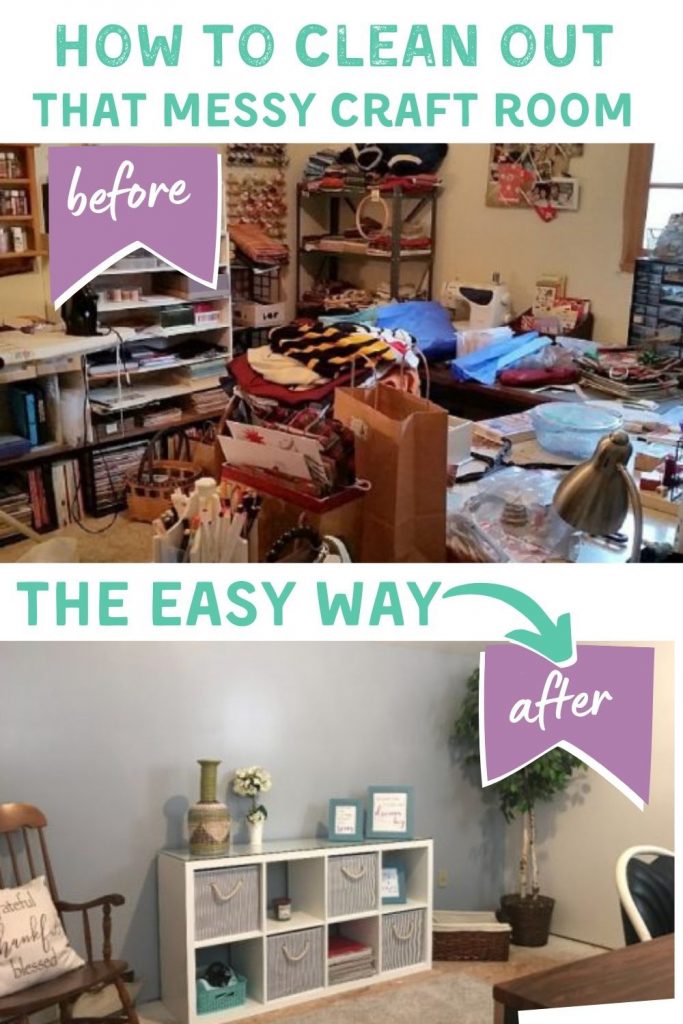
How to Declutter a Craft Room
Decluttering your craft room doesn’t have to feel overwhelming if you follow a few simple steps. Trust me, with a clear plan and some simple strategies, you’ll be able to turn your space into an organized and inspiring spot for all your projects.
Step 1: Start With the Basics
Before jumping into the hard stuff, tackle the obvious. These Three Core Steps will help you cut down the clutter so you’re not drowning in chaos before you even begin.
1. Take out the trash – Grab a trash bag and go through your space. Toss out anything broken, unusable, or clearly garbage. Don’t overthink it. Yes, even that pile of random scraps you’ve been saving “just in case” (looking at you, toilet paper rolls).
2. Recycle what you can – Next, take another bag and gather up recyclables like cardboard, empty bottles, or cans. Again, don’t stress. You’re starting fresh, so recycling those random odds and ends won’t hurt.
3. Put things back where they belong – This time, grab a laundry basket and collect items that belong in other parts of the house. Once you’ve filled the basket, go room by room to return these things all the way away where they belong.
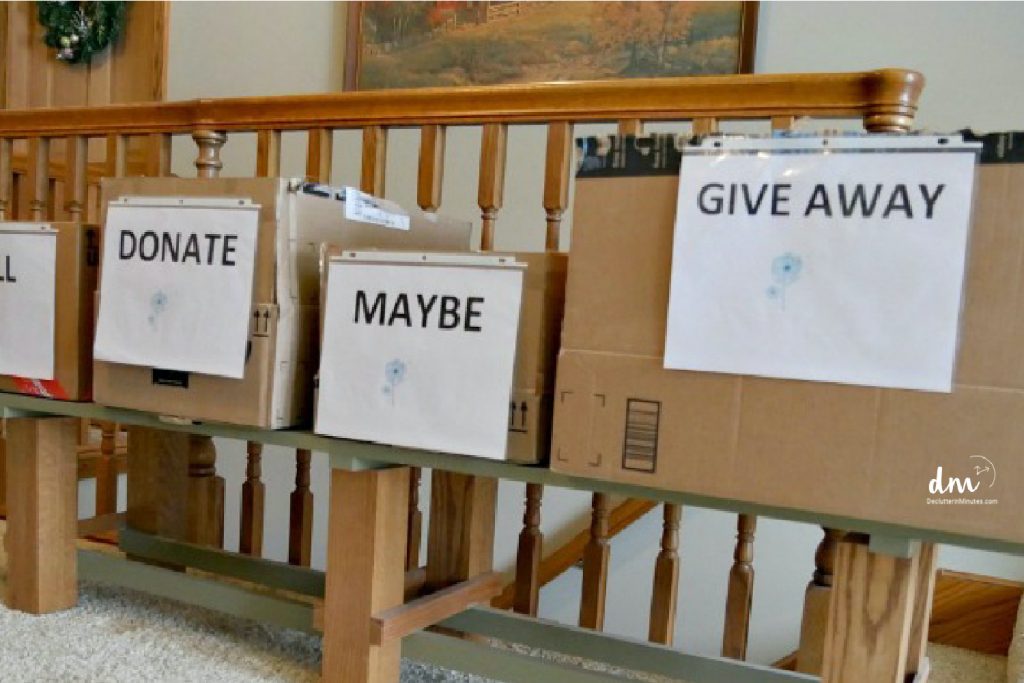
Step 2: Set Up a Sorting Station
Now that the surface junk is gone, it’s time to create a sorting area. You’ll need five boxes, bags, or bins.
- Toss for trash or recyclables you missed earlier.
- Donate for items in good condition that you no longer need. Consider giving extras to local charities, daycare centers, or community groups.
- Give Away for things better suited for friends or family, like fabric for a niece learning to sew or paints for your homeschooling bestie.
- Sell for big-ticket or valuable items you want to list online.
- Keep for items that will stay but don’t have a home yet.
Set up these boxes in or near your craft room. Having them close by will make sorting easier as you work.
Step 3: Stick to Your Plan
Now it’s time to put your decluttering plan in action. Check your calendar to remind yourself of when you’ll work on the room and how much time you plan to dedicate.
Set a timer. This might sound silly, but having a countdown ticking away can give you that extra push to stay focused. Even just 20-minute sessions can make a huge difference.
D/M Pro Tip: Make a playlist of 5 upbeat songs that will help you stay focused. Just 5 songs will give you about 20 minutes of work time.
Step 4: Dive Into the Work
Pick a spot to start. It could be a corner, your craft table, or even the center of the room. Then, piece by piece, decide what to do with each item:
- Keep it? Place it in the “Keep” box.
- Toss it? Add it to the trash or recycling pile.
- Donate, give away, or sell it? Move it to the right box.
When in doubt, ask yourself, “Do I need, love, or use this?” If the answer is “no,” say goodbye to it.
D/M Pro Tip: Touch every item in your room. Don’t leave things where they are unless they’re already in their permanent spot. Handling each item helps you really commit to your decisions and avoids second-guessing later.
Step 5: Keep the Momentum
Seeing a job all the way to done is sometimes the toughest part—but don’t stop now. Here are a few ways to keep yourself motivated:
- Team up. Ask a friend, partner, or your kids to help. They can do small tasks like taking out trash or carrying donation boxes while keeping you company.
- Remember your “why.” Think back to why you wanted an organized craft room in the first place. Picture your clutter-free, peaceful space waiting for you when you’re done.
- Track your deadline. Keep your “complete by” date in mind. If you’re falling behind, adjust your schedule and add a session or two to get back on track.
- Make it fun. Create a playlist of your favorite upbeat songs and work to the beat. Five songs? That’s about 20 minutes of decluttering done!
Every filled box is a win, and every step brings you closer to a craft room you’ll love spending time in. Just keep moving, and soon enough, you’ll have the organized, inspiring space of your dreams.
Decluttering a room may not make the top 10 of our most favorite things-to-do list, but the results definitely will. Having a space that is free of mess and chaos is a joy for any creative person to have.
Use the steps outlined here to help you declutter a craft room so you can then take the next step to organize it into a space you not only deserve but one you love to be in as well.

Thanks for the wonderful tips.
Now I think, I can declutter my super messy craft Room.