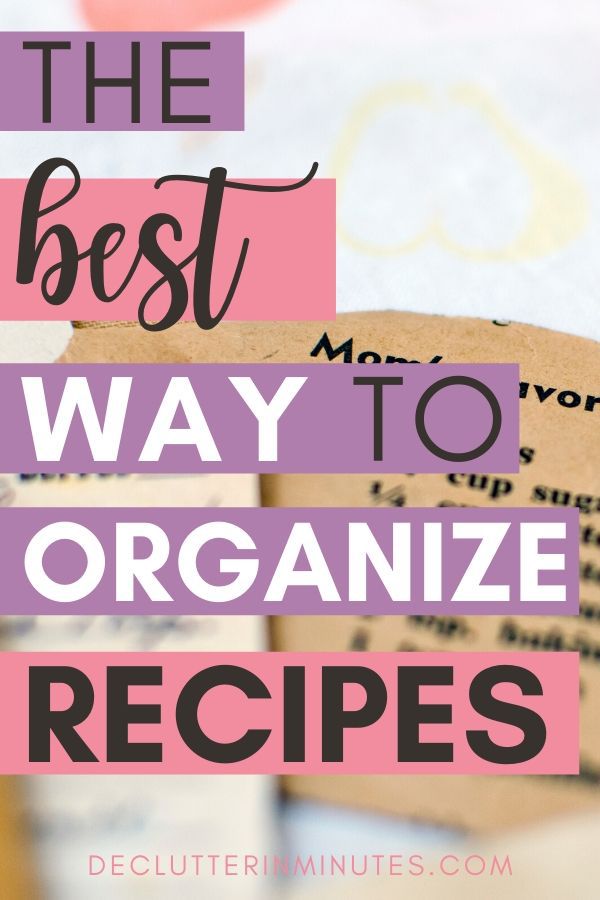
Ideas for Organizing Recipes so You Love to Cook Again!
You know what’s funny?
Most of us don’t actually have a recipe problem…
we have a too many recipes we never use problem.
Cookbooks on the shelf, printed pages stuffed in drawers, screenshots on our phones, Pinterest boards we forgot about…
And somehow, we still end up making the same 5 meals every week.
The Easiest Way to Organize Recipes
If you’re just looking for a simple way to organize your recipes without overthinking it, here’s what works:
Gather all your recipes into one place.
- Choose the ones you actually use
- Group them into similar categories
- Store them in one easy-to-access system
And yes, we’ll also cover what to do with digital recipes like Pinterest and saved links later on.
And here’s the part most people miss. The goal isn’t to find the perfect system… it’s to stop managing recipes you don’t even use anymore.
Today we will go over my top ideas for organizing recipes so you can tackle the daily task of cooking dinner without breaking a sweat.
How to organize all the notes and printed pages of recipes so you can find just what you want to make without having to turn your home upside down.
Ideas for Organizing Recipes
Before we get into organizing everything, let’s take a quick step back for a second.
I used to have recipes everywhere.Cookbooks on the shelf, printed pages stuffed in drawers, recipes torn out of magazines, and even a few saved on my phone that I completely forgot about.
And yet, when it came time to make dinner, I still found myself standing in the kitchen thinking, “What am I even making tonight?”
That’s when I realized the problem wasn’t that I needed a better system… it was that I had way more recipes than I was actually using.
Okay, let’s fix that.
Step 1. Set Up a Work Area
For a project like this one, you will need some space to spread out and work. A kitchen table is a perfect place for a job this size because it gives you plenty of room to sort things out into many categories.
Remove anything on the table so you have a clean and fresh space to work in.
Step 2. Gather Everything Up
Before you begin organizing, you will first need to see everything you have.This is also where things start to get really eye-opening. When all your recipes are in one place, it becomes much easier to see what you actually use… and what has just been sitting there for years.And that’s the real goal here. Not just organizing more, but making sure you’re only keeping recipes that still fit how you cook and live today.
Gather all the cookbooks, recipe boxes, printed recipes, and magazine clippings you have throughout your home. Be sure to check your favorite reading spots, like your bedside table and a bookshelf in your office. Don’t worry too much if you feel you are not finding them all. Once we have a system set up, any new recipes you find later on will be a breeze to add to your new system.
But more on that later.
Once you have everything together, section things off into piles to make the next few steps a bit easier to go through.
Here are a few suggestions:
- Cookbooks
- Cooking Magazines
- Printed Recipes and Recipe Pages
- Recipe Cards and Torn Sheets
READ: HOW TO SET UP A DECLUTTERING KIT
Step 3. Do an Initial Sort of Your Recipes
Since our goal is to set up a recipe system, you will first need to pare down your collection a few times until it is more realistic. To do that, let’s start with the loose recipes first. This will include printed recipes, notecards, and magazine pages.
These tend to be part of a recipe collection that can get quickly out of hand, so don’t be surprised if your stack is a bit larger than you expected it to be.
Divide your loose recipes into categories.
Before you start making categories, take a quick minute to look at what you’ve pulled together.You may already be noticing something… there are probably quite a few recipes in there that you haven’t made in years, or maybe never made at all.
Instead of automatically finding a place for everything, start by choosing the recipes you actually use and love. Those are the ones that deserve space in your kitchen.
- Family Favorites
- Can’t Wait to Try
- Hand Me Down Treasures
- No Longer Interested
Use labeled index cards to make this part of the project easier to do. Label each section clearly so you can leave this project and dive right back in without having to start over. The index cards are your file labels and make sorting a breeze when the labels are easy to read.
Once you have your categories labeled, go through each loose recipe one at a time, quickly scanning it over. Decide which section it belongs to using the following as a guide.
Family Favorites – These recipes are your go-to ones. Those simple yet tasty meals that you keep going back over and over. Usually, the condition will tell you if this is a loved recipe or has not been tried yet. There is nothing like a few greasy fingerprints to tell you at a glance whether you use a recipe frequently.
Can’t Wait to Try – These recipes still excite you, but you have not yet had time to try them out. Do yourself a favor and give the ingredients and instructions a quick glance. If you see anything that will make this recipe unrealistic for you, move it over to the “No Longer Interested” pile.
Trust me on this. Having unrealistic recipes in your collection is only going to add stress to meal planning. There is nothing quite as frustrating as a stack of Martha Stewart options nagging at you every time you make your weekly meal plan. Do yourself a (big and loving) favor and remove these recipes now.
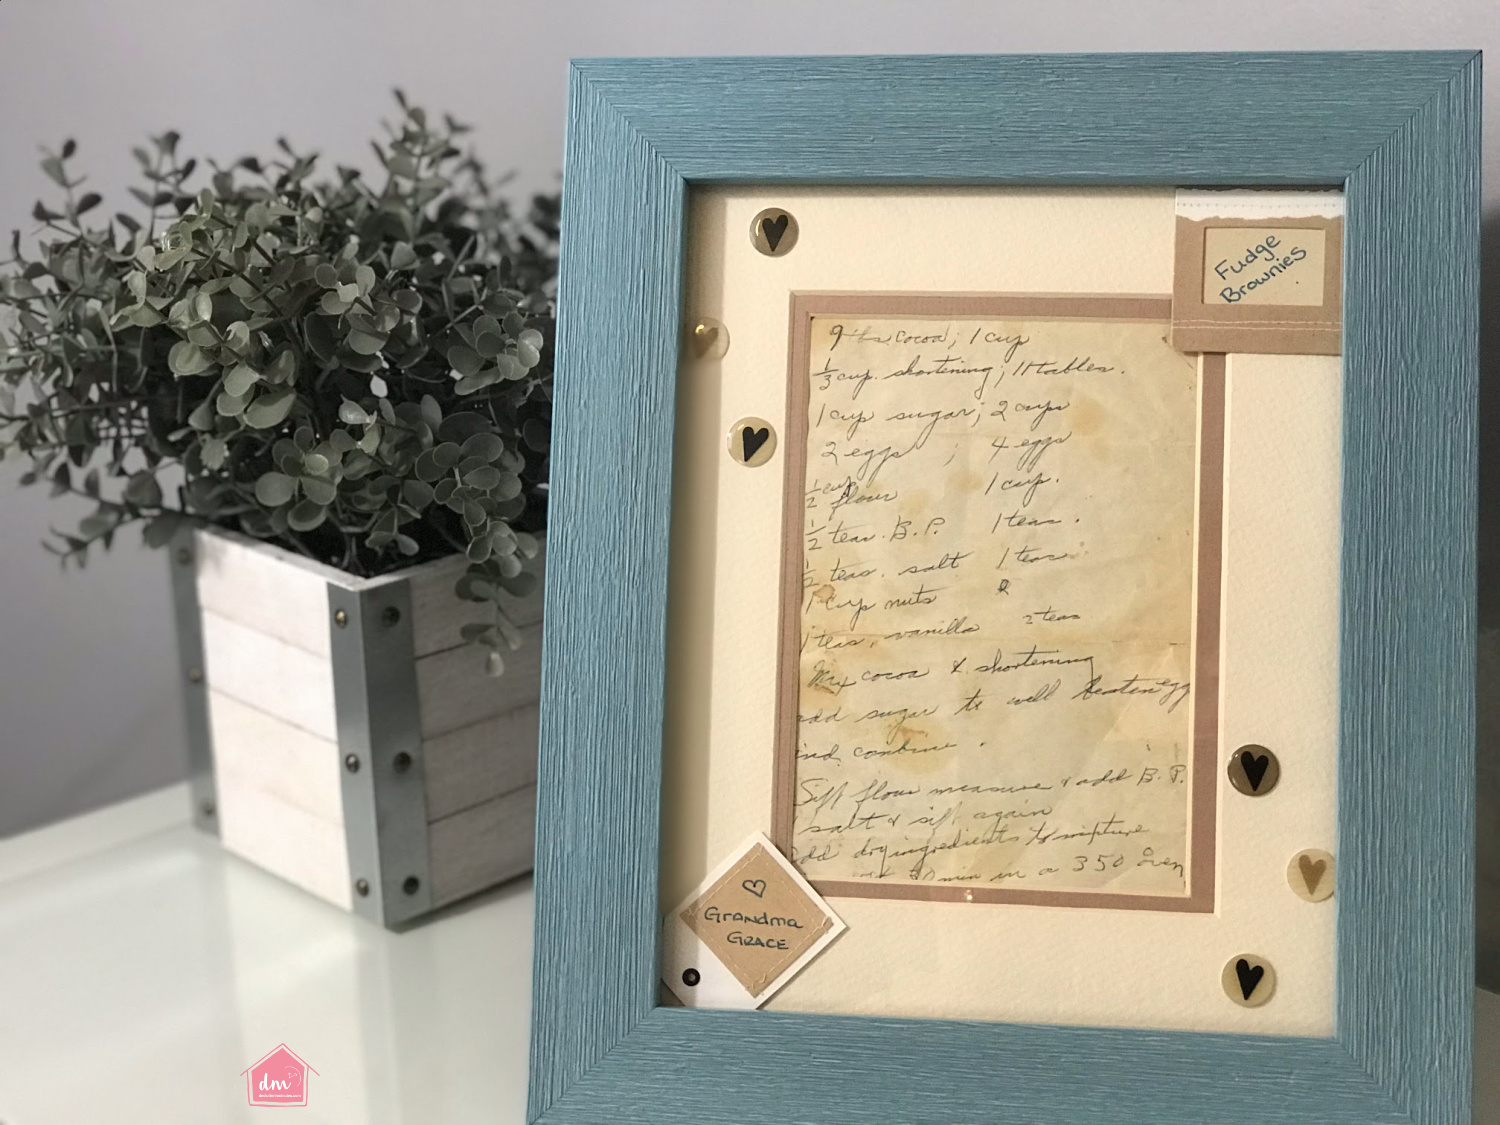
Hand me Down Treasures – Whether you have a recipe that was handwritten from your grandmother or a full collection you inherited from your Aunt, these too need to be sorted out into a more realistic pile. Again, go through them one at a time pulling out any you love or use often. The rest can be handed on to a child or another family member. You can also use them to make a family recipe book which is a great idea for a holiday gift.
TIP: Remember, not all recipes need to be filed away. Add a bit of love to your kitchen and frame out a family treasure. This lovely reminder will bring a smile to your face each time you see it and maybe even spark a conversation when your guests see it.
No Longer Interested – Sometimes you may see a recipe and think, what on earth was I thinking? Again, don’t judge your selections; just put them into the pile.
Remember to be honest. If you find yourself hesitating because you are not sure whether to keep or toss a recipe, that probably means you need to toss it. Our goal is to create a treasure chest of favorites that you can turn to each night quickly, so do your best to only keep the ones you know you will actually cook.
READ: HOW TO MAKE A MEAL PLAN AND ENSURE YOU USE IT!
Step #4. Do a Next Step Sort
Once you have all your paper recipes sorted into piles, you will need to dive back into each one to pare things down a bit more.
Let’s start easy, focusing on the last pile, “No Longer Interested.” Since most, if not all, paper recipes can be recycled, go ahead and take them there now. Don’t be tempted to pass these recipes on to someone else. There is no reason to give your clutter headache to someone else. Remove the guilt and get rid of these recipes.
Hand Me Down Recipes
Next up is the “Hand Me Down Recipes.” I just love to see a recipe that is written in my grandmother’s hand. Just a peek at her writing brings back so many memories. But rather than having handwritten treasures lost in a drawer, another option exists.
If this is a reasonable pile, you may want to create a Treasured Recipe Album to keep up on a shelf. This is such a simple way to give honor to family heirloom recipes, yet still have those pieces available if you do want to pull them out and give them a try.
To make a Treasured Recipe Album, put your recipes into page protectors to keep the integrity intact. Add a few stickers or notes, such as: “I used to make these with my Aunt Linda every Christmas. We loved to eat the batter as we were cooking together!”. This is a great way to personalize things, turning those loose recipes into a memory journal. Finish it up by putting them all into a pretty binder that will add a bit of charm to the room.
Can’t Wait to Try Recipes
Next up is the “Can’t Wait to Try” pile. Even though we are decluttering here, there is no reason to give up on trying out new recipes. Dinner can be boring, so having a new option each week to try can spark a bit of life to a busy week. Pick a day to experiment each week to be sure you keep this pile to a more reasonable one.
I like to have a file in my Weekly Planning Basket of new recipes. This way, when I plan meals for the week ahead, those new ones are right there, reminding me to give one a try.
TIP: When you try a new recipe and find it a success, put notes on it with post-its for the next time. Things like cutting the butter in half or double this for a freezer meal can be quite helpful the next time you make it.

Family Favorite Recipes
Finally, it’s time to tackle the “Family Favorites.” This should be your largest pile now that you have wittled down the others.
Go through each recipe and divide things down one more time. This time we are going to sort things out by meal theme.
Here are a few ideas to get you started:
- Appetizer
- Soup
- Poultry
- Beef/Pork
- Fish
- Vegetable
- Pasta
- Dessert
- Fast Food
Again, you may want to use index cards to make this step a bit quicker to get through.
Once you have all the recipes sorted out, it’s time to set up a system that will keep things easy to find and get to wherever you are meal planning or cooking. I love to use a binder for this. With a binder, I can easily add or remove recipes as our family’s tastes change.
A binder is also perfect to keep with my cookbooks, so my cooking library is simple to keep neat and tidy.
TIP: If you have quite a few recipes on small index cards, you can put them into page protectors so you can more easily file them in your recipe binder. Recipe boxes are nice, but if you want an easy and efficient recipe system, binders tend to be the better choice.
Find a binder large enough to hold all of your recipes; probably, a 1 1/2 inch will work well for this. Be sure to get subject dividers so you can more easily find recipes right when you need them. Label each divider with one of the sections listed above or any you may have come up with on your own.
Place each recipe in a page protector sheet. The page protector serves two purposes here. 1. It eliminates the need to punch holes in the recipe, and 2. it keeps the recipe intact and free from tears, greasy fingerprints, and food spills.
Once you have all your recipes safely inside, label the spine of your binder so you can more easily find it when you need it.
Recipe Magazines and Cookbooks.
As you did with the loose paper recipes, you will want to go through your books and magazines one at a time using the following categories for sorting.
- Love and Use
- Love and Look
- No Longer Love or Use
These may be self-explanatory, but let’s go over them quickly to be sure.
Love and Use are any cookbooks or magazines you have in your kitchen routinely. These are the ones you use so often that you keep in your kitchen, so they are always close by.
Love and Look are any cookbooks or magazines that look good on a shelf. Whether in your kitchen or on a bookshelf in another room, these books are ones you love the look of, but you aren’t necessarily dog-earing it up with frequent use.
No Longer Use or Love are any cookbooks or magazines you are ready to let go of. Now, before you send these books off to the donation center, you may want to think of a giveaway friend or family member. Cookbooks can be quite expensive, and for that reason, passing them on is a great option. Maybe your niece just moved into her first home and would love a few cookbooks.
Remember always to check before you give to be sure you are not passing your clutter onto someone else. If they are not interested, why not check with your local library or women’s shelter?
The best part of having a recipe binder is how easy it is to use when creating a weekly or monthly meal plan. Inside, each recipe is organized by the main ingredients, such as poultry or pork, and all are tucked safely inside a page protector, making them quite easy to move in and out.
Remove each recipe you select for the week ahead from your recipe binder and keep it clipped with your meal plan. Now, when it’s time to cook dinner, you have the recipe ready to go.
This time-saving step will help you on those hectic evenings when your family is rushed to get dinner done so they can head out the door.
TIP: Use a clear pocket protector like this one to hold your weekly recipes along with your menu. This tip will help you to remove the stress of dinner time since you will always know where your recipes are.
Not only that, but the visual reminder each morning will help you to pull out any meat that needs to be thawed for that day.

Digital Recipes
Let’s talk about digital recipes for a minute, because this is where things can get out of control fast.
If you’ve got recipes saved on Instagram, Pinterest, Facebook, YouTube, and your phone… you’re not alone. Most of us have them scattered everywhere.
The problem isn’t where they are. It’s how many there are.
So instead of trying to organize every single recipe you’ve ever saved, start here:
1. Pick one main place for your go-to recipes.
This can be a notes app, a simple document, or a recipe app. The key is that it’s easy to access while you’re in the kitchen.
2. Go through your saved recipes and only move over the ones you’ve actually made or know you will make.
If you haven’t tried it yet, it doesn’t need to be in your main collection.
3. Create one small “to try” list.
Keep this list short, just a handful of recipes you’re excited about right now. Not someday. Not maybe. Just the next few you want to try.
4. Let the rest go.
You don’t need hundreds of saved recipes to make dinner easier. In fact, they usually do the opposite.
Because when everything looks like an option… nothing feels like the right choice.
The goal here isn’t to organize more. It’s to give yourself fewer, better options so cooking feels simple again.
Why Organizing Recipes Isn’t the Hard Part
If you’ve ever felt like no matter how much you organize, things still feel a little overwhelming… you’re not imagining it.Most of the time, it’s not about finding a better system. It’s about having too much to manage in the first place.
That’s exactly where Right-Sized Living comes in.Instead of trying to organize more and more, it helps you focus on keeping what actually fits your life today… so your home feels easier to manage every single day.
If that idea is clicking for you, you can learn more here:
If this is starting to click for you…and you’re realizing it’s not about organizing more, but having less to manage in the first place…
I put together a simple guide to walk you through exactly how Right-Sized Living works.
Frequently Asked Questions About Organizing Recipes
You don’t have to meal plan, but it can make things a lot easier. When you have a small collection of recipes you actually use, planning meals becomes much more simple and less overwhelming.
Instead of choosing from hundreds of recipes, you’re choosing from a handful that already fit your life. That alone can take a lot of the stress out of dinnertime.
Keep your recipes as close to your kitchen work area as possible. The easier they are to grab, the more likely you are to actually use them.
If something is used often, it should be easy to reach. If it’s only used once in a while, it can be stored a little farther away. The goal is to make your kitchen work for how you cook today.
Digital recipes can get out of control just as quickly as paper ones. The key is to keep things simple and limit how many places you save recipes.
Choose one main spot for your go-to recipes and keep your “to try” list small. If you haven’t made something in a long time, it’s okay to let it go. You’ll always be able to find new recipes when you need them.
If you want more help with this, be sure to check the digital recipes section above.
More Organizing Resources:

Do you have a link for the clear pocket protector at the end of your article? It’s the one attached to the kitchen cabinet.
No, sorry I do not, Dale. I found it in the clearance section of Staples many years ago.
Tracy Lynn