How to Declutter a Kitchen Pantry
If your pantry feels more like a chaotic jumble than an organized space, don’t worry—we’ve got you covered. This guide walks you through how to declutter your kitchen pantry so you can create a smooth, hassle-free space for your food, paper goods, and kitchen tools. By letting go of items you don’t really need, you’ll open up room for a pantry that’s neat, organized, and easy to use.
Keep this guide close by so you have it handy anytime your pantry organization could use a refresh.
Clutter and food. Not exactly a match made in heaven, right? But think about this for a second—if you’ve got food sitting around that you’re not using because there’s too much of it or you don’t have a good way to store it, then you’re probably wasting it. And honestly, that’s what clutter really is. A collection of stuff you’re not using.
The best way to keep your food from turning into clutter is by setting up storage areas that are organized and easy to use. This includes your pantry, kitchen cabinets, fridge, freezer—even your root cellar if you’ve got one. But before you start arranging things, there’s an important first step you can’t skip. You’ve got to sort through and declutter all the food you already have.
Decluttering your food stash might sound like a huge, overwhelming job, but don’t stress—we’ll break it down into manageable steps. Yes, it might still feel like a big project, but take it one step at a time. You might just find it’s easier than you thought.
Fresh Start: Why It’s Okay to Let Go of Old Food
Tossing out expired or stale food can definitely stir up some guilt—we’ve all been there. But instead of beating yourself up over the money or food wasted, think of it as a chance to learn and do better going forward.
Clearing out your pantry gives you a fresh start and the opportunity to set up a system that really works for your family.
Give yourself some grace, toss what needs to go, and start fresh without any regrets. Once your pantry is organized, you’ll find it so much easier to stay on top of what you have and how much you bring into your home.
How to Declutter a Kitchen Pantry
For big projects like this, it helps to break things into smaller steps. That way, you can tackle one step at a time without feeling overwhelmed by the whole project.
Step 1. Prep Your Space
Before you start decluttering, you’ll need enough room to spread everything out. This will make the process easier and faster. If you’re using your kitchen table, give your household a heads-up that dinner might consist of takeout or sandwiches tonight.
Decluttering deserves your focus—not a ticking clock to make dinner.
Gather your supplies so they’re ready to go. You’ll need sticky notes or index cards, a black marker, a trash bag for expired food, and a sturdy box for donations. Once you’re all set, you’re ready for the next step.
Amazon Basics Sticky Notes, Office Supplies for Desk, 3-x-3-inch, 24-Pack, Assorted Colors Oxford Ruled Index Cards, 3Sharpie Permanent Markers, Chisel Tip, Black, 4 Count

Action Step: Set up your sorting station. Clear off your kitchen table, counter, or even set up a folding table. No room? Throw a blanket on the floor and use that as your workspace.
Read our guide on How to Setup a Decluttering Kit to jump start your decluttering projects whenever you feel the urge to sort.
Step 2. Pull Everything Out and Purge
Once your pantry is empty, sort through the contents and make some quick decisions. Here’s what to do:
- Toss anything expired, stale, or spoiled.
- Donate anything you know you won’t eat, but is still good (unopened, within expiration). This could go to a local food pantry, a family member, or a friend.
The goal here is to only keep the food your family will actually eat. When you’re finished, you’ll already feel like you’ve tackled a big part of the job.
Action Step: Keep a trash can nearby while you are sorting. Work until you have completely emptied out the area you are working on.
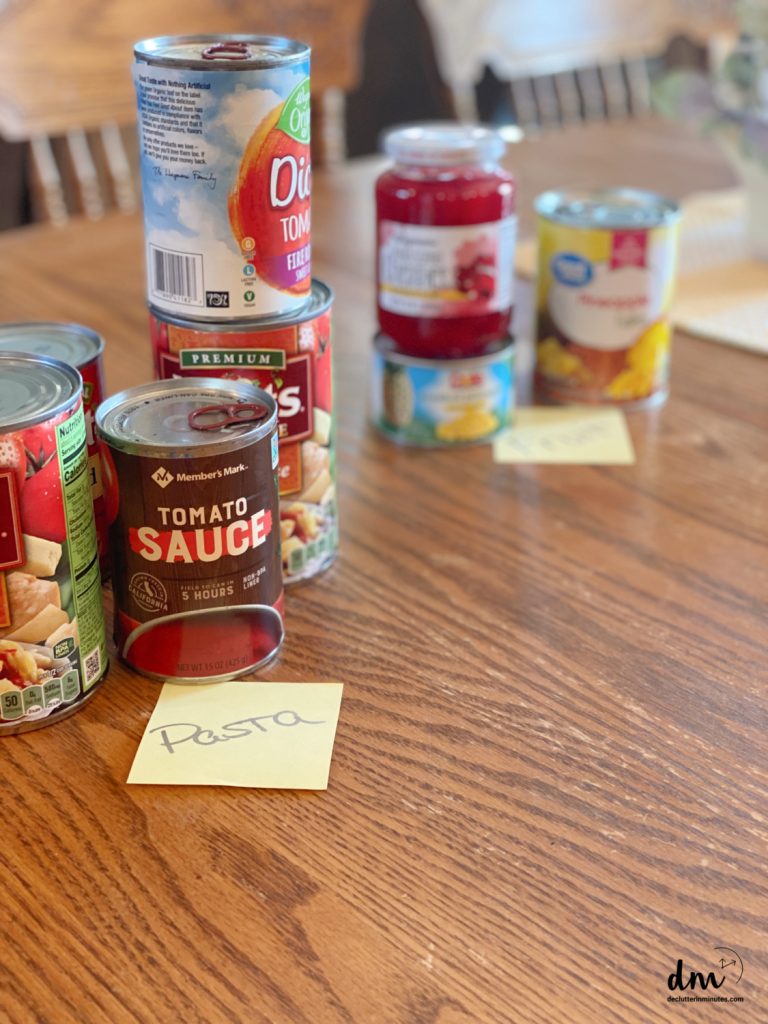
Step 3. Sort by Categories
Sorting food into categories will make it easier to put everything back when you are ready to organize. Categories also make it easier to do meal planning and shopping lists because you can more easily see what you have in stock.
Here’s an example of categories to start with, but feel free to customize them based on what your family eats the most.
- Main Course (boxed meals, meal kits)
- Side Dishes (rice, pasta, canned veggies)
- Soups and Canned Goods (soups, beans, broths)
- Breakfast (cereal, oatmeal, breakfast bars)
- Drinks (tea, coffee, drink mixes)
- Snacks (chips, pretzels, cookies)
- Baking Supplies (flour, sugar, yeast)
- Food for Special Diets (like keto, gluten-free, or sugar-free options)
Read our guide on How to Use Categories to Organize Your Food for our full and complete list.
D/M Pro Tip: Use sticky notes or index cards to label your groups while you’re sorting. This will save you time once you start putting everything back.
If you’ve got kids, consider creating a small snack bin for each child and label it with their name. Fill it with portioned bags of their favorite snacks so they can grab-and-go easily.
Step 4. Keep Track of Essentials
While you’re sorting through your food, keep a list nearby to jot down anything that needs restocking. Lists aren’t just a lifesaver for avoiding overstocking; they’re also great for sticking to your budget.
Before your next shopping trip, take a quick look at your pantry and check what staple ingredients you’re running low on. To keep your pantry organized without it getting cluttered, aim for just enough without going overboard.
It can take a little practice to find that balance, but as you build this habit, it’ll get easier to keep what you need without overloading.

D/M Pro Tip: Create a simple weekly menu with 3–5 meal ideas. Shop your pantry first for the ingredients you already have, then add any missing items to your list. This quick routine will make it so much easier to keep your pantry tidy and stay on top of what you really need.
Step 5. Clean
Cleaning out an empty pantry is as simple as it gets, and it’s the perfect way to start fresh. Grab a damp cloth or your go-to cleaning supplies and give everything a good wipe-down, top to bottom.
Make sure to dry each area as you go. Don’t forget those hidden areas like corners, the door, and even the floor.

Action Step: While you’re cleaning, keep an eye out for areas that might need fixed or updating. Maybe it’s time to add fresh contact paper, fix something that’s been broken, or even install new shelving to create extra storage space.
Cooyes Shelf Liner – Premium Non-Adhesive Cabinet & Drawer Liner for Kitchen – Waterproof Shelf Paper with Modern Pattern – Durable EVA Cabinet Mat – Easy to CutALIUNI Drawer and Shelf Liner, Non-Slip Kitchen Cabinet Liners Non-Adhesive Thick Strong Grip Waterproof Washable Mats Protect Dresser Shelves Cupboard Bathroom Cabinets, White Stripes, 12 in X 10 FTGORILLA GRIP Peel and Stick Paper, Removable Cover for Books, Shelves, Countertops, Drawers, Cabinets and Crafts, Easy Install Kitchen Decor, Shelf, Drawer, Cabinet Liners, 11.8 in x 20 FT Spiral Turq


Step 6. See Your Space Fresh
Here’s a super simple tip to help you get your pantry organized in no time. While it’s empty, take a step back and look at the space like you’re seeing it for the first time.
Really take it in. Start imagining how bins, baskets, or containers could fit and where they’d make the most sense. This is your chance to play around with different ideas and give your pantry a layout that works smarter for you.
Action Step: Pick one or two areas that could use improvement and make a note of any organizers or storage solutions you’d like to grab on your next trip to the store.
Great Organizers for the Pantry:
- Lazy Susan – Great for oils, spices, and dressings
- Stadium Shelving – Great for spices, cans, and bottles
- Narrow Bins – Great for seasoning pouches or gravy
- Sturdy Jute Baskets – Great for food categories
- Floor Blasket – Great for large lightweight items
- Wall Organizer – Great for cans, jars, or spices
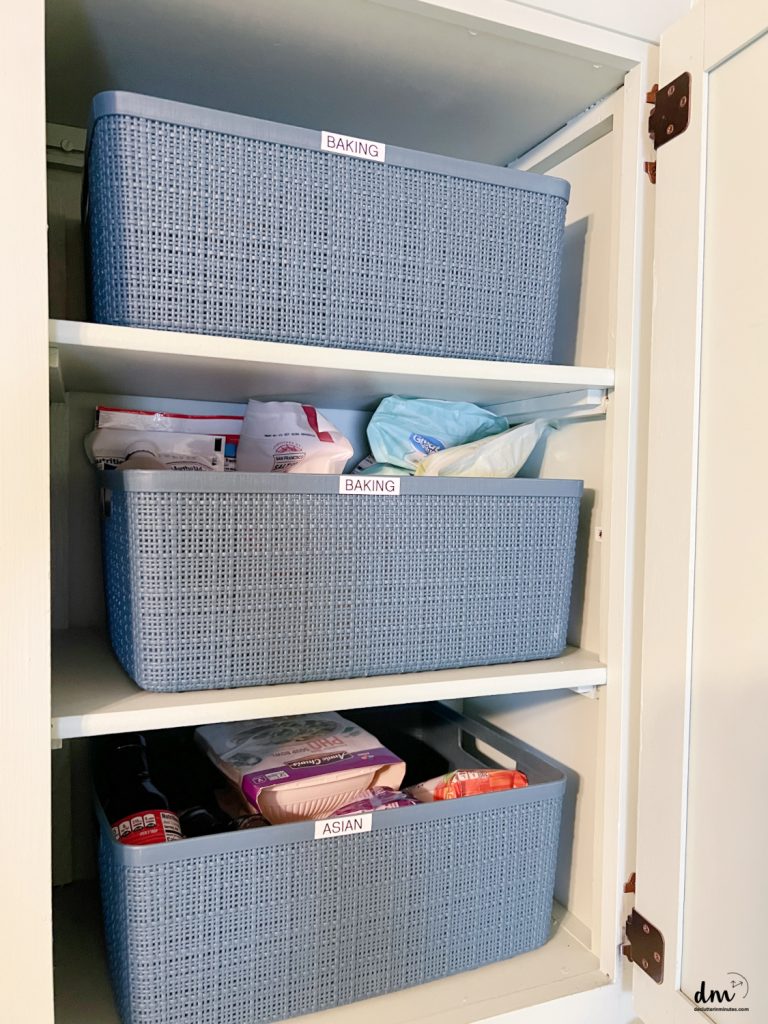
Step 7. Organize Your Space
When it comes to pantry organization, the goal is simple: make it easy to find what you need and just as easy to put things back where they belong. That’s where containers can be a game changer. Look for options that can handle daily use, are sturdy enough for what you’re storing, and are easy for the whole family to use.
For example, if you have a lot of sauces or oils, try using a lazy Susan to keep everything visible and within reach. Have tons of spices? A hanging rack can keep them neatly organized and standing tall without toppling over.
And if you have food pouches, clear organizers are perfect to help keep them upright and easy to read. Little adjustments like these can make a big difference.
X-cosrack Wall Mount Spice Rack Organizer 5 Tier Height-Adjustable Hanging Spice Shelf Storage for Kitchen Pantry Cabinet, Dual-Use Seasoning Holder Rack with Hooks, Black-PatentedLAMU 2 Tier Lazy Susan Turntable Organizer 9.25” Rotating Spice Rack Organization for Cabinet, Kitchen, Pantry, Countertop, Bathroom, Vanity, Medicine Cabinet Organizer, ClearBatoto Pantry Organization and Storage Bins, Refrigerator Organizer Bins – Clear, Kitchen Organization and Storage with Dividers (2 Pack)


Action Step: Set things up and test your system for a few weeks. If everything stays neat and in its place, you’ve nailed it! If not, tweak it until your setup feels intuitive to your daily cooking habits.
Pantry Clutter FAQ
What should you keep, and what should you donate?
This can be a little tricky, so let’s break it down.
Have you ever been scrolling online and stumbled across a recipe that looked so good you could practically taste it? Maybe it was something you’ve never tried making before, but the directions seemed simple enough. You printed the recipe, bought all the ingredients, and then… completely forgot about it.
Fast forward to now, and here you are, reorganizing your pantry with a bottle of miso paste and a can of bamboo shoots in your hand. You’re probably asking yourself, “Why do I even have this?” That right there is your cue to donate those items. Whether it’s to a food pantry or a friend who loves stir-fry more than you do, give those forgotten items a new home.
Remember, your pantry doesn’t need to hold everything you’ve ever purchased. A functional pantry is stocked with items your family actually uses. Starting fresh with only the foods you love and plan to eat will help you stay organized and make room for what really matters.
How do you know if your food is stale?
Figuring out if your food is stale is simpler than it seems. Start by checking the expiration date, but don’t stop there. For opened items, trust your senses. If something doesn’t smell right, looks discolored, or feels different than usual (like crackers that have lost their crunch), it’s probably stale. A quick taste test doesn’t hurt either if you’re still unsure.
How can you keep your pantry from getting cluttered in the future?
The trick is to dedicate just a few minutes of your week to pantry upkeep. Set aside five minutes to check for items nearing their expiration dates and make a plan to use them soon. It’s also helpful to give quick thought to what you’re adding to your pantry when you shop to avoid overstocking.
When it comes to decluttering your kitchen pantry you might be a little overwhelmed at the size of the job. Take a deep breath and just work on one step at a time and before you know it you will have another area in your home neat and free of clutter.
